by Softleitner
read manual online at
https://adventure.softleitner.com/manual
for support please contact
softleitner@gmail.com
- Overview
- How To
- Systems
- Hero
- Souls
- Other
Overview
permalink: /manual title: “Overview” sidebar: title: “Manual” nav: manual —
Welcome
This is the manual for Action Adventure Kit by SoftLeitner. Action Adventure Kit is quite the mouthful so I will be referring to it using the shorthand AAK.
Action Adventures are a very wide, loose genre with all kinds of different games and sub genres. There are some things that many of them have in common though. Lots of them have characters that perform actions. These might have items that change hands and attributes that define their capabilities.
AAK was made to provide a solid foundation for these common ideas within the genre so you can focus on what makes your game special.
Since AAK goes for a broad base of functionality rather than something more specialized it generally tries to do anything in the most default, unity-built-in way possible. For example the movement in the souls demo uses the default unity character controller and the intro is done using timeline. To accommodate for the fact that more special systems may be required for movement, inventory, actions, … AAK was made from the ground up with expandability in mind.
Setup
AAK is separated into multiple projects. If you are using AAK for the first time I recommend importing everything, including settings, into a new project.
If the project you are importing into uses the old input system the editor will prompt you to restart and you will have to start the import again after that.
AdventureCore
The Core Framework of AAK, always import this one.
AdventureCore.Tests
Contains test scenes for various features, can be useful to try out those features in isolation. Import while exploring AAK but should not be included in production.
AdventureExtras
Contains additional examples that use assets from the other demos. For example scenes that demonstrate how different objects can be reused between demos. An explanation for these can be found here. Since extras are built on top of the other demos these also have to be imported and I recommend exploring them individually first.
The AdventureArena demo found in the extras is a good next step up from the getting started tutorial. It shows basic usage of AAK in a full game without the added complexities of the hero or souls demos respective genres.
AdventureHero
Contains the hero demo, import if you want to start by adapting this demo.
Start up Scenes/HeroTitle to start the game from the title screen just like the demo does.
IMPORTANT, before playing the ‘SaveSlot’ app variable has to be added in visual scripting. In the ‘HeroTitle’ scene select the Logic Object in the hierarchy and click ‘Edit Graph’ which opens the visual scripting graph. In the ‘App’ tab on the bottom left add a variable called ‘SaveSlot’ of type Integer with a default value of -1. This is needed to carry over the save slot between scenes.
Scenes/Debugging/HeroDebuggingGeneral is a useful scene for testing, some more specialized scenes can be found in the same folder
AdventureManual
Contains the getting started project. Recommended to learn about the various systems of AAK in a minimal environment before jumping into the more complex souls demo.
Also contains some Visual Scripting examples. Be sure to read the visual scripting manual page before jumping into any scenes using Visual Scripting as there is some additional setup required!
AdventureSouls
Contains the soulslike demo, import if you want to start by adapting this demo.
Start up Scenes/Title/SoulsTitle to start the game from the title screen just like the demo does.
IMPORTANT whenever starting the souls demo from the editor you need to click into the window to lock the cursor before some input is accepted. This is done to avoid performing actions on accident from outside.
To jump directly into the game open Scenes/Dungeon/SoulsDungeon for the level itself, add Scenes/Dungeon/SoulsDungeonTemp for the temporary parts like enemies and crates.
Scenes/Debugging/SoulsDebuggingGeneral is a useful scene for testing out all the actions and Scenes/Debugging/Enemies/SoulsDebuggingEnemies can be used to debug combat.
Scenes/Debugging/Interaction/SoulsDebuggingInteraction can be useful to synchronize the character with some object they are interacting with, this is done using timelines.
The models for the demos were made using blender and then exported to fbx for unity. You can find the original blend files and the used export settings in AdventureModels.zip.
Dependencies
AdventureCore
- Input System allows binding character actions directly to inputs
- Timeline used to provide a character action that waits for a timeline to finish
- Cinemachine used in a helper that performs camera locking using two virtual cameras
- Visual Scripting for the custom visual scripting units
AdventureManual
- Input System for the inputs
- Universal RP for the materials
- Visual Scripting used in visual scripting manual
AdventureHero
- Input System for all the player inputs
- Timeline for the intros, scene transitions, chest action
- Cinemachine for the main camera
- Universal RP
- ProBuilder used to build the levels
- Visual Scripting enemy behaviour, character actions, scene transitions, loot, idle animations
- TextMesh Pro for the UI texts
AdventureSouls
- Input System for all the player inputs
- Timeline for the intro and bonfire actions
- Cinemachine for the main camera
- Universal RP
- ProBuilder used to build the environments
- Visual Scripting for some optional custom enemy behaviors
About Universal RP
AAK does not have a hard dependency on URP but it is the render pipeline the demos and manual projects use out of the box. The following steps show how the asset could be switched over to built-in.
- Import the entire asset(including packages and settings) into a fresh project
- Activate the Build-in Render Pipeline
- Select Edit > Project Settings > Quality.
- For each quality level, if an asset is assigned to the Render Pipeline field, unassign it.
- Select Edit > Project Settings > Graphics.
- If an asset is assigned to the Scriptable Render Pipeline Setting field, unassign it.
- Open a scene of the demo you want to switch over(for example HeroDebuggingGeneral)
- Switch over materials from URP to their built-in counterpart
- Universal Render Pipeline/Lit > Standard
HeroFade and SoulsFade need RenderMode Transparent - Universal Render Pipeline/Particles/Unlit > Particles/Standard Unlit
select the Particle-Default texture in albedo and adjust the modes
- Universal Render Pipeline/Lit > Standard
- objects in the scene should go from pink to their actual color
- Switch over materials from URP to their built-in counterpart
- Open the Package Manager and remove the ‘Universal RP’ package
For additional information about render pipelines please see unity documentation.
Manual
This manual is meant to explain the concepts and ideas of AAK rather then any specific detailed API. For more detailed explanations of every class in the core framework and most of the demo please consult the code itself. I try to give a detailed explanation for the purpose of the class in the xml-doc of the class itself and explain every field of the behaviors in the tooltip.
The manual pages for the core systems of AAK are always split into a Core part that explains the idea behind the system and a Souls part that covers how the system was used in that demo.
The Souls and Hero sections at the end of the manual contain some additional information about how the demo are set up and how they may be extended.
Additionally the ‘About’ button in the scene view leads to documentation relevant to the currently open scene.
Integrations
- Netcode for GameObjects multiplayer
- SceneConnector multi scene management
- Ink narrative scripting language
- KinematicCharacterController
All GitHub repositories related to my unity assets can be found in the Softleitner Extras list. I generally try to keep the main ones updated but some of the minor ones may be out of date.
Feedback
The quickest channels to reach me are mail and discord. Please feel free to reach out with any problems and questions. Feedback regarding the general direction of AAK and particular future features are also always welcome. Though I might not immediately be able to incorporate your requests I very much take them into consideration when planning out future updates.
If you can spare the time please consider leaving a review in the asset store.
Release Notes
permalink: /manual/releases title: “Release Notes” sidebar: title: “Manual” nav: manual —
1.10.0
minimum recommended unity version has been raised to 6000.0.76
CHANGED
- nav meshes are now created using NavMeshSurface
- cinemachine upgraded to version 3
components in demos have also been upgraded
core code is still compatible with both versions - various smaller adjustments for new unity version
1.9.5
FIXED
- error in build due to testing assembly
- item name display in hero present dialog
- collisions when pushing blocks in unity 6
1.9.4
ADDED
- Isle Demo
new demo showcasing a simple 2d mobile game
on screen controls usable in game view with device simulator includes top down overworld and side scroller cave scene - SideScroller2DMovement
2d movement with gravity that can jump and climb ladders - TopDown2DMovement
2d movement that freely moves in all directions without gravity - DialogAction
new character action that shows a dialog and ends when it is finished - WanderAction
new character action that makes 2d movement walk in a random direction
IMPROVED
- FadeAndDestroy now also works on SpriteRenderer
- additional events and unity for damage sending
- new ColorBlinker can visualize damage without needing animations
- new duration in motion action can automatically end action
CHANGED
- minimum recommended unity version increased to 2021.3.45
1.9.3
Various smaller changes made for the Netcode for GameObjects integration example. The example contains an experimental multiplayer version of the Arena Demo. The project is called AAK_Multiplayer and can be found on GitHub!
ADDED
- surrogates for inventory, action area, resource and attribute pools
can be used to bind ui to elements of characters that spawn during gameplay
IMPROVED
- new methods and visual scripting units for targeting closest player or enemy
- piercing field in projectile damage sender so projectile is not destroyed on impact
- arena demo screen fade in is delayed by a couple frames to mask loading
FIXED
- system even unit not unsubscribing when flow is disabled
- mixup of GetSlot and GetEmptySlot
- bad namespaces for modify damage instructions
instructions might have to be reassigned
1.9.2
CHANGED
- reserialization of all prefabs and scenes
FIXED
- issues with missing instructions
1.9.1
ADDED
- TiledInventory stores items in a 2d grid
example in new ManualItemTiled scene - ItemValue can be used to store persisted values with inventory items
could be used to store things like battery charge or item durability
example in new ManualItemValues scene
IMPROVED
- minor rework of ai movements
new NavMeshSteerMovement as a compromise between agent and tank movement
more uniform behaviour between agent, steer and tank movements - set rotation in CharacterControllerMovement using OnRotate
arena demo uses this for twin stick controls, disable by unbinding rotate - new settings for auto equip new items or unequip empty items in inventory
items are now auto equipped in the hero and souls demos - new debug scene HeroDebuggingBlackout demonstrates reset if character falls
1.9.0
ADDED
- Arena Demo
new roguelike mini game added to extras project
beat increasingly difficult stages of enemies to earn essence currency
spend essence in shop between stages on a set of randomly selected items - DamageModifier for changing sent and received damage
available on characters, trigger damage senders and receivers
can also be applied by instructions and may use stats for their value
used in arena demo to grant bonus damage based on character strength - DamageMessage for triggering events and sending messages
allow filtering based on damage kind and value
available on characters, trigger damage senders and receivers
used in arena to only send hurt message when affected by health damage - ActionItemSlot for instantiating items with one action
action can be started by binding input to slot, used for weapon slot in arena demo - UsableItemSlot for usable items that may be instantiated during action
item can be used by binding input to slot, used for quick slots in arena demo - PurchaseAction for exchanging items, attributes, resources for items(arena shops)
- AnimatorMovementSetter for setting movement parameters on animator
- instructions for min and max movement speed
min speed is used to give roll in arena forward speed when standing still - Fader component for easily fading camera and sound in and out(arena scene transition)
IMPROVED
- SuspendMovementInstruction can be set to still ApplyPhysics
used in arena, prevents enemies from clipping into player while performing attacks - PersistenceContainer can now buffer data between scenes
used in arena so data is only loaded in title and only saved on stage win - ProjectileDamageSender now has methods to directly instantiate
used in arena demo for sling and bow projectiles - LockOnManager additional setting CalculateCenter
needed when the camera is not centered on the character - CharacterAssociation can be set to search character automatically
- RootMotion can be disabled on CharacterControllerMovement
- RootMotion can be enabled on NavMeshAgentMovement
- ListedInventoryPanel filter by ItemSet
- PlayableAnimation with controllers can now also define Start- and EndTime
- hover over character message(‘Last 20 Messages’) in inspector for stack trace
- InputBindingText can now define Overrides based on control scheme
used in arena to display WASD for Move composite action input
CHANGED
- character initializes movement, inventory and pools in its Awake
this ensures everything is ready before any Start is called - damage direction SenderToReceiver now calculates direction from character to character
additional mode SenderTransformToReceiver goes sender transform to receiver character - minor rework of NavMeshAgentMovement Approach methods
can now also approach a Vector3 target
new NavAwayAction makes enemies run away from target - SphereDamageSender only sends damage once per character
would previously be sent once for each collider regardless of character - CharacterControllerMovement calculates SpeedSideways based on target direction
FIXED
- MotionAction going into release state with Release unchecked
- wrong message in object action preview
- playable animation preview not resetting properly
- SoulsHeroApe ragdoll being pushed properly by lethal damage
- playable animation not working when started in Next
- temp resource bars not being properly removed on character death
- added default color animation to hero animator to properly reset color after damage
1.8.0
ADDED
- Ape Boss Fight
- new scene called HeroGlade in Hero Demo
scene is entered from the temple and the new end point of the demo
intro and death cutscenes, various attacks, destructible rock armor
state machine based attack logic can easily be tested in HeroDebuggingApe - souls variant of the fight available in Extras/SoulsHeroApe
fully code based logic, new approach using randomly selected action enumerables - uses new NavMeshTankMovement that first rotates and then moves forward
- new scene called HeroGlade in Hero Demo
- ImpactItem and ImpactArea that spawn different particles and sounds when colliding
- swords in hero demo now have an item, destructible rocks an area(ROCK)
- longsword and fists in souls have an item
- additional debug scenes in hero demo demonstrating features not otherwise used
- HeroDebuggingProjectile showcases deflectable projectiles
- HeroDebuggingParcour makes the player auto-jump and pull up without climbing
- About button in the scene view opens relevant documentation for the current scene
IMPROVED
- hero and souls guard actions now guard directionally
angle can be configured on SoulsGuardAction and HeroShieldWeapon item
damage is guarded when its direction is counter the shield direction
it is also guarded when the sender is a character in front of the receiver - hitstop of 0.1s for melee weapons in hero and souls demos
message is sent from damage senders in weapons to message event in character - Idling event on actors that fires when the actor runs out of actions
- additional effects in hero demo
sounds and particles on guard(see HeroDebuggingProjectile) dust particles when stepping on dirt or sand(see HeroDebuggingGround) - LockOnManager can be configured to Cycle
used in ape boss fight because the points are vertical not horizontal - VisualScriptingHelper can be used to fire custom events from unity events
used in ape boss fight to send RAGE event when mask is damaged - OverruleCanStartMode in actors changes when CanStart prevents actions
- expanded souls demo documentation and full souls demo video
- additional xml comments and class summaries
CHANGED
- PlayableAnimation runs in GameTime update mode by default
new Unscaled toggle makes it run in UnscaledGameTime - presenting items in hero now pauses the game using PauseGameInstruction
consequently the following adjustments were made to other parts of the demo- chest action starts sheathing animation in unscaled update mode
- cinemachine brain in hero now runs unscaled
- timelines used in item presentation now run unscaled
- replaced more built in materials with dedicated ones for better pipeline switching
- SphereDamageSender now only collides with triggers
- CharacterController.Fallen event is also fired upwards and renamed to Landing
- hero pull up animation end message changed from END to CLIMB_END
- damage sender SendOnce setting only sends damage once per character
in addition to once per receiver, needed as ape boss has multiple receivers
FIXED
- pose action not working with identical start and end messages
- exception in dialogs during edit mode
- warnings in souls demo during character death
- ui navigation not working in unity 2021 for some dialogs and souls buttons
1.7.3
ADDED
- basic UI for items and inventory(see ManualItem scene)
CHANGED
- reorganized UI scripts into separate folder
- souls attack suspend movement on start messages instead of dmg
- moved start messages of punches back to dmg
IMPROVED
- minor inventory and item rework
- add and remove can be done partially and return remaining
- listed inventory exposes observable collection
- additional xml docs
- separate game state for hero game over
- separate field for hit format in resource bars
- item notifications now support legacy texts
FIXED
- unfocusing dialogs by clicking in hero
- getting stuck in hero game over screen
- broken barrier collider in hero beach
- lowered damage modifier on shield punch to 2 instead of 10
1.7.2
IMPROVED
- reworked bars for resources and new bars for effects
used in the ManualResource scene and the souls demo(+transition for boss health bar) - cinemachine 3 compatibility(v2 is still used by default)
to upgrade check ‘About Cinemachine Version 3’ in the Manual Overview page - resource values now have a Minimum field
souls Stamina and Poise have a negative minimum so lag is longer for big attacks
CHANGED
- messages on core actions(motion, object, …) are now configured in the inspector
these(START, ACT, END, …) used to be defined as const in code
the roll action in souls now uses ROLL_START instead of START which -
prevents overlaps with other actions since roll in souls can release early - turn animation in souls demo no longer stops movement making the player more agile
- attacks in souls demo now send START later to avoid overlaps with other animations
FIXED
- masked clips did not work in playable animations
1.7.1
FIXED
- issue in input binding texts when enable disable was called repeatedly
- input binding texts not switching to gamepad in hero title
- texts sometimes not completely finishing in timeline dialogs
- wrong loading scene name in souls demo when switching stages on death
1.7.0
IMPROVED
- Dialog Overhaul
dialogs are now used across both demos and also replace the timeline textbox character delay, options buttons, text arrays, event system focus, …
check out VisualScriptinDialog/Conversation and TimelineDialog scenes in AdventureCore.Tests more complex dialog in SoulsDebuggingNPCs, readable sign on floor in SoulsDebuggingGeneral - Playable Animation Preview
playable animations can be previewed directly in the parameter inspector some actions(button, object, …) can show preview across objects(player and door for example)
check it out in the PlayableAnimationTest scene and demo scenes like SoulsDebuggingInteraction - Game Focus and Cursor Lock handling unified in FocusHelper
improves focus handling especially in the editor - Predefined Searches for Characters and Managers(Ctrl+K > see left bar)
- StateManager, AudioManager and Dialogs sections in the manual Utilities page
- Hero Demo UI polish
- Unity 6 compatibility
- various minor fixes
1.6.0
ADDED
- PlayableAnimation
play animations on top of an animator using the playables api
this enables configuring animations directly on character actions
see the PlayableAnimationTest test scene for simple examples - HeroSouls and SoulsHero
example scenes that show how assets from one demo may be used in the other
makes heavy use of PlayableAnimation, found in AdventureExtras - ItemNotifications
UI behaviour that shows new items which is used in ManualItem and the new extras - CharacterActor custom Editor
inspector shows active actions and allows ending them in play mode
IMPROVED
- HelpUrl
clicking the ? button on an AAK behaviour will now open the API documentation - Unity 6 compatibility
- added default lighting data for debug scenes
- velocity changed to linearVelocity for Unity 6 and above
CHANGED
- Action.EndAction only calls the actor when IsHappening is true
- MinimalCharacterActor checks Action.CanStart
FIXED
- TriggerArea firing twice when destroyed during enter with multiple colliders
1.5.3
Additions to Documentation and minor fixes
ADDED
- HeroDemo manual pages(written + video)
- detailed HeroSetup prefab explanation
- individual description for each scene
- title screen background sound
FIXED
- money visualizer in title screen
- camera damping when switching LockOn
- woosh sound missing audio group
- removed obsolete nodes in canyon script machine
1.5.2
Hero demo audio and UI improvements
ADDED
- HeroDemo
- sound effects for most actions
- ambience sounds
- temple and combat music
- different steps by ground type
- sound sliders and quality dropdown
- improved sprites for buttons and items
- …
- AudioManager
- crossfading music tracks
- visual scripting units
- global manager accessibility
- GroundChecker that checks for material and color
IMPROVED
- PlayerPrefSaver debug data by key, stays between scenes
- CharacterActionArea setting SortByDistance
1.5.1
small hotfix for some smaller issues in the new demo
ADDED
- SphereDamageSender that sends damages using a SphereOverlap
used for bombs so damage only gets sent at the moment of impact
FIXED
- exception when using bomb from menu outside of debug scenes
- jump attacks only sent damage in the debug scenes
- locking on without a target would sometimes unlock itself
- duplicate persistence keys for chests in temple
- sling projectile now uses dynamic collision detection to avoid passing
- minor adjustments to level geometries
1.5.0
official release of the ‘Hero’ demo
ADDED
- HeroDemo
- Beach, Inland, Canyon and Temple levels
- Wall Climbing
- Block Pushing
- Slingshot Gear Item
- Skeleton Enemy
- Various Passage(Door) Prefabs
Scene Exit, Locked, Barred, Arena, … - Sword and Shield Items
- Destructible Vines, Walls, Bushes
- Random Loot Selection for Pots
- Readable Signs
- …
- Visual Scripting Units
- PlayAnimation
- Ragdoll
- VisualScriptingAction Bool/Int/Vector Received
- Activate/Deactivate Damage
- DamagedTriggerTotal/DamagedCharacterTotal
- EffectAdded/Removed
- Set/Reset/Override ManagerState
- Manager State Changed/Entered/…
- HasItem
- SetDialogResult
- AlignToPosition
- ResetInput/Momentum
- TimedAction
simple action that ends after a set duration - GenericDamage damage type
does nothing on its own, handling in Receivers
IMPROVED
- TriggerArea handles overlapping colliders better
- TriggerDamageSender setting SendOnce
only sending damage the first time a receiver is added per activation
can be useful to avoid double damage from things like sword slashes - MotionAction setting OnlyGrounded
disables the action when the character is not grounded - Gravity for ProjectileDamageSender
- ResetMomentum in MovementBase
- ResetMain in LockableCameraBase
resets the player camera to the main camera - LockableCameraBase can also lock the cursor in Build
CHANGED
- CharacterControllerMovement now uses Physics.SyncTransforms() when teleporting
disabling the collider prevented some trigger messages from occuring
1.4.1
second update focused on the new ‘Hero’ demo
ADDED
- HeroDemo
- Title Screen, Scene Transition and Death Action
- First Person View
- Gear and Equipment Menus, Health and Damage in HUD
- Stunning Nut and exploding Bomb Equipment Items
- Pouches that expand carrying capacity for Money, Nuts, Bombs
- Carrying Blocks, Pots and Bombs
- Heart, HeartContainer, HeartPiece, Coin, Nut and Bomb Pickups
- …and much more, check out the HeroDebuggingGeneral and HeroTitle scenes!
- InputBindingText
displays current input binding in UI texts(Legacy, TMPro, UIToolkit)
useful for texts like ‘Press {Confirm} to continue!’ - StateManager
simple state manager that acts through unity events
used in Hero for game and HUD state - Simple UI Dialog Windows(OkCancel, YesNo, … decisions)
usable from code and new custom visual scripting nodes
used in hero demo for name input and delete save game check - Marching in MovementBase
makes a character walk to or toward some target
timeline track included so marching can be used in cutscenes used in Hero when entering and exiting scenes
IMPROVED
- More Custom Visual Scripting Units
Hero uses visual scripting for a large part of its logic(see AdventureHero/Graphs) - More Custom Editors
many of the core components now have custom editors for improved debugging
trigger areas show their current items, actions can be started, items added, … - Save Data Window for PlayerPrefSaver
see Window/ActionAdventure/SaveData or ‘Edit Save Data’ on the PersistenceContainer - TMPro Support
Hero uses TMPro, Souls is still UIToolkit - Actions can be started by name if they are children of the main actor
- CharacterControllerMovement can now apply weight(WeightPower field in Inspector)
CHANGED
- visual scripting now uses ICharacterAssociator instead of directly referring to characters
ICharacterAssociator implemented by components that are directly owned by characters
this allows units on actions to easily use the executing character - damage direction is stored in DamageEvent
damage direction should be assigned to DamageEvent.Vector during IDamageSender.OnDamage
TriggerDamageSender now has additional direction options(Up, SenderToReceiver, …) - force of damage and ragdolls is applied as ForceMode.Impulse
- neutral layer tweaked to be more consistent with Player and Enemy
- minimum recommended unity version increased to 2021.3.29
1.4.0
first in a series of 2-3 updates that focus on the second demo titled ‘Hero’
it is experimental for now and subject to major changes in the future
ADDED
- AdventureHero Demo [Experimental]
movement, attacking, lock on, item pickup and various other systems are already working you can check out the current state of the demo in the HeroDebuggingGeneral scene - AdventureCore.Tests Project
contains test scenes for various features(lock on, timeline textbox) - Timeline TextBox
can be used to display text using a timeline and pause it until confirmation
examples can be found in AdventureHero and the AdventureCore.Tests Project - Timeline Instructions applies Character Instructions from a timeline track used in AdventureHero to suspend character movement while showing pickups
- Additional Visual Scripting Nodes for Lock On, Acting, VectorDirection, …
IMPROVED
- Additional sounds in Souls Demo for Bow, Pebble, ….
- Particles Effect for healing in Souls Demo
- added PropelCharacterLocal which is useful for motions like jumping
- horizontal velocity in CharacterControllerMovement improved
- LockOnManager now also manages and exposes the candidate lock on point
- LockOnManager now checks the entire ray between camera and potential points
this means models with lock on points can’t be on the default layer
therefore target dummies in souls are now on the new neutral layer
FIXED
- Sprinting not working in Souls demo until button released again
- Bonfires did not suspend movement correctly
- Projectiles not being destroyed in Souls Demo
- E Key not working in Souls Demo Title
1.3.1
ADDED
- Simple Third Person Prefab (AdventureManual/Prefabs/AAKThirdPerson)
- Basic CameraController for Third Person
- Resource System Manual Scene (AdventureManual/Systems/Resource/ManualResource)
- Resource Bars for uGUI
1.3.0
ADDED
- Visual Scripting Support
- custom visual scripting units for all core systems
- visual scripting version of the getting started scene
- enemy behavior examples
- simple examples based on getting started
- advanced enemies for souls demo(archer, attacker)
- Loot in Souls Demo
- random state is persisted
- define items and chances
- loot drop is persisted until pickup
- Item Manual Example Scene
- equipment that is visible on the character
- usables that add health and vitality
1.2.0
This update continues building out the souls demo while polishing up the core framework. It also adds a getting started tutorial project that should provide a smoother experience at the beginning. There is also a new integration available on GitHub for the Kinematic Character Controller asset!
ADDED
- Step by step getting started tutorial
- Pebble usable item in souls which can be thrown
- Two handing weapons in souls
- stances for two handed melee and bows
- assignable actions for all 4 shoulder buttons
- Bow and Arrow in souls
- damage is summed between bow and arrow
- easily customizable arrows
FIXED
- Camera damping in souls demo
- SoulsBossArea not properly resetting on player death
- MotionAction without cost now works on characters without ResourcePool
- Namespace of SoulsHideHUDInstruction which unfortunately breaks references so it has to be reassigned or fixed in text
IMPROVED
- MovementBasePersisted does not error if no Persister is set
- LockableCameraFreeLook can move a target group member instead of adding the lock point
- LockOnManager can directly parent a visual to the locked point
Starting from this version I will no longer upload a dedicated version for the 2021.2 tech stream. I recommend using the latest 2021.3 LTS version.
1.1.1
Various smaller changes made for the AdventureSouls Scene Connector integration example. The example is called ConnectorSouls and can be found on GitHub!
IMPROVED
- TimelineAction and SoulsBonfireAction auto bind CinemachineBrain to PlayableDirector
- AnimationToggler can be moved instantly using SetA and SetB
- SoulsLadderAction EndingTop and EndingBottom events
- SoulsLoading can be configured to load additional scenes
- SoulsPlayerCharacter multi scene support
- saves current scene as checkpoint
- goes to loading screen on death in a different scene
- recovery is instantiated under SoulsCommons
- EffectPool and ResourcePool persist immediately when reset
1.1.0
ADDED
- Shrine - New Souls Demo Stage!
- Trader and Talker NPCs
can be interacted with or attacked - Sprout Enemy
causes poison damage - Elevator
one way elevator with levers - Teleporter
moves character between scenes
- Trader and Talker NPCs
- Effects - New Core System!
set of behaviors that can be added or removed from characters- Poisoned
periodically causes damage, healed by the new moss item - Boosted
doubles strength for a while, added by the new booster item
- Poisoned
- Inventory
allows using items directly from the UI without equipping them - Loading Screen
IMPROVED
- intro can now be skipped
- NPCs can return home or patrol when idle
- additional events for characters on GenericTriggerArea/Item
- better gamepad support
- movement and resources are not saved unless they actually change
- picked up items are now displayed in a message box
- persistence can now be exported and imported from PersistenceContainer
- boss arena properly resets player position
- camera now uses cinemachine free look
- …
An integration for the ink narrative scripting language is available on GitHub!
–WARNING–
Depending on your depth of use this update will contain a varying amount of breaking changes!
Using source control and removing any previous versions completely when upgrading is recommended.
1.0.1
ADDED
- manual page for SoulsPlayer(includes step by step guide for replacing the model)
CHANGED
- Animator is now part of CharacterBase, AnimatedCharacterBase is therefore obsolete
IMPROVED
- simplified model replacement for SoulsPlayer
- colliders moved to separate GameObject ‘Body’
- TimelineAction and SoulsBonfireAction can pass character animator to the PlayableDirector which lets us remove the dependency between environment and player model
- translation and rotation of model can be suppressed independently
- SoulsAttackAction no longer locks rotation until damage is activated
- MovementSaver can be overridden from outside
- BossArena uses this to properly reset the player if the game is quit during a fight
- intro sequence can now be skipped
- 2021 LTS compatibility
FIXED
- usable items not being hidden if action is interrupted
- potential initialization order errors
- AttributePool value/stat dictionaries
- CharacterActionArea Bindings
- armor no longer vanishes at certain camera angles
1.0.0
Initial Release
Getting Started
permalink: /howto/gettingstarted title: “Getting Started” sidebar: title: “Manual” nav: manual —
Be sure to import at least the AdventureCore and AdventureManual projects to check out the getting started project. The scenes are located directly in Assets/SoftLeitner/AdventureManual/GettingStarted and the different asset used are all found in the subfolders.
The GSFinished scene contains the fully finished project, GSStepByStep has a deactivated gameobject for the state after each step and the GSEmpty scene only contains the environment and can be used to start from scratch when following this page.
1 Movement
First off we’ll just get a character moving around the environment.
- Create an Empty gameobject called ‘Character’ and reset its transform
- Add a GenericCharacter character component
Most games, including the souls demo, will probably require some custom logic in the character but in this example we can get away with using the generic one just to bind all the other parts together. - Drag the GSRobo prefab into the Character and assign the Character field in the AnimatorProxy and the animator field in the character
The prefab just contains a little robot model with a couple animations set up. The AnimatorProxy will forward things like animation events and root motion to our character which allows us to have them on separate objects. - Add a CharacterController and a CharacterControllerMovement movement component to the Character
- adjust the character controllers center and skin width
- assign the movement to the Movement field in the GenericCharacter so other systems can access it
- assign the GSRobo you created as the Pivot in the movement so it is rotated when moving
- assign the MainCamera as the Camera of the movement so it can translate inputs relative to the camera
- Add a PlayerInput component to the Character(Input System)
- for Actions select GSInput which can be found in the Other subfolder
- set its Behavior to ‘Invoke Unity Events’
- under Events->Default->Move create a callback that calls CharacterControllerMovement.OnMove
You should now be able to push play and move the character around the scene.
2 Triggers
In this chapter we’ll set up a trigger mechanism that slows our character when it moves through a certain area.
- Add a GenericTriggerItem and a CapsuleCollider component to the Character
- Assign the Character field on the trigger so it is accessible to areas it enters
- Adjust the colliders size and tick the IsTrigger field
- Create a new Cube 3D Object and add a GenericTriggerArea
- Adjust the cubes size and material and tick its colliders IsTrigger
- Add the MovementSpeedMultiplier instruction to the area and set the Value to 0.5
Start the scene and move the character through the area to see that it is slowed down by the factor defined in the Instruction. The area adds its instructions to the character of any trigger item that enters it and removes them when it exits. The generic trigger items and areas are good for general purpose, when creating more specialized logic consider inheriting from TriggerArea and TriggerItem like, for example, the damage system does.
3 Effects
Here we will add the same kind of slow effect as in the last chapter with a status effect instead of directly applying it. This allows us to visualize the effect on the character and it would also be easier for other systems to check if the character is currently in one of these areas.
- Create an empty child in the Character and name it ‘Status’, this is where we will organize all the behaviors that make up a characters status
- Add an EffectPool component which will manage the characters active effects
- Assign the Character to the EffectPool to each other
- Set the Effects field on the Pool(used later when dealing with persistence)
- Copy the slow area from the previous chapter and remove the instruction
- Create handlers in the areas CharacterAdded and CharacterRemoved events
- Drag the GSSlow effect into them and select the EffectType.AddExternal and EffectType.Remove methods
- Create a new UI Text and add a EffectPoolText
- Delete the EventSystem Unity creates when you first add a UI component
- Adjust the Text size and position
- Assign the fields in the effect pool text
The effect assets for this chapter have been created upfront to streamline the process, the effect set and effect type can be created from the context menu under Create/Adventure. The most important bit is the effect Prefab which contains the effect itself with the slow instruction as well as the visual.
When you start the game now and move into the new effect area you should be slowed and additionally see a small blue sphere above the character. You should also see the effects name in the UI text you created.
4 Pickups
Next up we’ll create some item pickups and allow the character to add them to its inventory. First up we’ll allow the character to start actions that it runs into.
- Create an empty child in the Character and name it ‘Actor’, this is where we will put all the logic that lets the character perform actions
- Add a MinimalCharacterActor which will manage the characters current action
- assign it to the character and the character to it
- Add a CharacterActionArea which lets the character start actions it collides with
- assign the actor to it so it knows where to start its actions
- Add a Trigger CapsuleCollider and a Kinematic Rigidbody for the action area
- Add a MinimalCharacterActor which will manage the characters current action
- In the UI create a new Text, this time with a CharacterActionAreaText which will display the areas current action
- In the PlayerInput where we previously bound the move input create a new handler for Action and bind it to CharacterActionArea.OnStartAction
The next step is to give the character an Inventory it can store items in.
- Create an empty child in the Character and name it ‘Inventory’, this is where everything related to items will go
- Add a ListedInventory and assign it to the characters Inventory field. Assign GSItems to its Items field which will be important for persistence later.
- In the UI create a new Text, this time with a ListedInventoryText which will display the items in our inventory
Finally let’s create the pickups that we can place around the environment.
- Create a cube with a trigger collider similar to the ones used for the trigger areas previously
- Add a PickupAction component
- Add a SuspendMovement instruction so the character can’t be moved while performing the action
- Set the CharacterTriggerName to ‘Pickup’ which is the name of the parameter in the GSRobo Animator
- In Items assign the GSItem and set Quantity to 1
- Once you’re happy with the Pickup clone it a couple of times so you can test adding multiple items to the inventory
You should now be able to see ‘Pick up Item’ when you move the character over a pickup. If you start the action using E or A on a Gamepad the character should perform a little animation, the pickup should be destroyed and the item added to the characters inventory.
5 Gate
The Pickup we have created in the last chapter performs an animation on the character only. Here we will create a new action that plays synced animations on both the character and an object in the environment. We’ll also define an item cost so we can actually do something with the items we’ve picked up in the last chapter, this is fairly common behavior for things like keys.
- Drag the GSGate prefab from the assets into the scene
- Create a new child object under GSGate and name it ‘Action’
- Position it in the same place and rotation you want the character to stand when performing the action, for example 1.4 in Z and rotated 180 around Y
- Add an ObjectAction component
- Add a SuspendMovement instruction
- Set the following:
Name: ‘Open’ (displayed by the Action Area)
Cost: 1 x GSItem (can’t start action unless character has the item)
CharacterTriggerName: ‘Open’ (can be checked in the GSRobo Animator)
ObjectCharacterTarget: the action itself (character is moved here)
ObjectTriggerName: ‘Open’ (like in the GSGate animator)
ObjectStateName: ‘Opened’ (see GSGate animator, used in persistence later) ObjectAnimator: GSGate
- Add a BoxCollider with IsTrigger and Size 2 so the action area can collide with and start the object action
If you want to test out the action without having to pick up an item first you can either remove the cost or add some items to the ListedInventory in the editor before you start the game. To see how the animations are synchronized check out the animation events on the Open animations. The START and END events are needed so the action knows its state, the ACT message in the character animation starts the object animation.
6 Health
In this chapter we’ll give the character a health resource.
- As a child of Status create a new object named ‘Health’ with a ResourceValue component
- Set the type to GSHealth which identifies the resource and gives it a name
- Set Maximum and Value to 100 so the character starts with full health
- In Status add a ResourcePool component
- Add the health resource value to its values
- Assign the pool to the characters Resource Pool field
- In the UI create a new Text with a ResourcePoolText which will display all resources of the Pool and their values
Next we’ll create some areas that deal damage which can subtract from the health resource or add to it.
- Create two new areas, probably easiest to just copy the slow areas and remove the trigger area
- Add TriggerDamagerSender components to both
- In the Damages field assign GSHealthDamage in one and GSHealDamage in the other with a value of 1
- Adjust the timing settings, for example check SendTick and set TickRate to 0.1
- On the character add a TriggerDamageReceiver and assign the character so it can actually receive the damage
The characters health should be reduced when moving into one area and increased in the other.
7 Vitality
The maximum Health was previously just statically assigned in the resource itself. In this chapter we’ll add a Vitality attribute and a HealthMaximum stat(which is just VIT*10) which will be assigned as the Health resource maximum.
- In Status add an AttributePool component and assign it to the character
- Add GSVitality to the Attributes and give it a starting value of 10
- Add a new ResourceMaximum with the Health resource value and the GSHealthMaximum stat
- In the UI create a new Text with a AttributePoolText which will display all attributes of the Pool and their values
- Create two new areas by copying the slow areas but this time leave the trigger area and just empty the event handlers and instructions
- Add a new handler to CharacterAdded and drag in the GSVitality attribute
- Choose the AttributeType.Add method in one area and Remove in the other
When you move into the areas you should now receive or loose one point in the Vitality attribute which changes health max by 10.
8 Persistence
Finally we will take care of persisting the state of all the things we’ve created this far.
- Create an empty gameobject named ‘Persistence’
- Add a PersistenceContainer component, you’ll find some useful buttons in its inspector like ‘Delete Data’ which can be used to reset its save data
- Set the Key to ‘GS’
- Add GSPersistence to its Areas
- Add a PlayerPrefSaver and assign it as the containers saver
- Add a PersistenceContainer component, you’ll find some useful buttons in its inspector like ‘Delete Data’ which can be used to reset its save data
- Add a ManualPersister to the character and assign it to
- GenericCharacter, CharacterControllerMovement
- ListedInventory
- Resource-, Attribute- and EffectPool
- Add and assign a ManualPersister to the ObjectAction in the Gate
- The PickupAction has its persister built in so you can assign PersistenceArea and Key directly to it instead of adding a ManualPersister
- In every ManualPersister(and PickupAction) assign GSPersistence as the Area
- Give every ManualPersister(and PickupAction) a Key to identify the piece of data
Instead of manually choosing keys you can also click ‘Generate Missing Keys’ on the persistence container which will generate keys if they are empty.
Since the container should be set to AutoSave and AutoLoad by default everything you do in play mode should now be saved. When you stop play mode and start it again the state will be loaded. You can reset the state by clearing player prefs or deleting data from the container. If you want suspend persistence and start from scratch every time you can unassign the Saver on the container.
Next
You should now be familiar with the major systems in AAK. As a next step towards a more complete game you can check out the AdventureArena demo found in the Extras project. It is meant as a middle ground of complexity between the mechanics shown here and the relatively sophisticated hero and souls demos.
Visual Scripting
permalink: /howto/visualscripting title: “Visual Scripting” sidebar: title: “Manual” nav: manual —
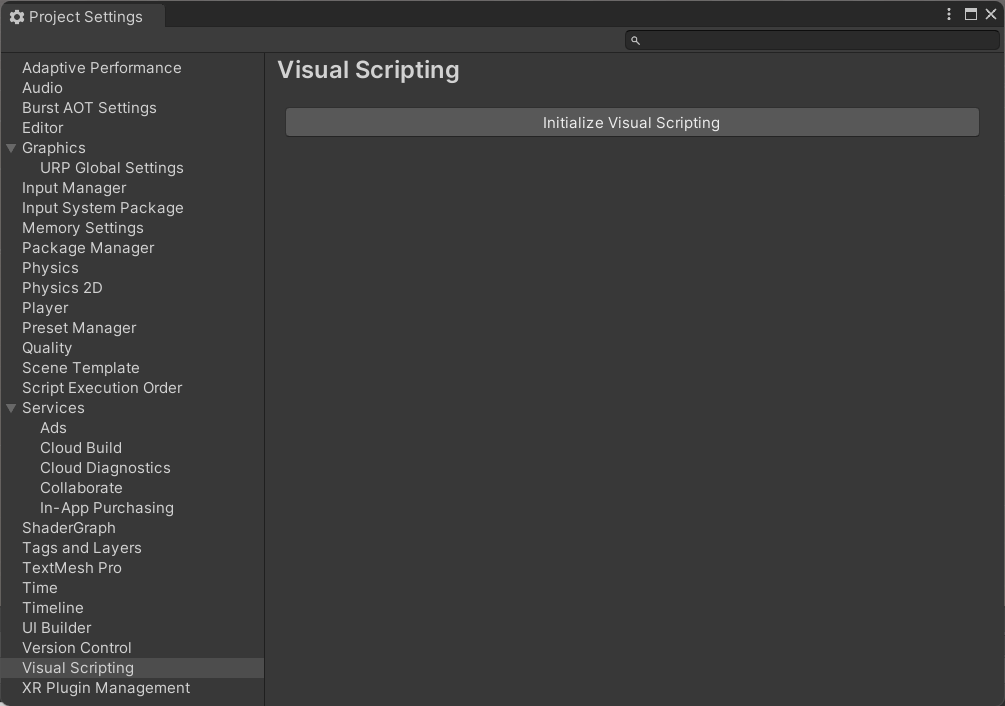
Setup
Visual Scripting is not automatically initialized when importing AAK. Before opening any of the visual scripting scenes be sure to go into Edit/ProjectSettings and click the ‘Initialize Visual Scripting’ button.
This would be enough for the included scenes to work but to be able to use AAK types in variables and find the included nodes in the fuzzy finder we’ll have to add them to the visual scripting settings.
You can find a prepared settings file in …/AdventureManual/VisualScripting/VisualScriptingSettings.asset which you can replace your own settings in the ProjectSetting folder with. After doing that you’ll have to restart the editor.
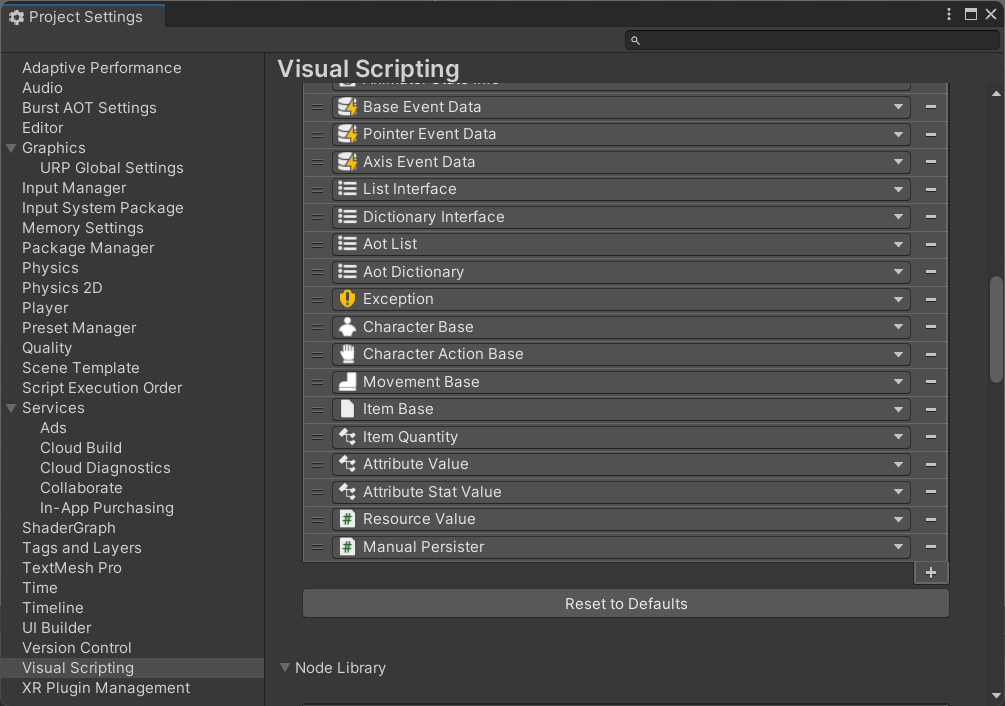
Add additional AAK types here so you can use them in variables or call their methods and properties directly. A lot of AAK functionality is exposed through the custom units but there will always be specific use cases where that is not enough.
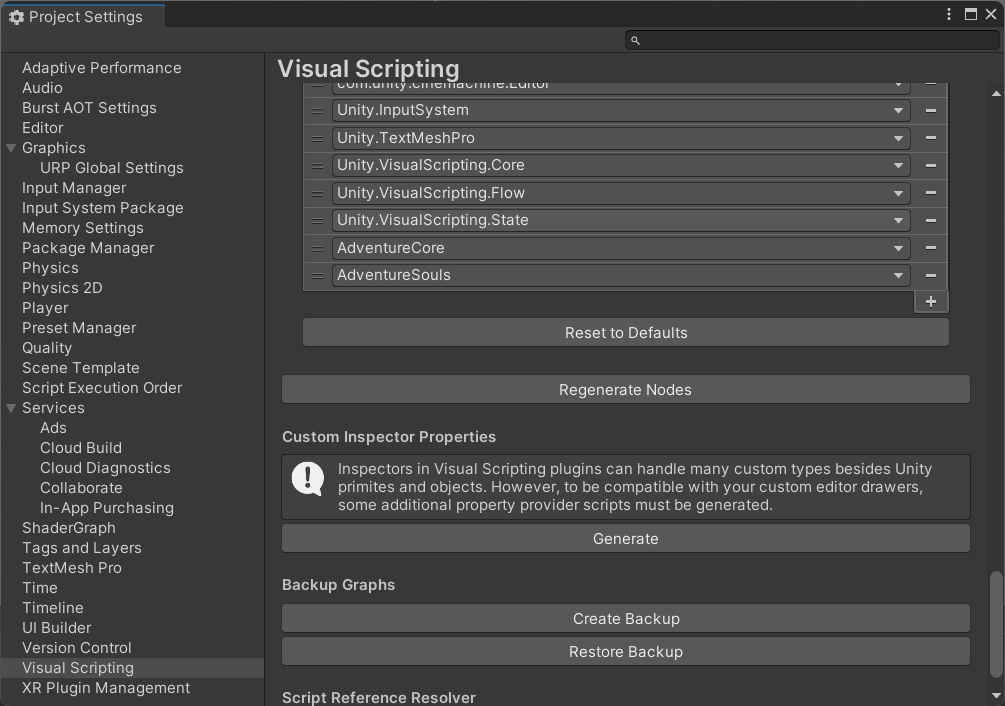
Finally make sure the AdventureCore(and AdventureSouls if you are exploring the demo) are added as Node Libraries and click ‘Regenerate Nodes’ so all the custom units that come with AAK can be found in the fuzzy finder.
Getting Started
The Assets/SoftLeitner/AdventureManual/VisualScripting/VSGettingStarted.unity scene copies some of the behaviors from the getting started manual using visual scripting. In doing so it touches on how to use most of the included custom units.
Areas
The CharacterEnter and CharacterExit units found in Events/AdventureCore/Triggers fire whenever an item with an attached character enters/exits their area. Like many of the custom units when the area is not set explicitly the unit looks for the needed component on the GameObject of the machine and its parent. This has a small performance cost but it improves reusability and readability of the graph.
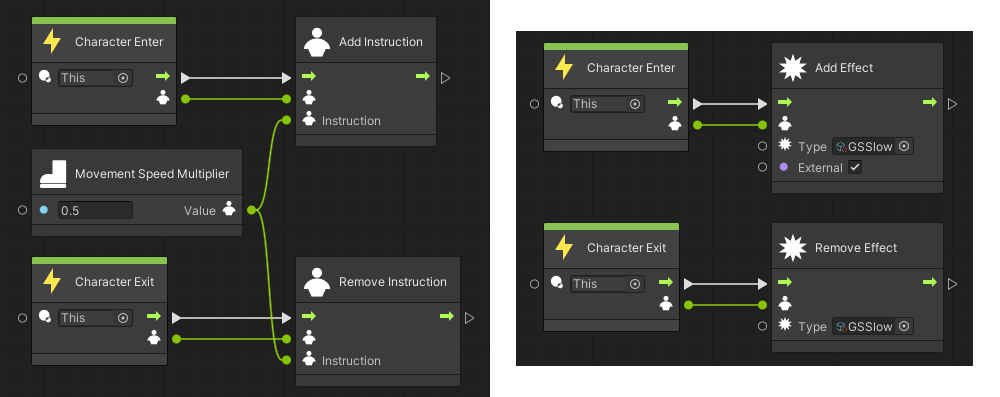

The SlowInstructionArea adds an instruction when a character enters and removes it on exit. Take note that the instruction that gets removed has to be the same unit as the one added and not just one of the same type. The character that this is done to is passed from the events to the other units.
SlowEffectArea work pretty much the same but instead of instructions is adds and removes an effect. Same thing for the vitality areas, just split into two different areas.
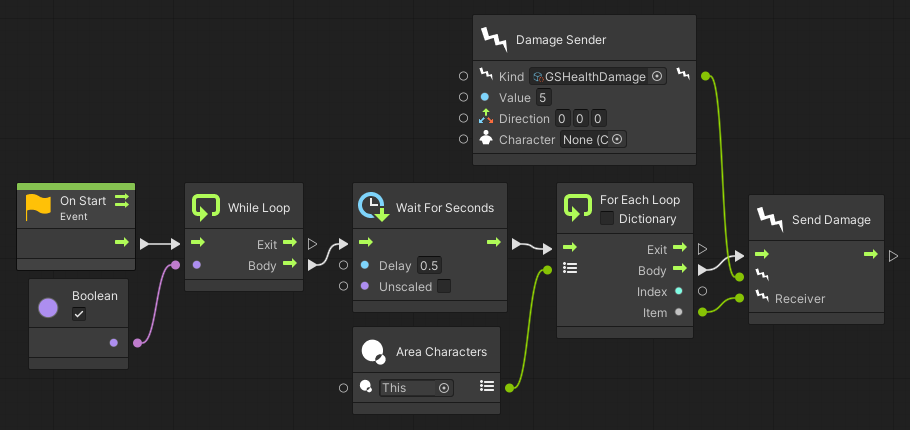
The DamageSenders work a little differently as they do things periodically instead of just on entry/exit. Every 0.5 seconds they request the characters currently inside the area using the AreaCharacters unit. It then loops through them and send each one a damage event. They could be improved to only run once a character has entered but for the sake of simplicity they run non-stop here.
Actions
To define actions using VisualScripting we will use the VisualScriptingAction behavior. This action does nothing on its own but provides some additional events and methods geared toward that. For example usually whether a specific character can start an action is checked in a method. VisualScriptingAction fires the CheckStartable event and then returns whatever was set in Startable by the graph.
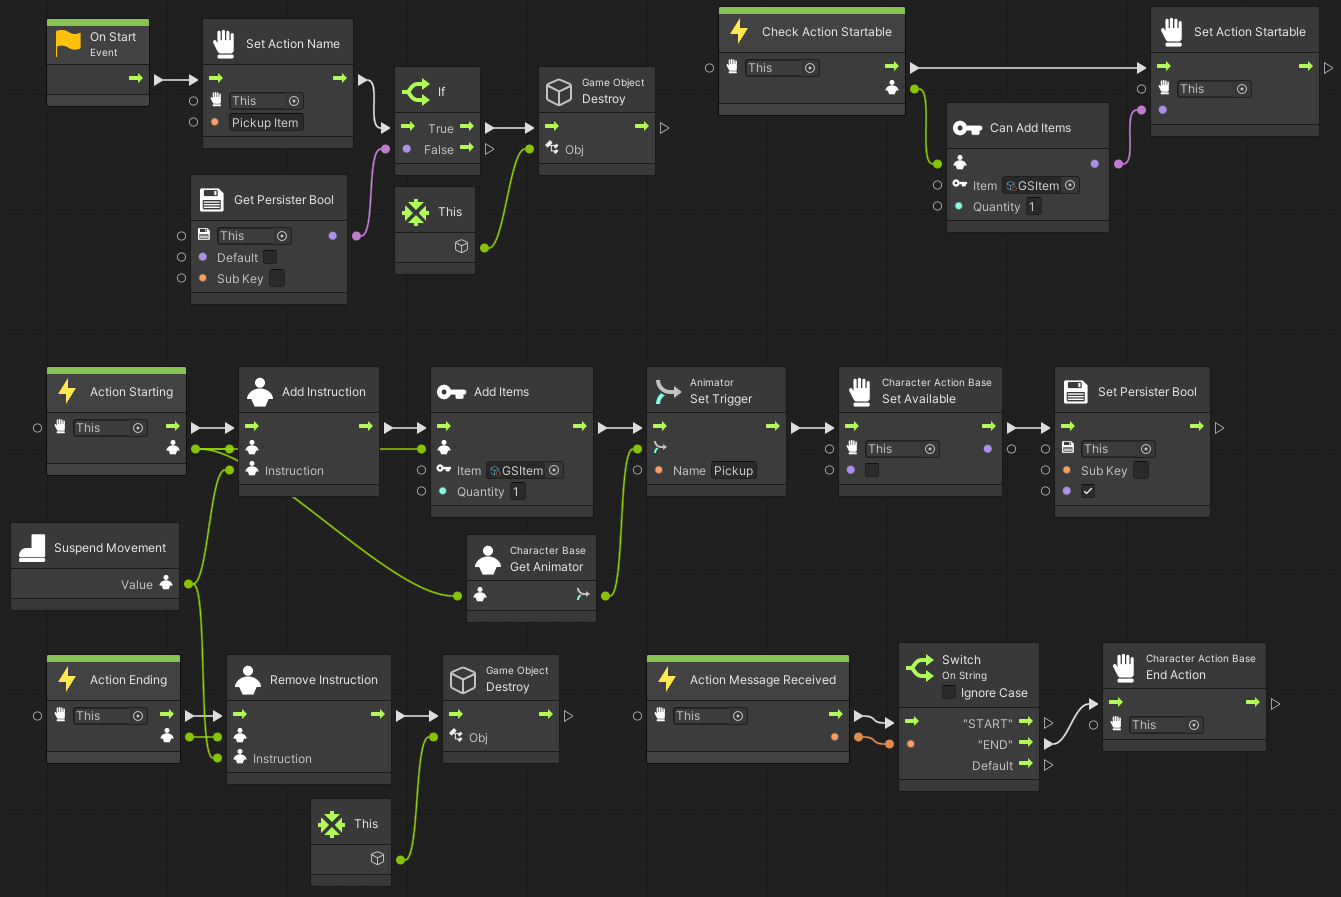
When started the pickup sets the action name which will be displayed in the UI. In this case that is unnecessary but, for example, if the item was changeable we could use the item name here. After that is checks in persistence if the action has already been performed and destroys the action if it has.
On Action Startable we check if the items can actually be added to the characters inventory.
When the action is actually started we do various things, whenever the character is concerned we pass the one that started the action which we get from the event parameter. We add an instruction that suspends the characters movement so the character can’t move during the event. We set a trigger on the characters animator to start the pickup animation. We also add the items to the characters inventory and set the persistence bool that saves if the action has been executed. On the action we set Available to false so the action can no longer be started in any way.
In the ActionMessageReceived we wait for the ‘END’ animation event which ends the action. In the coded PickupAction there are additional checks that make sure that the ‘END’ message is only accepted if a ‘START’ is sent first. This is meant for situations where a character is still in another action(a roll for example) when the pickup action is started.
Finally when we receive ActionEnding we let the player move again by removing the SuspendMovement instruction and destroying the GameObject.
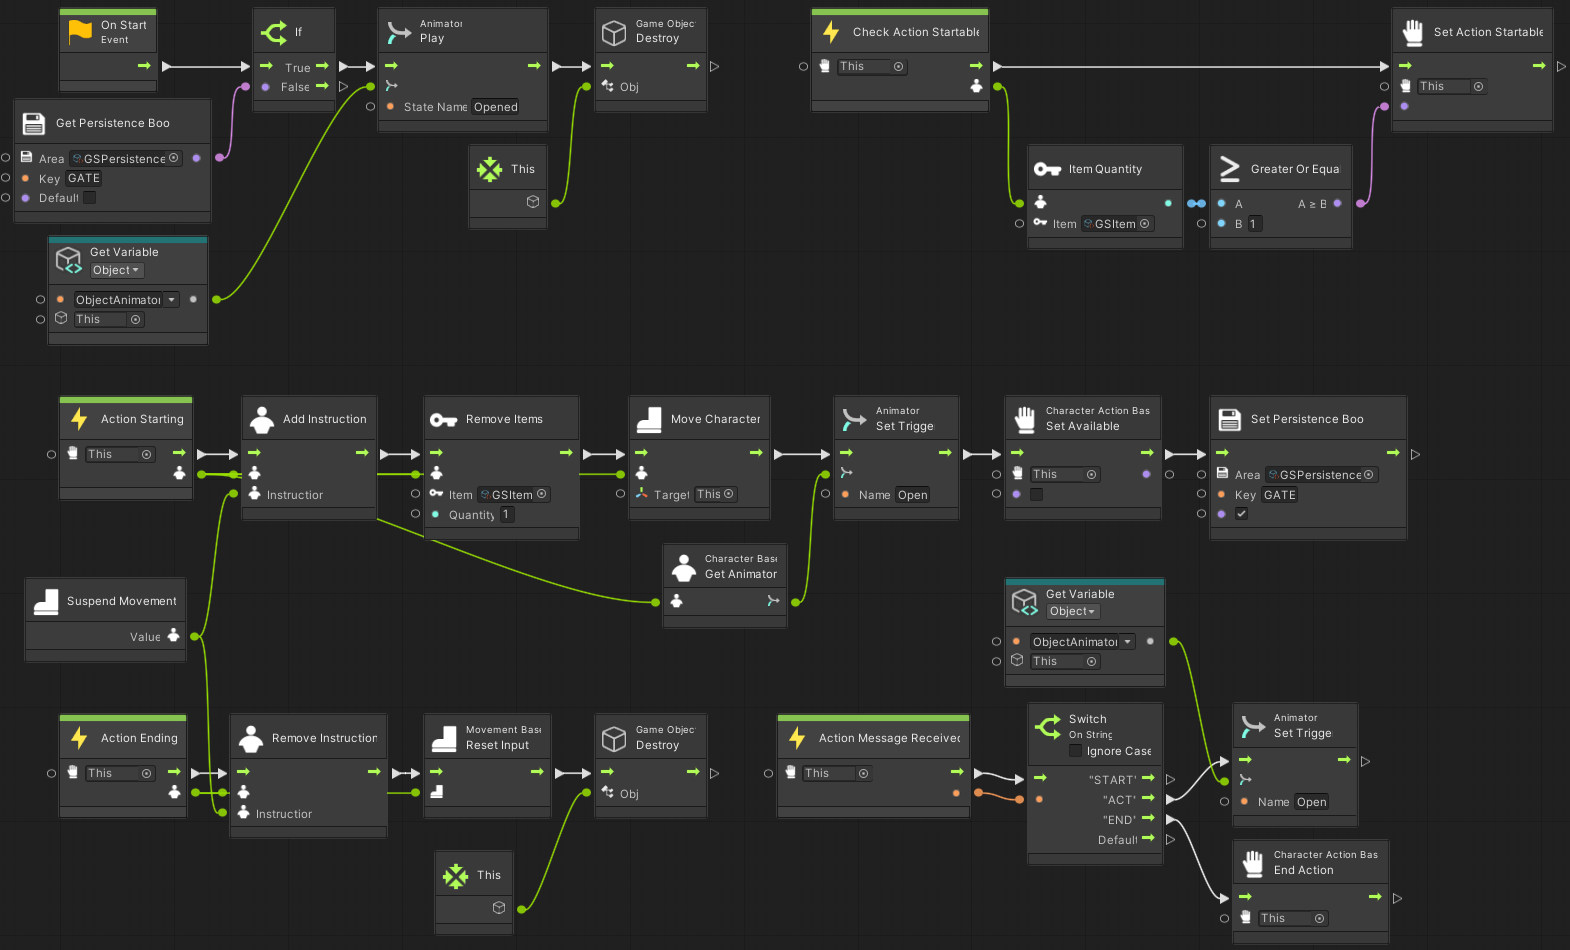
When it starts and the action has already been executed the animator gets moved to the Opened state. The GameObject also gets destroy but as opposed to the pickup this only destroys the action here and not the whole object.
When checking for Startable the action on the gate checks if the character has at least one GSItem in its inventory.
In addition to things similar to the pickup action the gate action also moves the character into position and removes the items from its inventory.
There is an animation event called ‘ACT’ which starts an animation on the gates animator.
Lean
One deviation from the getting started manual is the character leaning forward a bit when moving. To achieve this an additional Transform called ‘Pivot’ has been inserted between the character and the GSRobo model. This is needed so the movement and the lean logic have separate transforms and don’t interfere with each other.
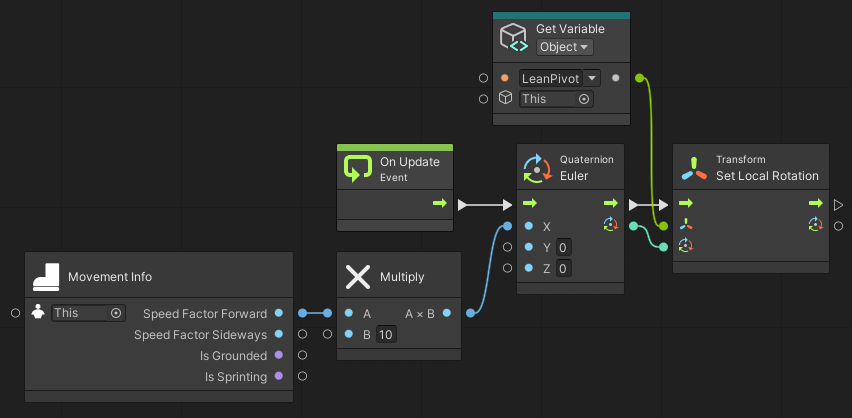
The implementation is relatively straightforward. We take the SpeedFactorForward from our character multiply is by 10 and set it as the x rotation of the pivot. Bear in mind that the context of the MovementInfo is a character and not a movement. This is the case for most of the units working with parts of the character like inventory, attributes and so on.
UI
The scripts that display the resources, attributes, … in the UI have also been replaced with visual scripting. For simplicity most of them simply rely on the ToString implementations of the units they display. Just like the scripts they replace this is more of a debugging solution than something suitable for a release.
Behavior
The following chapters show a couple different ways that NPC behavior may be controlled using Visual Scripting. The first two are found in the …/AdventureManual/VisualScripting/VSBehaviour.unity manual scene.
Patrol
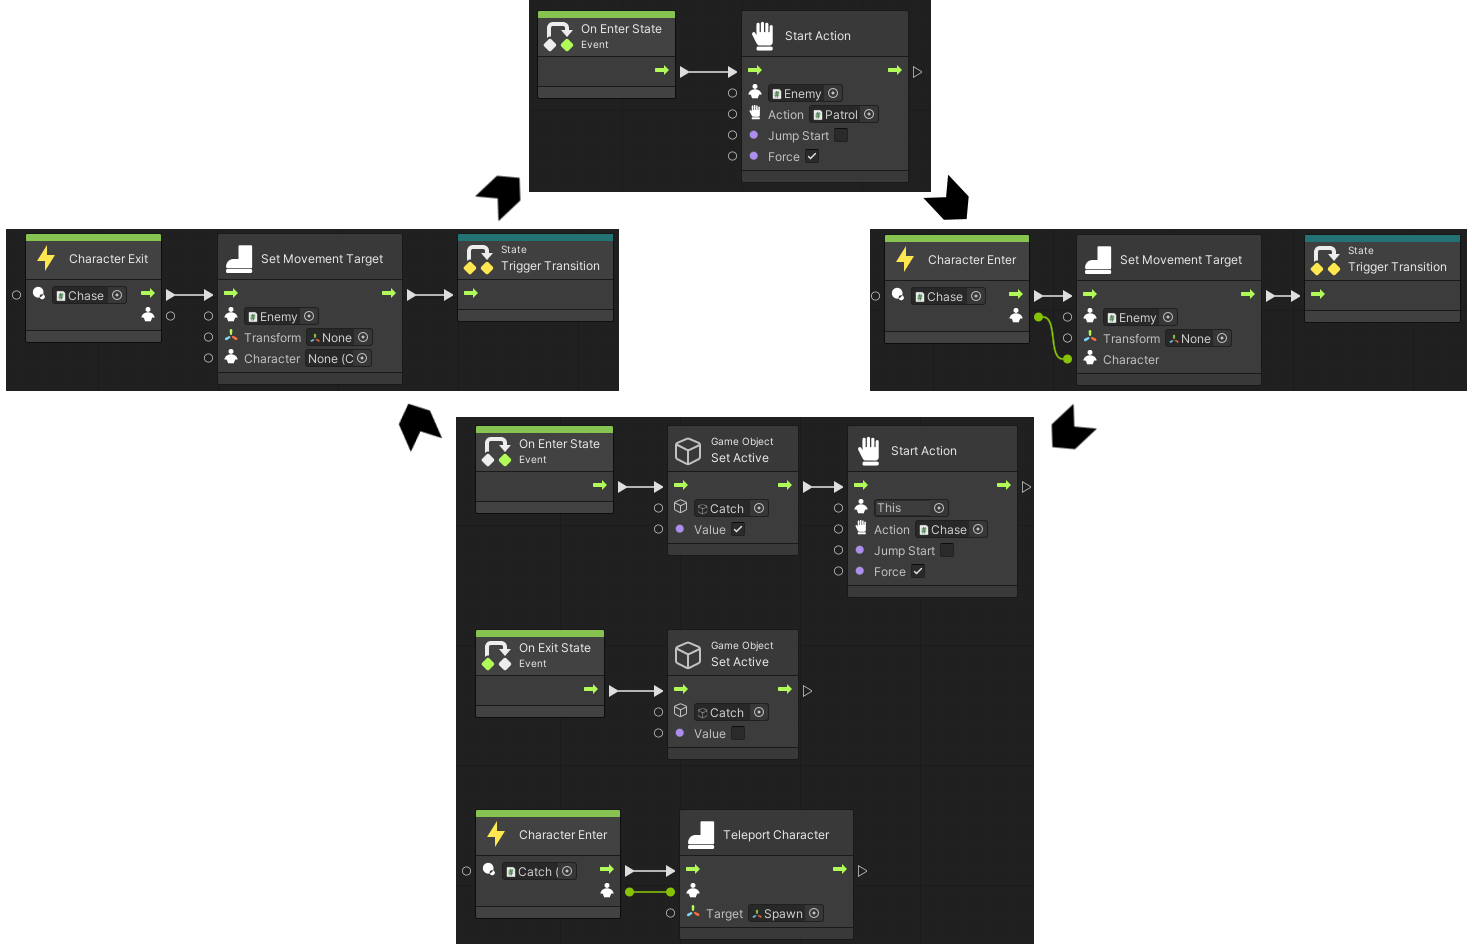
The red bot patrols between two points until the player enters its area. As long as the player is in the area it approaches it. If it catches the player it teleports it back to its spawn point.
This behavior is realized using a state graph which has separate states for patrolling and chasing. It switches between them when the player enters or exits the chase area which also sets the movement target so it know where to go. When either state is entered the appropriate action is started.
We don’t have to do any additional work for persistence here since patrol persists the current target on its own and the rest of the behavior is determined by the characters positions which gets saved by their movements.
Toggle
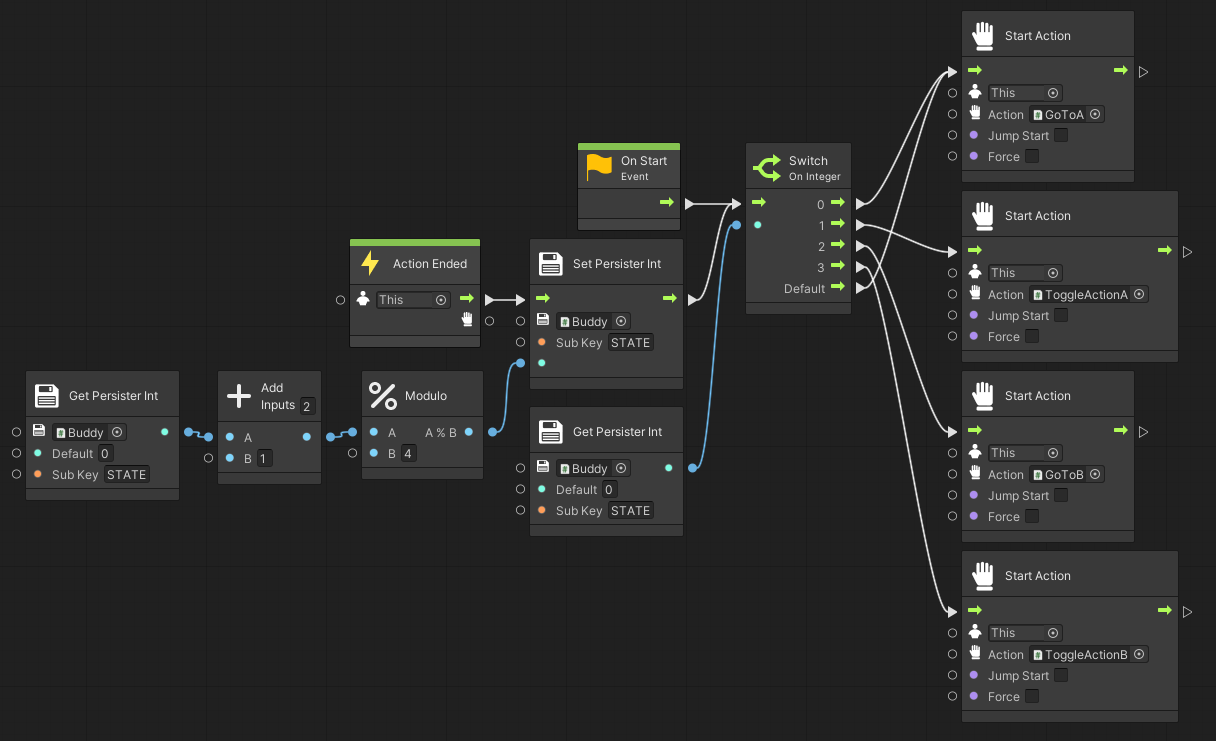
This script machine shows a way to chain a couple different actions and persist the current state. This is what makes the yellow bot move between and toggle the gates.
When it is started it retrieves a persisted integer and starts the appropriate action. Whenever an action ends it increases the counter by one and starts that action.
AdventureSouls
Open up …/AdventureSouls/Scenes/Debugging/Enemies/SoulsDebuggingVisualScripting.unity to find two special enemy variants for the souls demo. They are not used in the regular levels as visual scripting is optional in that demo.
Actions in these enemies are not just started once like in the manual examples. They are kept active using the Perform NPC Action node which start their action whenever possible and just pass the flow if the action currently happening. This allows for a different kind of modeling behavior that is similar to classic behavior trees.
These enemies are also not entirely visually scripted. They still use the SoulsEnemyCharacter for things like death and loot. The graphs also use some special units that allow easily retrieving the state of the character or its current default or item actions.
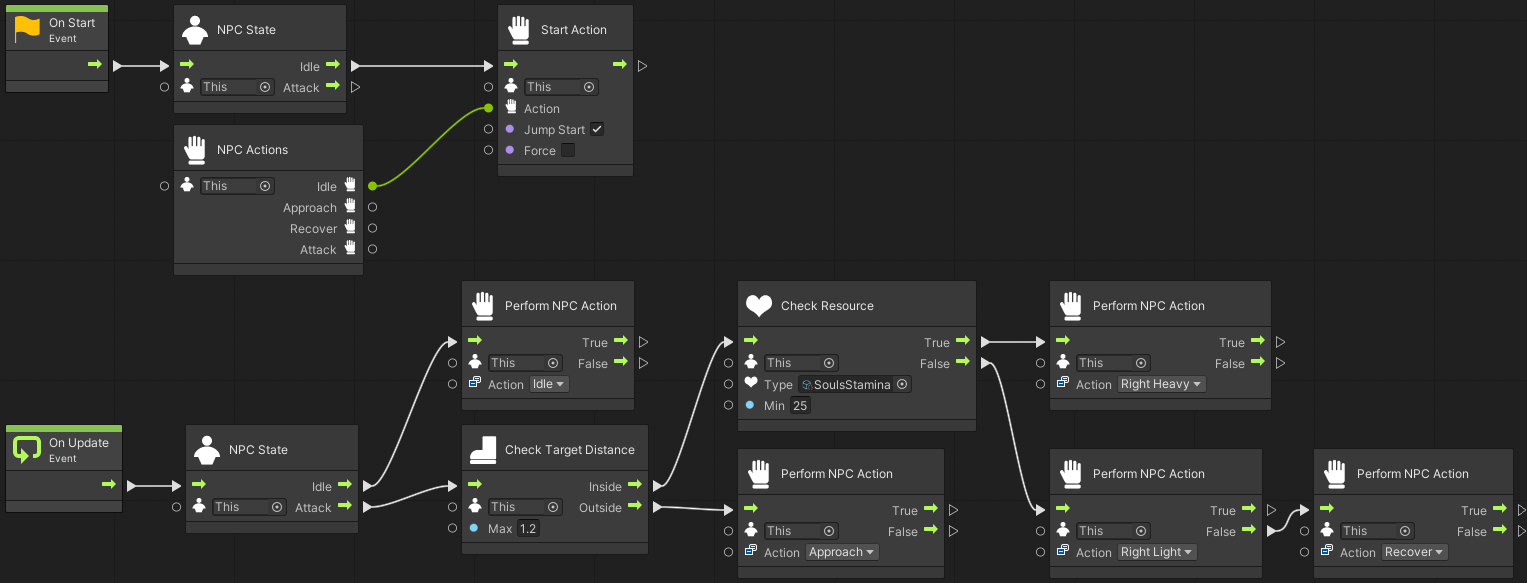
The attacker enemy is a slightly more advanced version of the default enemy. It varies its attacks depending on the stamina it currently has and also uses whatever weapon it has equipped in its right hand. When it can no longer perform even a light attack using its current stamina it performs the recover action.
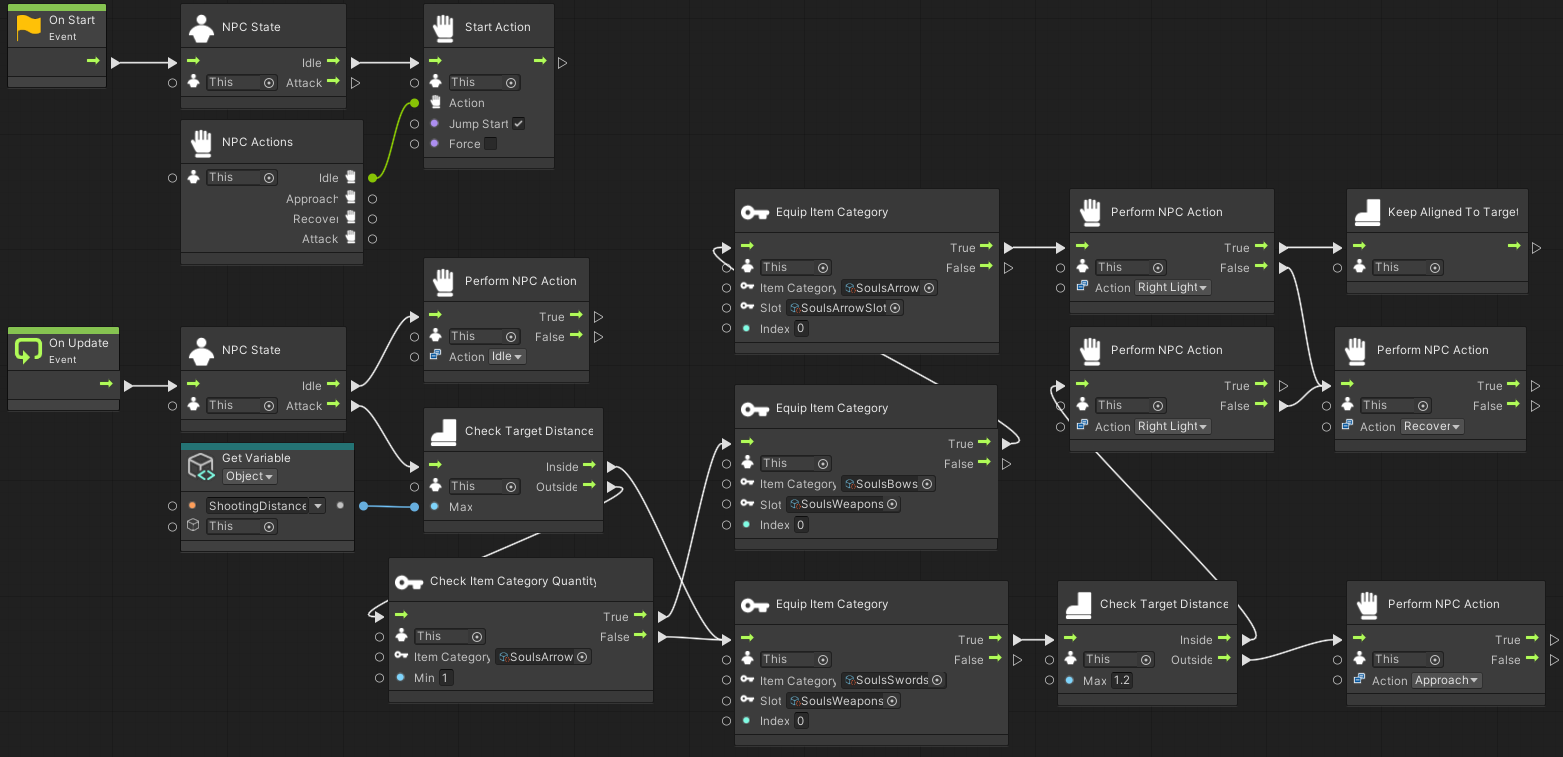
The archer is able to equip appropriate items depending on the players position. The distance at which it switches to melee can be configured using the ShootingDistance variable.
The SoulsWeaponSlot does not allow switching equipment while an attack is happening. So if the archer is currently aiming when the player enters its melee range it will wait until that action has been appropriately canceled. The EquipItemCategory units go to their False output in that case.
Also note that the action after equipping the bow and arrows goes to KeepAlignedToTarget when it is active. This is what makes the enemy actually turn to aim at the player. When it can’t be started, probably because of lacking stamina, it goes to the Recover action through its False port.
Character
permalink: /manual/character title: “Character” sidebar: title: “Manual” nav: manual —
Core
Characters are the brains of the operation for any entity in the world be it player or NPC. They tie all the other concepts together and implement any logic the belongs to a specific character but does not fit any of the other concepts.(input for players, AI for enemies)
CharacterBase has explicit fields for AttributePool and ResourcePool since these probably wont be inherited from. The actor, movement and inventory implementation can be freely defined when inheriting. CharacterBaseTyped/AnimatedCharacterBase define the fields for theses in a generic manner which makes them convenient to inherit from.
The character base implements a very simple messaging channel that can be used for events that may be used by every other system on the character. Typically messages are received from things like animators or timelines and then used by the current action(animation end>action end) or something like the AudioManager(play sound on animation foot down).
Instructions
A CharacterInstruction defines some type of state change for a character in a way that can be set and reset. This is done to deal with situation where multiple systems modify the same properties without knowing about each other. For example modifications to the movement speed or the visibility of an item slot. AdventureCore defines some useful general instructions like multipliers for attributes or stats and suspending damages, collisions or movement. See the header of the different instructions for a more detailed explanation of each one.
CharacterInstruction(or CharacterInstruction[]) can be used as an inspector field despite being abstract because AdventureCore comes with a PropertyDrawer that allows choosing the actual implementation in the inspector. An overview of all the available instructions can be found in the api documentation.
Souls
- SoulsCharacterBase provides some common defense, stagger, guard and parry logic
- SoulsPlayerCharacter manages input(movement, lock-on, menu, …), XP recovery and character reset(bonfire)
- SoulsMorningstar character is a specific boss enemy that chooses its attacks based on the position of the player.
- SoulsNonPlayerCharacter base that provides some default behavior for simple NPC characters
- SoulsEnemyCharacter attacks when something enters its trigger area
- SoulsFriendCharacter has some additional objects(talk, trade) when idle and only attacks when damaged
Hero
Most of the player logic is done through the HeroCharacter scripting graph. This includes things like Animation Parameters, Context Actions Selection, Damage and Death Handling. The graph subscribes to the main StateManager on the HeroSetup object to switch between its Play and Paused states.
The HeroPlayerCharacter class provides the sheathing behavior and keeps track of important transforms like ItemLeft or Sword. These are exposed to visual scripting in HeroSheathingUnit and HeroInfoUnit. It also manages presentation of newly found items and passing on confirmations to text boxes.
The HeroSkeleton character uses the GenericCharacter class from AdventureCore, its entire logic is driven by the HeroSkeleton visual scripting graph.
Acting
permalink: /manual/acting title: “Acting” sidebar: title: “Manual” nav: manual —
Core
Action
An action is basically anything a character can do that may occupy it for a while.
Where the action behavior is defined depends on its use. It could be defined directly on a character so it can be triggered by AI or input(attacks, moves, …). Alternatively it may also sit on some object in the environment and become available to the character by colliding with a CharacterActionArea(Door, Levers, Dialog, …).
The most important methods to override when implementing a new action are:
CanStart returns if all requirements to start are met(key for door, stamina for move).
OnStart is called by the actor when the action is actually started so this is the main point where things are kicked of.
CanEnd defines if an action can be ended by the outside even though it has not ended itself yet.
OnEnd is called by the actor when the action is ended. This is where things are reset for reusable actions or when actions are destroyed if they are one time.
OnMessage is where messages from the character will be directed when the action is active. For example events from the animator that are needed so the action knows when it has ended.
Actor
A character actors manages a stream of actions for a character. That means taking care of how and when they are started and ended as well as forwarding the appropriate messages to them.
CharacterActorBase can technically accommodate more than one active action at a time but the most common scenario is that actions are performed one after the other rather than parallel. SerialCharacterActor serves as a good base class for these scenarios. Both the MinimalCharacterActor(ai) and BufferedCharacterActor(player) inherit from it.
Souls
Attack
Attacks in AdventureSouls have a custom implementation called SoulsAttackAction.
Attacks CanStart when the character has enough stamina and either the action has not started or when it has and it CanCombo. OnStart it triggers an animation and adds an instruction that suspends the characters regular movement so that only the root motion from the animation is used. It also removes the used stamina from the character.
It responds to the following in OnMessage
START confirms that the animation has actually started, this makes sure we are not responding to messages from the wrong animation.
DMG_ON/DMG_OFF control whether the damage on the weapon is turned on.
COMBO is sent when the animation is ready to transition to the next swing.
END means the animation has ended and the action should end.
CanEnd is true when the attack CanCombo and the next action is that same attack. OnEnd the attack reset some things including the combo counter if the next action is not itself.
Roll
The roll in AdventureSouls uses an action from AdventureCore called MotionAction. This action is useful for rolls, jumps and any other moves that are based on a character animation.
CanStart returns true when is has no cost or when the character has any of the demanded resources left. OnStart removes the cost from the character and sets the animation trigger. If AlignCharacter is checked(which is the case for a roll) the motion calls AlignToInput on the characters movement. Without this the player would not be able to change direction when rolling multiple times in a row because movement is always suspended.
CanEnd is true when RELEASE has been received by OnMessage so we can transition into the next roll before it has ended. OnEnd just resets things.
Gate
The gate in AdventureSouls uses an action from AdventureCore called ObjectAction. This is a good action for interacting with objects in the world. It supports one animation on an object you’re interacting with and another(optional) one on an object that should move in the end. It is useful for doors, levers and chests.
An ObjectAction CanStart always unless there is a cost item defined the character does not have. OnStart it moves the character into place and triggers its animation. When ACT is received in OnMessage it starts the animation on the lever and in OnEnd it starts the one on the gate.
Hero
Attacks
The different directional Attacks of the Hero use a VisualScriptingAction combined with the HeroAttackAction scripting graph. The kind of attack each action performs is determined by the AttackType integer variable on the object. This integer gets sent to the animator in the graph which triggers the attack animation. During the animation the graph reacts to messages defined in the animation like DMG_ON which activates the damage sender on the sword.
Which of the attacks is started is decided in the Actions Subgraph of the HeroCharacter. This graph checks if the hero actually has a sword equipped and then selects an action based on the input direction.
Throw
Throwing is another VisualScriptingAction that shows a visual(HeroNutVisual) in the characters hand while it winds up and that instantiates a projectile(HeroNutProjectile). It is started from an equipment item(HeroNut) and uses the HeroThrow graph.
In the actual levels this item only randomly drops from pots. To try it out imediately open the HeroDebuggingGeneral scene, the inventory of the player is overridden to have it equipped.
Carry
The HeroCarryAction is s custom action either started as a context action from the CharacterActionArea(Pots) or by an Equipment Item that uses the HeroSpawnEquipment graph(Bombs). The HeroDebuggingGeneral scene contains some examples of pots, bombs and other objects that can be carried.
It parents itself to the ItemParentOverhead transform defined on the HeroPlayerCharacter when started and sets its rigidbody to IsKinematic=true. It sets the CONTEXT_ACTION_OVERRIDE variable to receive the context action button while it is active. When it is ended by Throwing, Putting or some other action occuring it unparents itself again and sets isKinematic=false so it is affected by Physics again.
Climb
In contrast to most other actions the custom HeroClimbAction starts itself under the right circumstances. It uses a GenericTriggerArea to detect climbable surfaces and checks whether the player input points against those.
During climbing it checks points in four directions to determine if the climb can continue, these points are visualized as blue spheres when the action is selected. When it cannot climb upwards is performs Raycasts forward and down to check if the character can pull itself up. These are visualized as green lines.
To define a surface as climbable simply add a GenericTriggerItem and set the Key to CLIMB. Check out the HeroDebuggingClimbing scene for examples of climbable surfaces.
Block
The HeroBlockAction lets characters pull and push on rigidbodies. It is defined on the respective side of the objects that needs to be pushed and gets started through the CharacterActionArea.
The rigidbody needs to be set to isKinematic=true when not used so the character can’t simple push it away by running against it. When pushed isKinematic is set to false to allow the object to fall when it is pushed over a ledge. The action then ends itself and waits for the rigidbody to stand still before it resets isKinematic.
The HeroDebuggingBlock scene contains various examples on how block pushing may be used.
Item
permalink: /manual/item title: “Item” sidebar: title: “Manual” nav: manual —
Core
The getting started tutorial shows how an inventory can be added to a character and how to create item pickups. An example of usable and equippable items and slot can be found in …/AdventureManual/Systems/Item/ManualItem.unity.
Item
Items are a type of ScriptableObject that defines whether an item can be equipped or used and how it acts when it is. Derive from ItemBase and override the appropriate methods to do so and declare fields for relevant for items of that type(for example visuals). For items that do not have any behavior of their own(key items, currency) the GenericItem can be used. ItemBase also defines some basic common properties that most item systems will use like name, image and categories.
The EquipmentItem acts as a attribute- and stat modifier while it is equipped and whether is can be equipped is also determined by the attributes and stats of the character. The UsableItem can add Attributes, Resources and Effects to the character when used. Both of them derive from PrefabItem which can define a prefab that is instantiated when equipped to a InstantiatingItemSlot.
Inventory
An Inventory is where items are stored, mostly in combination with a character. InventoryBase defines some common ways an Inventory may be interacted with like adding, removing or using. AdventureCore comes with a simple implementation called ListedInventory which just stores items in a list without any limitations to item quantity or stack size. To implement a more specialized inventory, for example a re4 style case, just inherit from InventoryBase and implement the needed methods.
One important distinction to make when working with Inventory is between an ItemQuantity and an InventoryItem. While both of these have an Item and a Quantity they are used very differently. An InventoryItem represents an entry in an Inventory and can be used to react to the quantity of an item a character has and whether it is equipped. An ItemQuantity is not bound to any Inventory or Character and can be used to configure amounts of items that are gained or used when performing some action like picking up items or using a key.
The Inventory of a Character also acts as the access point for its ItemSlots.
ItemSlot
ItemSlots enable Items to be equipped to and interact with a character. Deriving from ItemSlot and overriding equip and unequip is the recommended way to create a new kind of ItemSlot. Since they are in scene and exist by character ItemSlots can take care of any runtime data the item may produce when equipped(visuals, effects, …).
AdventureCore includes a couple simple default slot implementations:
- GenericItemSlot
does nothing itself, items are equipped or not, any actual logic may come from the items
for example EquipmentItem for raising stats, attributes or adding effects while equipped - InstantiatingItemSlot(Arena Trinkets)
only works with PrefabItem, instantiates the prefab while an item is equipped- ActionItemSlot(Arena Weapons)
looks for an action on the instantiated prefab and allows binding input to it
- ActionItemSlot(Arena Weapons)
- UsableItemSlot(Arena Usables)
uses items equipped to it, for example UsableItem can add resources or attributes
if the PrefabItem has a Prefab with an action it instantiates it and performs the action(eg drinking animation)
Souls
Armor
The SoulsArmorItem defines a prefab for the visual of the armor when it is equipped. The instancing of that prefab is done by the SoulsArmorSlot which also makes sure the bones on the renderer are set and manages the instance(as in destroys it when unequipped).
When armor is equipped it can also modify some stats, adding the modifier is done in the slot but could also be done in the item since it has no side effects. Lastly the armor defines attribute requirements which are checked by the item itself in its CanEquip.
Weapon
In addition to the slot-item combination that armor uses, a weapon also has a SoulsWeapon behavior which serves as the access point for a weapons actions and damages in the weapons prefab. It can be used to check the damage through the prefab when the item is stored in the inventory and for the actions when it has been instanced by the slot.
The SoulsWeaponSlot allows binding input to its weapons light and heavy actions. It then rebinds these whenever the equipped weapon changes.
Hero
All the items in the hero demo have a visual prefab which is used when the hero presents the item when it is first picked up.
Gear
Sword and Shield are simple PrefabItem from AdventureCore. They are instantiated on the respective InstantiatingItemSlot when equipped. Their actual functionality in defined in the attack and guard actions which themselves check that an item is equipped.
The hero demo also has various items that expand the inventory. For example the HeroBombPouch that lets the character carry more bombs. These did not make it into the levels yet but can be tried out in the HeroDebuggingGeneral scene(chests).
Equipment
Equipment items hold an action prefab and can be assigned to on of three equipment slots to use them. When the HeroEquipmentItem is equipped to a HeroEquipmentSlot its action prefab is instantiated and when the slot is used that action gets started. When an item is used directly from the inventory it gets equipped to a hidden EquipmentX slot.
Usable
HeroHeart is a UsableItem which restores one HeroHealth resource.
The HeroHeartTriple is a placeholder for three HeroHeart items. Therefore it is presented as a seperate item but when added to the inventory three hearts are added instead.
HeroHeartEssence adds one HeroHearts attribute which expands the characters health pool. HeroHeartShard is placeholder for the essence but has a prerequisite count of four before it is replaced.
Attribute
permalink: /manual/attribute title: “Attribute” sidebar: title: “Manual” nav: manual —
Core
Attributes are whole number metrics that, roughly speaking, define a characters capabilities(strength, vitality, ….) but can also be used for any other number that should be persisted and does not fit any other concept(xp). Attributes do not define any behavior of their own, instead other things that depend on them will check them when needed. To add an attribute simply create an Adventure/AttributeType from the context menu in your assets.
In contrast to attributes an AttributeStat does not have a value of its own. Is is usually calculated based on one or multiple attributes or even just a constant value that just gets changed by modifiers. How a stat is calculated is defined by in its GetValue method, derive from AttributeStat to define your own calculations. Check the stats already defined in AdventureCore for examples.(MultipliedStat, TieredStat, …)
The AttributePool manages the available attributes and stats and their value in the scene. It is usually attached and assigned to a character. This is also where modifiers can register to change exposed values and where observers can register to be notified of changes of attributes and stats.
Souls
The SoulsVitality attribute can be leveled up at bonfires and influences the SoulsHealthMaximum stat which defines how many hit points the player has. On enemies the hit point maximum is set directly without using a stat.
SoulsEndurance is pretty much the same but for SoulsStaminaMaximum.
SoulsStrength can be leveled at the bonfire and influences the SoulsPhysicalAttack which is used by weapons to calculate their damage.
SoulsLevel and SoulsExperience are counters that are used to check if the player can level up and how many times they have done so.
Lastly SoulsFlask defines how many flasks are restored to the player when they sit at a bonfire. There is no way to change it currently but it has been added so increasing it with a pickup or some other action can be implemented later.
The stats SoulsPhysicalDefense and SoulsPoiseMaximum are not influenced by any attribute, they just have some base value and are only increased by modifiers like armor.
Hero
AdventureHero only defines a single Attribute called HeroHearts. It is used in the HeroHeartsMaximum stat to define the maximum health in the AttributePool of the player character. The Attribute starts at 3 and gets raised by collecting HeroHeartEssence.
Resource
permalink: /manual/resource title: “Resource” sidebar: title: “Manual” nav: manual —
Core
The getting started tutorial shows how resources can be added to a character and how to create damaging trigger areas. An example of different resource types and bars can be found in …/AdventureManual/Systems/Resource/ManualResource.unity.
Resources are floating point metrics that can change on a frame to frame basis. A resource has a resource type which is mostly used to identify it and a ResourceValue behavior which actually holds and changes the value. The default ResourceValue does not change on its own. For more specialized resource values that change their value over time or by some other means you can inherit from ResourceValue(look at ChangingResourceValue for an example)
Resources are managed by a ResourcePool which can be used to check, change and monitor resource values.
Souls
SoulsHealth is a simple ResourceValue that does no change on its own. It is checked after a character receives damage to see if they die.
SoulsEndurance is a custom behavior in AdventureSouls called SoulsStamina. This is similar to a ChangingResourceValue but also subtracts from its value when the player is sprinting.
SoulsPoise is a resource value that defines whether the character gets staggered by a hit. It gets damaged by attacks and then refills on its own.
Hero
The player only has the HeroHealth resource which gets reduced by HeroHealthDamage and recovered by picking up HeroHeart pickups.
The Damage subgraph in HeroCharacter checks if the health has been reduced to zero and starts the Die TimelineAction with the HeroDeath timeline.
In addition to health skeletons also have the HeroStun resource. This EffectResourceValue adds the HeroStun effect to the character which stops movement and animations. The HeroStunResource visual graph is in charge of visualizing the effect by tinting the model materials in a blue shade.
Effect
permalink: /manual/effect title: “Effect” sidebar: title: “Manual” nav: manual —
Core
Effects are temporary behaviors that can be added or removed from a character. Every EffectType scriptable object assets describes an effect and points to a prefab that will be instantiated when the effect is added to a character. These prefabs have some implementation of EffectBase at its root which, through its Pool property, gets access to the character it was added to.
The GenericEffect implementation of EffectBase can be used when an effect is only visual or if the effects logic can be expressed using character instructions. Attribute- and StateEffect modify a characters attributes and stats and can be useful for buffs and de-buffs. DamageEffect periodically sends a damage event to the character and may be used for a burning or poisoned status for example. Lastly the TimeoutEffect is an expanded version of GenericEffect that removes itself after some time instead of having to be removed be some outside logic.
One built in way to add an effect to a character is the EffectResourceValue which adds the effect when its value is full. Another would be using a GenericTriggerArea which has events for when a character enters or leaves its area. Since EffectType has an Add method that takes a character as its parameter it is possible to link it directly in the inspector.
Souls
The SoulsPoisoned DamageEffect gets added when the players SoulsPoison EffectResourceValue reaches its maximum. The resource is increased when something deals SoulsPoisoning ResourceDamage to the player. This kind of damage is currently only dealt by the sprout enemy which has a ticking DamageSender and is either reduces by just waiting or by using the SoulsMoss ConsumableItem.
SoulsBuffed is a simple TimeoutEffect buff that doubles the characters strength for a set time and then removes itself which is added by the SoulsBooster consumable item. SoulsSlowed reduces a characters movement speed. Both of theses use character instructions for their actual effect.
Hero
The HeroStunEffect gets added to enemies like the skeleton whenever they are stunned. The effect adds some instructions to the character that stop movement and animations. The rest of the logic is found on the resource value.
Movement
permalink: /manual/movement title: “Movement” sidebar: title: “Manual” nav: manual —
Core
The movement is where all the traversal logic for a character is located. Movements will probably vary quite a bit depending on if it is meant for the player or some NPC and also depending on the game. This is why MovementBase defines mostly ways for other components to interact and interfere with movement in some general ways. For example it gives other components a way to slow movement down, suspend it when some animation plays or force it to move somewhere. Any more specialized logic will have to lie in the implementation.
Conveniently the generic base classes for characters(CharacterBaseTyped, AnimatedCharacterBase) allow us to declare the type in the class header which lets us use the implementation directly from inside the character or any other component that references the character implementation rather than CharacterBase.
Souls
AdventureSouls uses the CharacterControllerMovement for its player, the SoulsPlayerCharacter send all the necessary input to it.
The zombie enemies use the NavMeshAgentMovement implementation in combination with NavApproachAction so that they can follow the player around the level.
Lastly the Morningstar boss uses ManualMovement since it does not really do any traditional movement. Even if the Morningstar had more movement of its own a nav mesh would not really be necessary. The boss arena is a simple rectangle and there is no way for the boss to leave to as long as it aligns itself to the player and walks it will always get to them.
Hero
Similar to the souls demo the player in hero uses CharacterControllerMovement and the skeleton enemies use NavMeshAgentMovement.
Looking at the component you may find that the movement speeds are both set to 0. This is done because movement in hero is driven by root motion.
Persistence
permalink: /manual/persistence title: “Persistence” sidebar: title: “Manual” nav: manual —
Core
Persistence in AAK is built as simple as possible for the consuming components. Therefore we will start exploring persistence from this side and work our way towards the persistence management.
Most built in components of AAK simply reference a PersisterBase to keep their own persistence logic as slim as possible. That PersisterBase has methods for checking if a value has ever been set, retrieving it, setting it and clearing it out. For example the ObjectAction just calls Set(true) when it is triggered and whenever it is started in the future(scene/game reload) it calls Get
Persisters can come in different forms but there is one called ManualPersister that is meant specifically for the case above where some other component needs to save its state. The persister has a field for a key which is needed to identify its data and one for the area. A persister is convenient to keep persistence logic out of game logic but not necessarily needed, the PickupAction for example just deals with persistence itself without using a separate persister.
Another kind of persister is the DestructionPersister which simply sets a bool when it gets destroyed and destroys its GameObject if that bool has been set in the past. This means you can just add this persister to any destructible object to persist the destruction without any other scripting needed.
A PersistenceArea is a ScriptableObject found in Adventure/PersistenceArea that groups together data that will be saved together. This can be useful to separate smaller data that is saved frequently from larger data that is saved less frequently. The PersistenceArea also has the IsGlobal flag which is meant for data that is saved independent of save slot(settings for example).
The PersistenceContainer is the central singleton manager for persistence that is needed in every scene that uses any kind of persistence. This is where all the persistence data is managed and eventually sent to the saver that actually saves it to a storage medium. As you might have guessed from the above ObjectAction example state persistence in AAK is pushed rather than pulled. This means that state is not collected when a save game is created, instead state is sent to the container whenever it changes and the container decides when it actually saves the state. The container can be set to AutoSave so that is saves at the end of the frame whenever anything has changed, otherwise a Save() has to be called by some outside component like a save button.
In the inspector for PersistenceContainer you can find some useful helper buttons that can be used to deleted data when debugging or to check the keys of the persisters in the scene for duplicates. It can also generate random GUID keys for any persisters with an empty key field. So if you have objects that do not necessarily need a readable key just leave the key in their prefab empty and generate them all before you use the persistence.
As mentioned above the container does not save to disk itself, instead it references a PersistenceSaverBase for that purpose. This is done so that the ‘device-facing’ part of persistence is easily replaceable as I anticipate it might have to be customized depending on the built platform and other factors.
Since objects access persistence in Awake the loading has to be done before any other Awake calls happen. This means that the object initially triggering Load(PersistenceContainer, SoulsCommons) needs to have a lowered Script Execution Order. The upside of this is that we can be sure that all objects are done loading when Start is called.
Souls
State in AdventureSouls is split into a couple different areas. SoulsSystemPersistence is a global area independent of the save slot that is used for settings like the sound effects volume but also to save a short info structure for every save index that is displayed in the title screen. SoulsPlayerPersistence is just used by the player character, the player gets its own area because it is saved quite frequently. The SoulsPermanentPersistence is used to save permanent world state like collected items or pulled levers. Lastly SoulsTemporaryPersistence is where any state resides that is discarded whenever the player changes the level or sits at a bonfire. It contains the state of the enemies and destructible environment objects.
The PersistenceContainer is part of the SoulsSetup prefab which contains all the necessary setup to run the game. Basically if you create a new scene and add the setup as well as a plane for the player to stand on you can start the game and it’ll work. If you check the container on the setups in the debugging scenes like Scenes/Debugging/SoulsDebuggingGeneral you may notice some overrides. For one the key is overridden so that data saved for that debug scene does not override data from the actual game scenes. Also the saver has been removed for most of them, this completely disables persistence because for most debug scenes a complete reset is more useful. If you want to debug the persistence logic you have to reassign or revert that saver.
Hero
Persistence in the hero demo is a bit more straightforward than in souls. There is only one PersistenceArea for game data called HeroGamePersistence which saves all the data per save slot. The second area called HeroSettingsPersistence is only used for global settings like sound effects volume or visual quality.
Movement is not persisted, the current scene is set in the ‘Scene’ variable and the desired entry point is saved in ‘Parameter’. The game is saved automatically in scene transitions(HeroExit) which also write the current scene or when the game is ended from the menu. When the game is loaded the scene set in the variable is opened.
Whether, for example a heart shard has been picked up or a cracked wall bombed is persisted using a DestructionPersister.
Damage
permalink: /manual/damage title: “Damage” sidebar: title: “Manual” nav: manual —
Core
Damage in AAK is a multi stage process that lets a sender, receiver and kind of damage interact. In PreDamage the sender and receiver are informed that a damage is about to occur between them, they both have the chance to completely cancel the damage here. During OnDamage each kind of damage that the sender has is packaged into a damage event that gets send to all the participants. This is where a senders and receivers can modify the damage value and where the DamageKind applies whatever effect the damage has. Finally in PostDamage the sender and receiver have a chance to react to the combined changes of the applied damages.
An IDamageSender is any component that causes damage occurences. It can be implemented by any class that sends damage. You can Use the static DamageEvent.Send to send your damages. AAK comes with a TriggerDamageSender that uses that regular Unity trigger messages(OnTriggerEnter, …). By default it only sends damage when a TriggerDamageReceiver first enters but it can also be configured to send damage in intervals or at the end.
AAK also comes with the DestructibleDamageReceiver which destroys(or replaces) its gameobject when it gets damaged. This is ideal for destructible environment object or any other object that needs to get damages but does not warrant a full character.
Both the TriggerDamageSender and the TriggerDamageReceiver forward all their damage calls to the character they are attached to(if any). Therefore if we want to react to any kind of damage done to a character we can conveniently do that in the character implementation. The SuspendSendDamage and SuspendReceiveDamage character instructions hook in here.
Damages can theoretically be anything, what exactly a damage does is decided by the DamageKind implementation. The most common kind of damage is removing a resource(HP) from a characters ResourcePool. AAK comes with the ResourceDamage damage kind which does exactly this.(ContextMenu>Adventure/ResourceDamage)
Souls
Somewhat more complicated than a lot of other games damage in the souls demo is split into physical and poise damage. Poise damage is generally used to signify the brunt of an attack rather then the pure health malus.
The base character defines a lot of the damage handling in the demo. Parries are checked in PreDamageReceive so that the damage can be cancelled if a parry succeeds. In OnDamageReceive the damage value is reduced by defense or set to 0 when a character is guarding. In PostDamageReceive it checks if the character dies or is staggered as a result of the damages applied.
One thing we need to make sure is that a player does not damage itself. We could theoretically just cancel any damage that a player weapon might do to the player in PreDamage but using Layers is far more convenient and performant.
The AdventureSouls demo has various Layers that control which objects can interact with each other. Check the Physics settings to see how exactly they are configured.
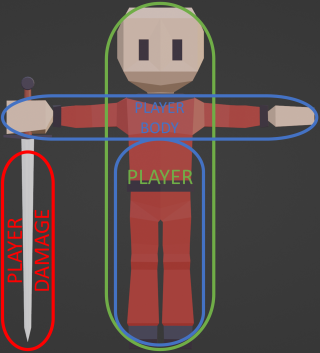
The player has a general Player Layer that is used for any kind of logical interaction like entering areas or object interactions. The PlayerBody Layer is used to receive damage and interact with physics objects like destroyed crates. In the current demo the body, just like the logic, uses a simple capsule collider. To get more exact hitboxes and more interesting physics interactions the PlayerBody is the one that should be changed to have more detail. Lastly PlayerDamage is used on any weapons the player uses and interacts mostly with EnemyBody.
The Enemy has a very similar setup to the player with the Enemy, EnemyBody and EnemyDamage Layers. There is also a NeutralDamage Layer that is used by traps so they can send damage to either character. The Trigger Layer is used for logical area to make sure these do not interact with damages or physics at all.
Hero
Damage in Hero fairly straightforward. The HeroHealthDamage is used by player and enemy attacks as well as environment hazards like the boulder to reduce the health resource of the characters.
The Layer is also not split within the character, the entire player including the sword and its damage is on the Player layer. In the same way the skeleton lies on the enemy layer.
HeroStunDamage is a special kind of damage caused by the HeroNut throwable that can stun enemies. It does so by raising the HeroStun resource which ultimately adds the HeroStunEffect to the character.
The HeroBombDamage does nothing on its own but is used as a damage filter on the HeroCrackedWall so that the DestructibleDamageReceiver can only be affected by bombs.
Hero Setup
permalink: /manual/hero-setup title: “Hero Setup” sidebar: title: “Manual” nav: manual —
The following is an overview of the HeroSetup prefab in the AdventureHero demo.
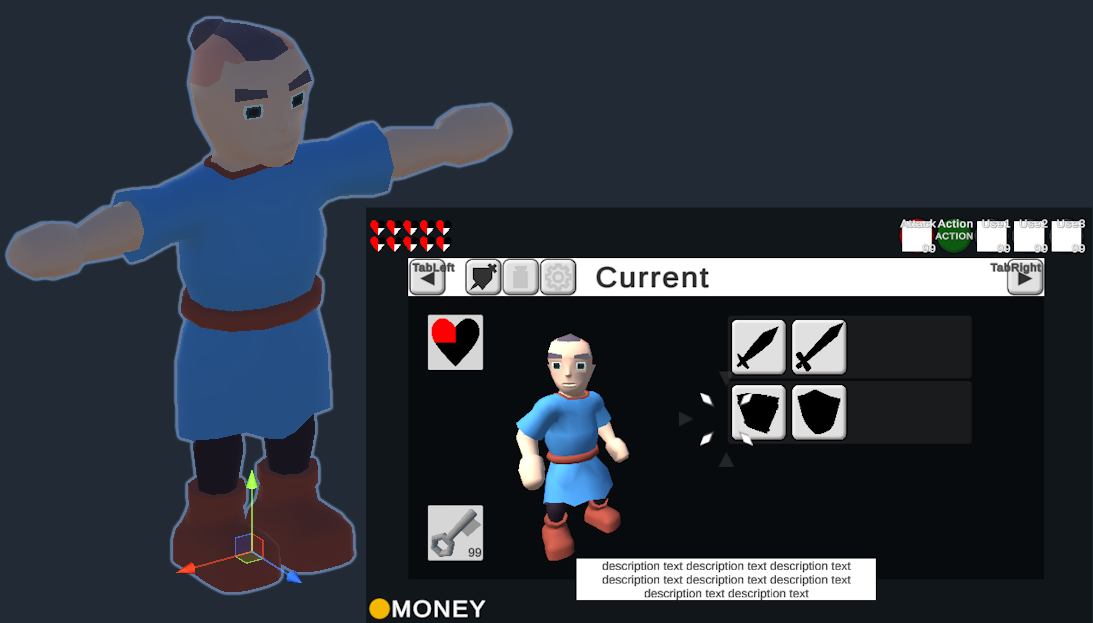
HeroSetup
The top gameobject starts off with a couple components related to Persistence.
PersistenceContainer is the main persistence component that manages all the current data.
The PlayerPrefSaver is used by the container to load and save its data to unity player prefs. When the Debug field on the saver is checked it uses temporary variables instead. The data in DebugData then deactivates intros and starts the inventory off with a sword and shield.
The PlaytimePersister saves the current playtime which is then displayed in the intro scene when selecting the save game. The RandomStatePersister makes sure that random drops like items from pots are consistent between sessions.
The StateManager manages the general state of gameplay. The PLAY and MENU states are triggered by input events on the PlayerInput component on HeroCharacter. The CUTSCENE state is, for example, triggered by a state override in the HeroIntroBeach timeline. Check out the events of the manager to see all the actions it performs when states are changed. Some examples are:
- Switching Input Action Map
- Showing and Hiding Menu UI
- Transitioning the Audio Snapshot
- Setting the HUD State
HeroSetup also contains the scenes variables for Visual Scripting. Action contains the context action that the HeroCharacter state machine determines. ActionOverride is used by some actions like holding a bomb to temporarily override that action.
Camera
This object contains the main Camera and CinemachineBrain as well as a couple different virtual cameras.
The Flash and Hurt cameras have a timeline that very shortly switches to them resulting in Red and White flashes of the screen. They are triggered by FLASH and HURT messages on the character. HURT is sent from the HeroCharacter state machine when damage occurs. FLASH is sent on start by a script machine in the HeroNutImpact.
The free look and first person objects are used by the LockableCameraFreeLook on the camera object inside the HeroCharacter for the general camera movement.
The PresentCamera is switched to within the HeroPresent timeline when new items are shown. It points at the PresentTarget within the character model in front and above the character.
HeroCharacter
The HeroPlayerCharacter script contains some custom hero demo logic in addition to the base character functionality it inherits from the core character class. This includes presenting new items and sheathing the items the character has in its hands. It also forwards confirmation and cancel presses to text boxes. If you check its events in the inspector you should find some actions that forward messages to the audio manager.
Most of the custom logic of the character is defined in the HeroCharacter state machine.
- Forwarding Animation Parameters from Movement
- Triggering Idle Animations
- Choosing and Triggering Context and Attack Actions
- Responding to Damage and Death
When the main StateManager is not in its PLAY state the character state machine moves from its Gameplay to its Paused state and also sets the Time Scale of the entire game to 0.
The CharacterController and CharacterControllerMovement manage the characters movement. The movement speed is set to 0 because in this demo movement is driven by the root motion of the animations.
PlayerInput is a part of the ‘New Input System’ in Unity. It is configured to Invoke Unity Events here so you can find the various actions that are driven by Input by expanding the Events field.
The SignalReceiver at the bottom can receive the HeroReset signal from timelines to reset the camera controller. This is done in the HeroPassage timeline to reset the camera position to the new position at the other side of the door.
HeroKid
This is where the visuals of the player are located. It contains the Animator along with an AnimatorProxy that passes along events and root motion from the animator to the character.
The following steps show how the player model could be replaced by the skeleton model that is usually used by the enemies. Some other components of the demo depend on the player model so those have to be moved over or reassigned.
- Open up the HeroSetup prefab
- Drag the Models/Characters/HeroSkeletonZombie into HeroCharacter
- Assign the HeroKid Controller to the Controller of the Animator
- Select the old HeroKid object and drag over the AnimatorProxy and AnimatorParameterSetter
- Fully expand both models, you will see some additional transforms in HeroKid
- Drag over the extra transforms into the same spaces in the skeleton
- FPSPosition in Head
- ShordSheathe, ShieldSheathe and OverheadItem in Chest
- HoldingLockOnPoint, … directly under HeroKid
- Delete the HeroKid model
- On the HeroPlayerCharacter set Animator to HeroSkeleton
- Set ItemParentRight/Left to the new Item.R/L transforms
- On CharacterControllerMovement set Pivot to HeroSkeleton
- In the LockableCameraFreeLook in Camera replace the Reference transform and set all the renderers from the skeleton to FirstPersonHideRenderers
If you now open up HeroDebuggingGeneral you should be able to move around and perform all the different actions with the new model.
Trigger
This object contains a CapsuleCollider trigger and a Rigidbody. These are used by a TriggerDamageReceiver for damage that affects the player and a GenericTriggerItem for general trigger areas like the exit trunks.
Actor
Contains actions the player can perform on its own and the actor that manages their execution. Other actions are located on items or environment objects.
The hero demo uses the MinimalCharacterActor so the character can only perform one action at a time and no further action can be queued until the current one is done.
- Jump is a basic MotionAction that propels the character when it is started
- Roll is also a MotionAction but it locks rotation movement while active
- The different Attack actions use VisualScriptingAction
open up the HeroAttackAction graph to explore how it works, the messages it receives are sent by animation events found in the HeroKid model - The JumpAttack uses a MotionAction
additional logic like damage activation is handled in a script machine executing HeroJumpAttack - Guard is a custom action made for the hero demo
it was made in code as it performs some bone rotations that would be a hassle in visual scripting, the Starting and Ending events are configured to send messages that are used in the AudioManager - Sheathe is a simple VisualScriptingAction that prompts the character to sheathe items it has in its hands, the sheathing itself is handled in the HeroPlayerCharacter
- Present is a TimelineAction that executes a timeline that shows off a newly gotten item
it gets started by the HeroPlayerCharacter which also instantiates the visual of the item - Die is another TimelineAction that is started from the HeroCharacter visual graph
- Climb is a custom action that lets the player climb up some special surfaces
double click the script to check it out in Visual Studio, like most classes in AAK it has an explanation at the top of the file, examples for climbable surfaces are found in HeroDebuggingClimbing or the HeroBeach and HeroInland scenes
Inventory
The Inventory uses a simple ListedInventory and contains no items in the prefab. Items can be added for debugging in all scenes except the beach scene. As this is the first scene that is loaded the inventory content there determines the players starting items. In any other scene there should already be save data that overrides the inventory content set in the scene.
Both Sword- and ShieldSlot are of type instantiatingItemSlot. The Shield- and SwordParent transforms they instantiate into are move to the characters hand or sheathing position by the HeroPlayerCharacter script.
The equipment slots use a fairly simple custom slot called HeroEquipmentSlot which instantiates the action prefab defined on the HeroEquipmentItem. The instance of that action is then checked to determine if the slot can be used. The three regular slots are used from the equipment buttons that are visualized in the top right, the fourth slot called EquipmentX is used when an item is used directly from the menu.
The inventory also defines some item capacities. These are raised when the player collects a CapacityRaisingItem like the Nut Bag or Money Pouch. There is no place to collect these in the regular game yet but they can be tested in HeroDebuggingGeneral
Status
This object contains a couple different components representing the characters status.
There is only a single resource value in the ResourcePool called health. It is decreased by HeroHealthDamage and increased by usable items like the HeroHeart. The HeroCharacter state machine initiates death when it runs out.
The Attribute Pool contains the HeroHearts attribute which is increased by collecting HeroHeartEssence usable items. The HeroHeartsMaximum stat copies that attribute and is used to determine the maximum health of the hero. This is configured in the ResourceMaximums field of the pool.
There is an Effect Pool even though there are currently no effects relevant to the player character. The currently only effect of the demo is called HeroStunEffect and is added to enemies when their HeroStun resource is filled by the HeroStunDamage done in HeroNutImpact. You can quickly try that out in the HeroDebuggingSkeleton scene.
LockOn
Contains a trigger collider and LockOnManager which is a special kind of TriggerArea. It receives inputs from events in the PlayerInput component on HeroCharacter. Enemies and anything else that needs locking on have to contain the counterpart LockOnPoint. There are some simple spheres with lock on points to quickly try this out in the HeroDebuggingGeneral scene.
The HeroTargetCandidate has a Follower component that is triggered by actions configured in the managers inspector. It visualizes possible lock on points while nothing is locked on. It also contains an animator that is controlled by events on the follower. Another Follower can be found on the LockOnTarget in the UI transform. This one is shown when a point is actually locked on.
There is a separate testing scene for the lock on system in AdventureCore.Tests called LockOnTest which can be used to test out the system in isolation.
Sound
The AudioManager here contains sound effects directly related to the player character. Its Key field is empty making it the main manager accessible anywhere. The manager responsible for music can be found directly under HeroSetup. Another one that plays UI selection beeps and button clicks is located in the UI transform.
All Messages received on the HeroPlayerCharacter are forwarded to it using the MessageReceived event. This includes messages sent by animations using the OnAnimation function. You can find these on the HeroKid model import. For example select HeroKidRoll and expand the event section to find STEP messages along with the START and END messages needed by the action. Some messages are also handled by items, for example the S_SWING message on the HeroKidAttackHA animation is handled by a CharacterMessenger directly on the HeroDebugSword prefab allowing different sounds per sword. Some messages are also sent by actions directly, jump and roll send a GRUNT message when they are started.
UI
This is the root transform for the 2d user interface of the hero demo which is made using Unity uGUI. As such it contains the typical Canvas and EventSystem components as well as the InputSystemUIInputModule which connects it to the new Unity input system. The only AAK component here is the EventSystemCursor which places the Cursor element over the current gameobject of the event system and scales it to fit.
SignDialog
Dialog used by the VisualScriptingAction in the HeroSign object. Has to be assigned in the variables of the script machine of the sign so it can display its text.
TextBox
The TextBoxTMP here is used to display newly acquired items as part of the Present TimelineAction. The one located in TextBoxFullscreen is used in the Die action.
Menu
Contains the pause menu with its gear, equipment and settings tabs. Showing the menu and tabbing between screens is handled by the HeroMenu script. It references the Fade transform which contains a solid black screen that is used to fade out the screen when the game is ended.
The top bar contains buttons that can jump directly to their tabs and buttons that switch to the right and left. Those are connected to the right and left triggers on controllers using a ButtonInputAdapter which is triggered by events on the PlayerInput component on HeroCharacter.
The actual contents of the tabs are located in the Contents transform. Feel free to activate any tab you are making changes to, any tab except the starting tab set in the CurrentTab field is automatically deactivated on start.
The Gear tab shows some general item info and lets players select their current gear.
- Character shows the fake character model located in Gear
- Items contains different buttons that use the HeroGearToggle script to equip and unequip gear items
- HeartShards visualizes how many HeroHeartShard items the player currently carries using a visual script machine, since the shard is a PlaceholderItem when the player collects their fourth shard a HeroHeartEssence is added instead and the shards are reset
- Keys uses a simple ItemQuantityVisualizer to visualize the current number of keys
In the Equipment tab players can assign equipment items to their equipment slots. The actual assignment and animation is handled by the respective HeroSlotPanel in the HUD. These check which HeroEquipmentButton is currently selected to know which item to assign. Alternatively equipment can be directly used from the menu by pressing the button.
The Settings tab contains AudioSlider components for changing different audio group volumes and a QualityDropdown which changes the visual fidelity to one of the quality settings defined in the project settings. It also has buttons for ending the game that trigger methods inside the HeroMenu.
HUD
The HUD shows the player health, money and available actions during gameplay. Different situations like cutscenes or dialogs require parts or the entirety of the HUD to be hidden. This is done using a StateManager that activates gameobjects and passes animator parameters according to the current state. Since its not possible in Unity to call methods with multiple parameters from events the manager uses an AnimatorParameterSetter to set the state parameter of the animator.
- Equipment1-3 use the HeroSlotPanel script to display the currently assigned item and for assignment of the slot from the equipment tab
- Money has a ItemQuantityTextCapped script which visualizes the quantity in a text field and changes its color when the item capacity is reached
- Health displays the current and maximum player health using one HeroHealthBar script which has references to a HeroHealthUnit for each possible heart.
Money and Health are both stored as prefabs so they can be reused to display money and health of the save slots in the intro screen.
Gear
This is where the player model that is shown in the gear screen is located. It uses its own camera and lighting which is separated from the regular game by using the UI layer. The contents of the sword and shield slots from the actual player character are copied using InstantiatingItemSlotClone scripts.
Hero Title
permalink: /manual/hero-title title: “Hero Title” sidebar: title: “Manual” nav: manual —
The Title screen lets players select game slots to create new games or continue games they have started previously.
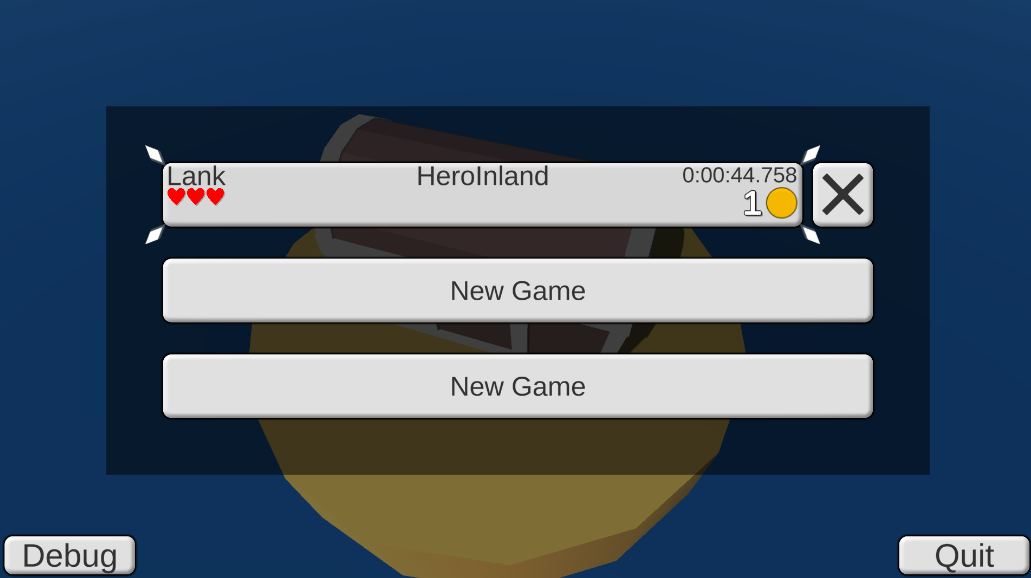
The Background of the screen is made using a CinemachineDollyCart that runs on a looping CinemachineSmoothPath.
Logic
The general flow of this screen is controlled from the StateMachine found on the Logic transform. It goes through the following states.
- Black sprite fully blanks out screen
- fade out Black sprite to reveal the background
- fade in the Logo sprite
- wait for confirmation
- fade out the Logo sprite and fade in the Saves canvas
- wait for game selection
- fade in Black sprite
- load scene stored in Scene variable by HeroSaveSlot
Saves
Save slots are found in UI>Saves>Contents and use the HeroSaveSlot prefab. They each have a minimal character setup including a PersistenceContainer and GenericCharacter which loads data from the configured save index. The prefabs displaying health and money use that to load their data. You can check the data of each save slot from the editor using the “Edit Save Data” debug button in the inspector of the container.
The behaviour of each slot is defined in the HeroSaveSlot visual script. When it starts it checks whether the PersistenceContainer already has any data and shows the NewGame or Load objects accordingly. When a game is started or loaded the script sets the SaveSlot application variable which is used by the containers in the actual game scenes to retrieve the current index. It then sets the Scene variable to the current scene of the save game or HeroBeach for new games and triggers the START event on the Logic object which transitions that StateMachine and ultimately loads the game scene.
Every game keeps two persisted strings that dictate where the player currently is. The string stored under Scene simply contains the name of the scene that should be loaded. The string in Parameter is meant to store how the scene should be entered, for example a number representing the entry point.
Hero Beach
permalink: /manual/hero-beach title: “Hero Beach” sidebar: title: “Manual” nav: manual —
This is the game scene players enter when they first start a game. It plays a short intro cutscene that shows the player character waking up and then hand control over to them. Over the course of the stage players climb a cliff to collect a sword and shield. The sword then lets them cut through some vines that block the path to the next stage. A heart shard is hidden in an optional little cave that is also blocked by vines.
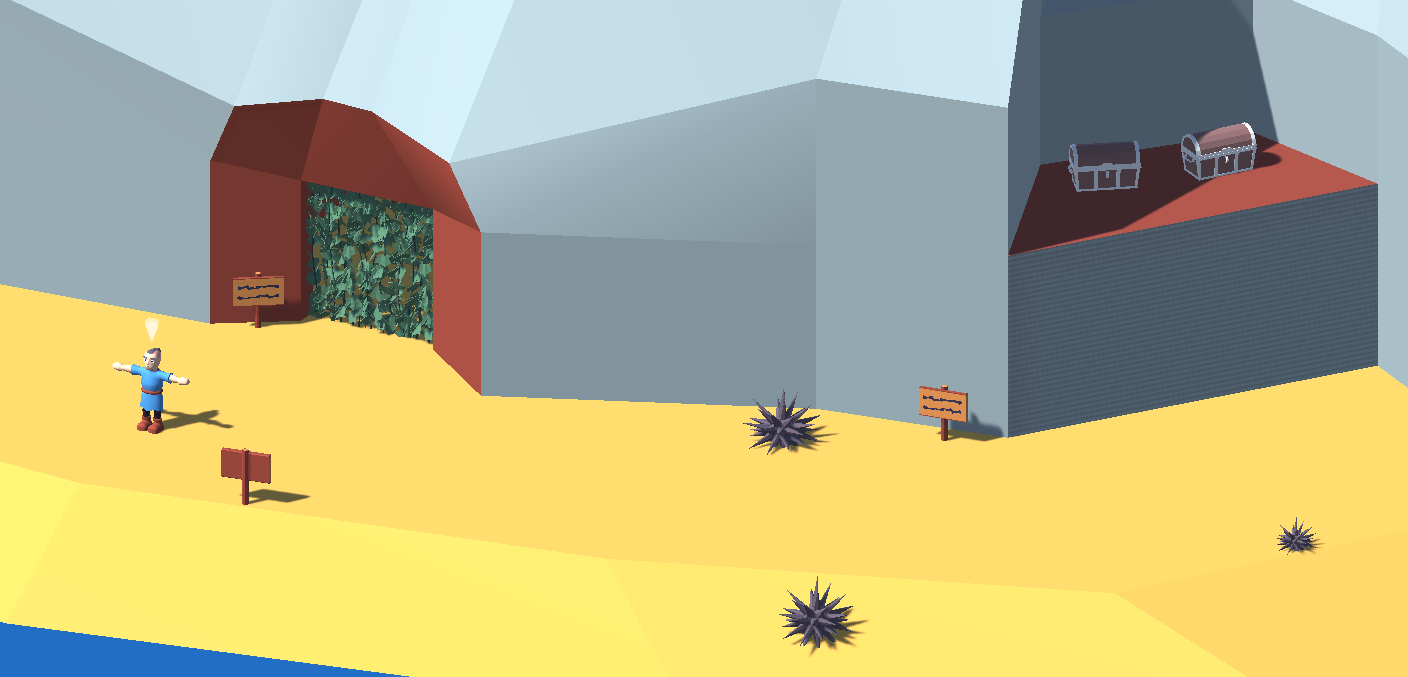
Entry
When the scene is loaded a couple different things can happen. This is configured in the ScriptMachine in the Entry object. It checks if the intro has already been played using the Beach_Intro persisted bool. If it has not it starts the TimelineAction in Intro. Otherwise it checks the string persisted under Parameter. If a “1” is found it starts the HeroEnter subgraph that moves the player in through the trunk leading to the inland scene. Otherwise it starts the HeroWake TimelineAction which quickly fades the screen in from black. This usually happens if the player has died.
Environment
All the environments in the hero demo were made using ProBuilder. They use the same HeroDefault material as all the object and character models that were made externally using blender. To assign colors to individual surfaces the UVs of those surface have been collapsed together and moved to the wanted color in the ProBuilder UV Editor.
Cliff
This part of the environment has been split into its own mesh. The gameobject has a MeshCollider and GenericTriggerItem so it can be detected by the GenericTriggerArea of the HeroClimbAction located in the player actor inside the HeroSetup prefab. The collider has some depth resulting in a semi pyramid kind of shape as flat surfaces result in some problems with how climbing works.
Chest
Chests in the hero demo use the custom HeroChestAction which extends the common TimelineAction. When it is started it moves the character to an exact spot in front of the chest defined in the ObjectCharacterTarget and when it ends it adds items to the character as defined in the Items field.
It also saves whether it has already been opened to the Persister. When the game starts and that persister is already set it moves the chest Animator to its Opened state and destroys itself so it can’t be used again.
It can be annoying to get both the chest and player model into place to test out the timeline in a regular scene. The HeroDebuggingInteraction scene contains a non-playable version of the player chest interaction that makes this easier.
Ambience
The Forrest transform contains an AudioSource with a looping track that contains some tweeting birds and general forest ambience. Its position and spacial parameters are set up so that the player only hears them as they get closer to the inland caves and so they increase in volume as they move into them.
In the opposite direction out in the water there are five different transforms(WaveA-E) for waves sounds. These are controlled by the ScriptMachine found in Waves. The machine waits for a random duration between 1 and 5 seconds and then chooses one of the waves, varies its pitch, plays it and repeats.
Destructibles
Both the HeroVines and HeroSeaUrchins have colliders and a DestructibleDamageReceiver which replaces them with their DestroyedPrefab when hit by any kind of damage.
The HeroVinesDestroyed prefab simply contains a sound and some particles which all play automatically when it is spawned. It gets destroyed after two seconds by its FadeAndDestroy script.
HeroSeaUrchinPickup also contains a HeroHeartPickup which uses a HeroPickupArea to give a HeroHeart usable to any character that enters its area. The pickup sits under an Animator which performs a little growing and floating animation. The entire object starts to blink after 10 seconds and then blinks for 3 before being destroyed as defined in the FadeAndDestroy script in its root.
Trunk
The HeroExitTrunk found here is used to transition the player to the HeroInland scene.
The ScriptMachine in its root defines how it behaves. When the player enters its area it sets the game state to CUTSCENE, starts the Exit TimelineAction and transitions the sound to the Muted snapshots. When that action is done it sets Scene and Parameter to whatever is defined in the variables. In this case the Scene is HeroInland and Parameter is 1 so the inland scene knows which entry the player is coming from. Finally it Saves the game and Loads the next scene.
In addition to the Exit action it also contains an Enter action which is triggered by the Entry if Parameter is 1 meaning the player enters the beach coming from the inland trunk.
An isolated version of this behaviour with visible marching points and collision areas can be found in HeroDebuggingLoading.
Hero Inland
permalink: /manual/hero-inland title: “Hero Inland” sidebar: title: “Manual” nav: manual —
This is the second scene players encounter in the hero demo. They reach it after leaving the beach through the trunk they find in a cave. It prominently features an entry to the temple scene which is initially blocked by some rocks that can only be removed using a bomb. The bomb equipment item can be found in the canyon scene which is entered through the second trunk located on the right side of the one coming from the beach. Players can also find their second heart shard on a ledge to the left of the trunk. To get it they have to defeat a skeleton that pops out of the ground when anyone gets too close.
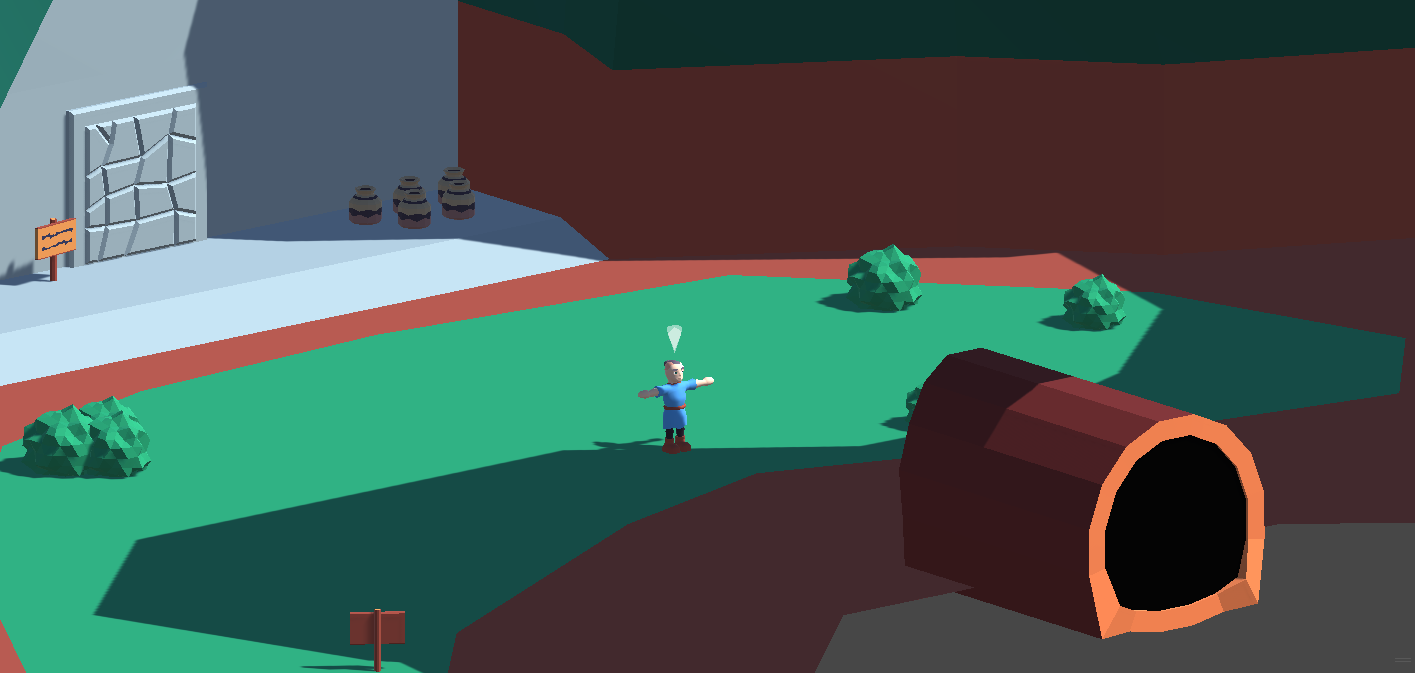
Entry
Decides between three different Parameter values.
- Entering from HeroBeach
- Entering from HeroCanyon
- Entering from HeroTemple
Otherwise identical to the entry logic in the beach scene.
Passage
The entry to the temple uses the HeroExitPassageBomb prefab which is a prefab variant of HeroExitPassage with the addition of a bombable cracked wall.
HeroExitPassage behaves pretty much identical to the HeroExitTrunk exits we have already seen. It only differs in the models and timelines used which animate the passage opening and closing with some particles and a sound effect.
The HeroCrackedWall is another destructible similar to the vines we have encountered previously. It can only be destroyed by bombs because HeroBombDamage is set in its Filter field and bombs are the only damage sender with that kind of damage.
When it is destroyed the damage vector is applied as a force to all the rigidbodies in the HeroCrackedWallDestroyed instance. The strength of that force can be changed by adjusting the Magnitude of the damage sender in HeroBombImpact or by changing the PushPower multiplier in the damage receiver of the wall. Of course changing the mass of the rigidbodies will also change how far they are propelled.
Whether the cracked wall has been destroyed is persisted using a DestructionPersister. This kind of persister sets a bool when its gameobject gets destroyed. If it wakes up and that bool is already set it immediately destroys itself. The BehaviourEventTrigger on the same transform activates the Exit whenever the cracked wall is destroyed. This prevents players from unintentionally activating the exit area before actually cracking the wall.
Pots
The pots around the entrance of the temple combine a couple things we have already seen. They can be destroyed by any kind of damage like vines and their destroyed prefab has separate rigidbodies for all the shards resulting in a nice dynamic shattering effect like the cracked wall.
Pots can also be picked up and thrown due to the HeroCarryAction located on the Action transform. It is available as a context action when its area collides with the players CharacterActionArea. The force applied when throwing can be changed in the PowerForward/Up fields. If the PutAllowed field is checked the pot will be softly put down in front of the player when the throw button is pressed while the character is not moving.
It is not used like this in example game scenes but HeroCarryAction could also be used for small plate puzzles. An example of this can be found in the HeroDebuggingGeneral scene(look for CarryObject and PressurePlate).
In addition to regular damage pots are also destroyed when their rigidbody receives a strong enough impulse, usually when they are thrown against something. This is configured in the MaximumImpulse field, how much that impulse affects the destroyed shards can be adjusted in ImpulsePower.
The HeroPotPickupRandom is also a bit more advanced than the pickups we have seen on sea urchins previously. The HeroPotPickup visual script chooses a random pickup from a number of different options. Some of the options, like bombs, are preconditioned by the character already having that item in their inventory. Otherwise players could randomly find bombs in a pot before they actually get them in the canyon scene.
Skeleton
These enemies use a basic GenericCharacter in combination with a NavMeshAgentMovement to move them around. The actions they have available can be found under their Actor. Skeletons are not visible at first because their animator starts them off in the buried animation.
The skeleton stays underground until a character enters the GenericTriggerArea found in the Area object. While the player is inside that area a AnimatorFloat instruction is applied to it as defined in the Instructions field setting the Aggro animator variable to 1. This changes the stance of the hero while locked on and transitions its face to the Mad animation. The HeroCharacter state machine also monitors that variable to change to combat music.
Which actions the skeleton performs is driven by the HeroSkeleton script graph. Once a character enters their area it sets that character as its movement target, starts the Rise action and activates its LockOnPoint. Whenever the current action of its actor changes to null now it checks if it is close enough to punch the player, otherwise it runs towards them. The ScriptMachine also checks for damage. Whenever it receives a hit that does not kill it it force starts the Hit Action making it flinch. If the damage does reduce the health to zero it replaces itself with HeroSkeletonDestroyed. The Ragdoll visual scripting unit transfers all the transform positions to the destroyed model.
The HeroSkeleton script accesses actions by their name. This can be done for any action that is a child of the main actor of the character. This saves us the hassle of keeping all the needed actions as visual scripting variables.
Hero Canyon
permalink: /manual/hero-canyon title: “Hero Canyon” sidebar: title: “Manual” nav: manual —
In this scene the player evades a rolling boulder to get to a chest containing the bomb equipment item. There is a cracked wall on the boulders path that blocks the entrance to a little cave containing the third heart shard.
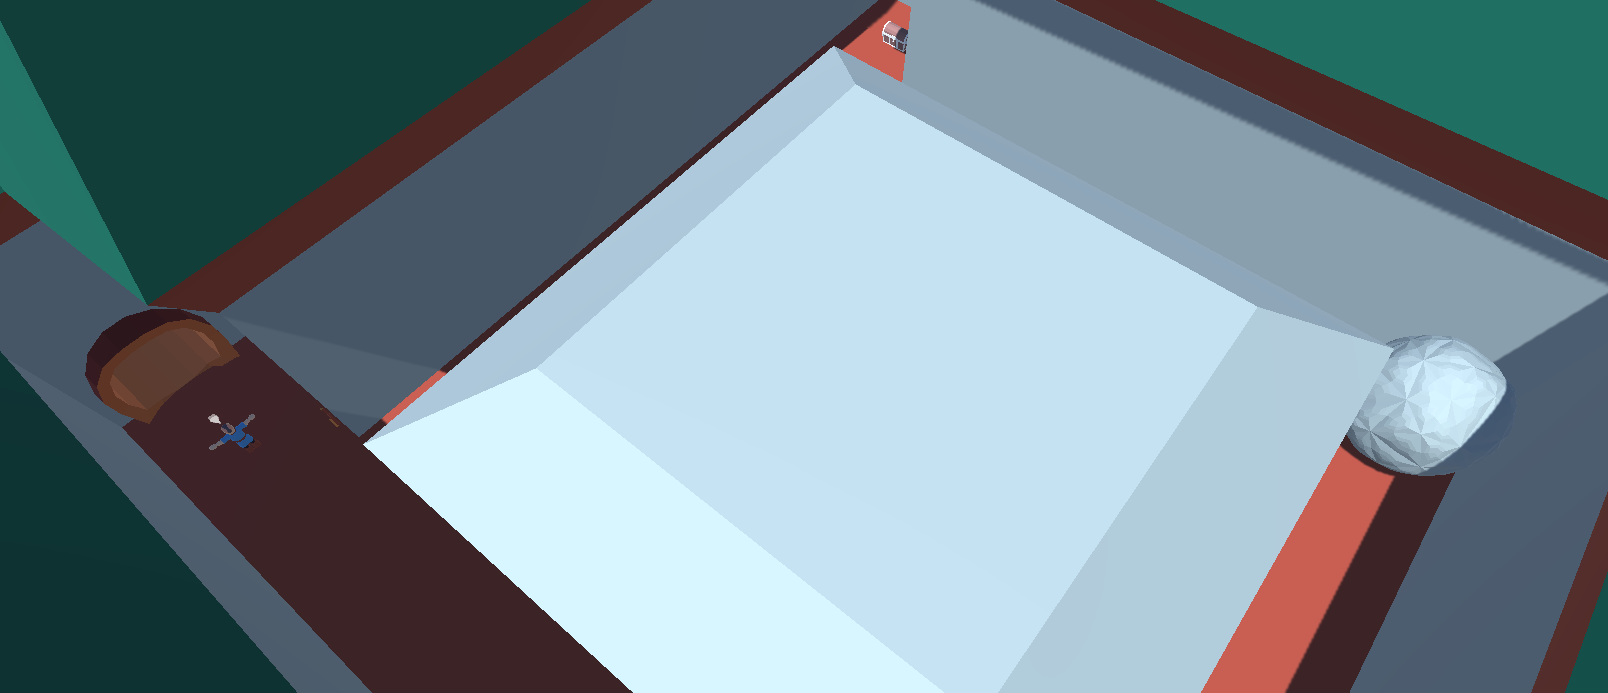
Boulder
During the intro cutscene the boulder is deactivated until the camera pans over to it. This is only done to make timing it a bit easier. It is controlled by the custom HeroBoulder script which moves it between the points defined in the Points field. When it reaches one of those points it fires the Stopped event and then waits for the CornerDelay.
The boulder carries a TriggerDamageSender that basically damages the player if they touch the boulder. Its Direction is set to SenderToReceiverXY which causes the player to be pushed away from the boulders center but into the ground or up into the sky. Whenever it hits something it calls Delay on the boulder script which stops the it and avoids just rolling over the player.
Hero Temple
permalink: /manual/hero-temple title: “Hero Temple” sidebar: title: “Manual” nav: manual —
This used to be the final scene of the demo prior to update 1.8 which added the HeroGlade scene with the ape boss fight. Upon entering the player is faced with two blocked off passages and one open one.
Entering that passage they are locked in with a skeleton enemy. Upon defeating that enemy they can collect a key item from a chest that lets them unlock one of the other rooms accessible from the center.
There they move a block in order to reach another chest that contains the sling equipment item. The final heart shard is hidden behind the block here, if this is the fourth heart shard players collect they gain a heart essence increasing their HP by one heart.
The sling lets players open the third room in the entrance by shooting the target above it. Behind it they find chests containing the superior knight versions of the sword and shield.
The final room is another arena containing a bigger skeleton with increased health. The chests behind it contain heart essences that increase their maximum health. The passage behind it leads to the glade scene with its ape boss fight.
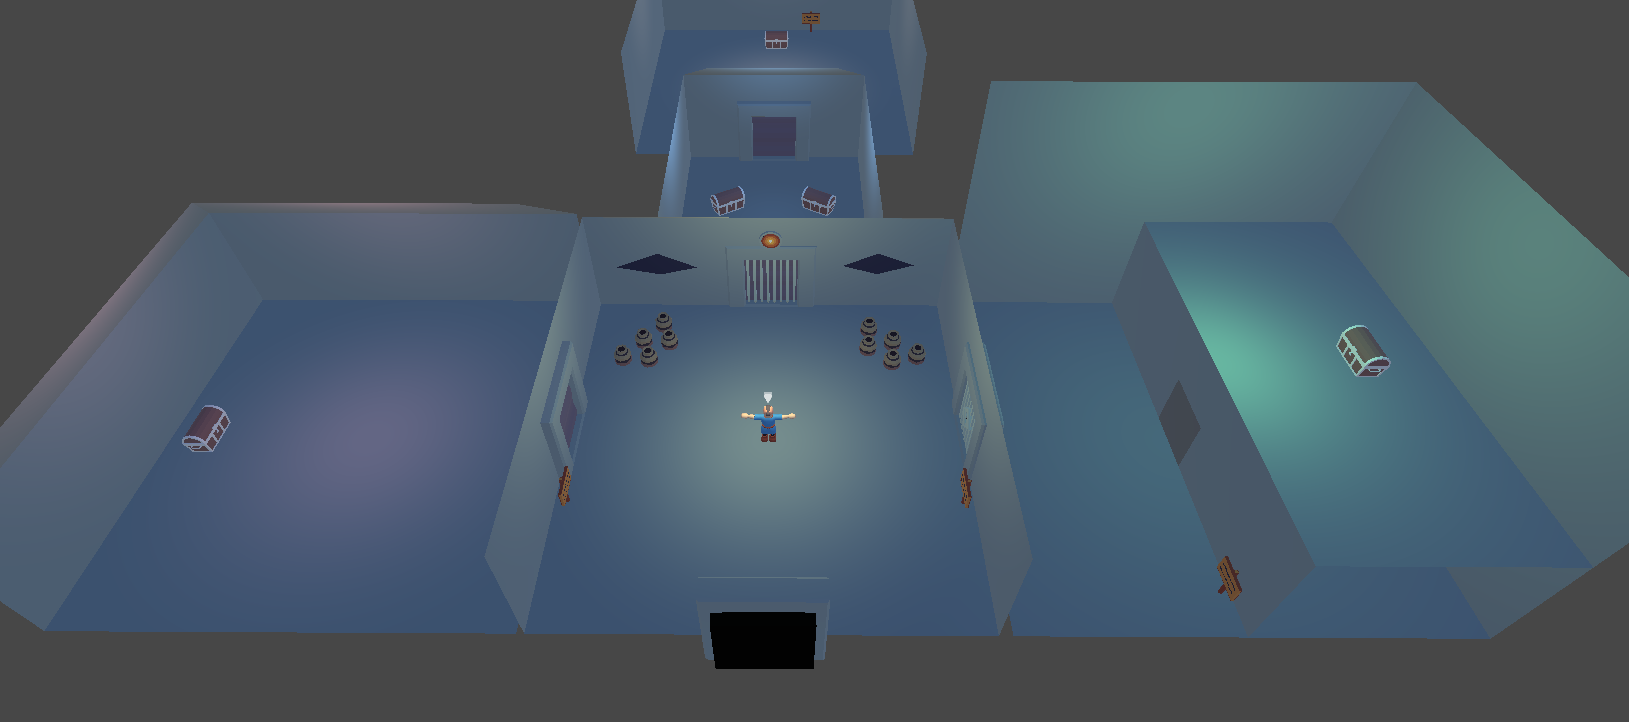
Passages
The temple scene uses a couple different variants of the HeroPassage prefab. It is basically a door with an action for each side that moves the player to the other side. Check out the HeroDebuggingPassage debug scene for various examples of passage setups including one for the base prefab that just lets players walk through without any special behaviour.
The HeroPassageArena variant adds a script machine to the passage which starts acting when the TimelineAction on the Enter transform of SideA ends. The script closes the bars and then activates the enemy. It shows these happening using the HeroHighlight subgraph which activates Cinemachine cameras for a set duration. It then periodically check if there are still enemies remaining. When they are all gone it opens the bars back up and sets a persistence value. If that value is already set when the scene is started the arena destroys itself which lets the player walk through unhindered.
HeroPassageLocked contains a simple VisualScriptingAction that determines whether it can be started by checking the characters inventory for the HeroKey item. When it is started it removes one key from the characters inventory and plays a short animation after which it opens the passage up. It also sets a persistence key which lets it know if it has already been opened if the scene is reloaded.
The HeroTarget visual script on HeroPassageTarget attaches to the Damaged event of a TriggerDamageReceiver. When it is hit it plays an animation which is highlighted by a virtual camera and then opens up the passage. It is also persisted very similarly to the other passages.
Block
The HeroBlock lets player move it by using one of the HeroBlockAction actions located at each side. For some other examples of using this prefab, like falling down or activating a switch, check out the HeroDebuggingBlock debug scene.
One notable difference in the activation of this action is that it ends once the button that activated it is released. This is detected using the CONTEXT_ACTION_RELEASE message which is sent from the HeroCharacter state machine inside the setup prefab.
Whether the character should push, pull or stand still is determined by the input the action receives in OnInput. The input is received from the Move event in PlayerInput which is configured to call OnDirection on the player character. The character then forwards it through its actor to the active action. Climbing also uses this input for its climbing direction.
The isKinematic field on the Rigidbody is set to true unless the character is currently moving it which may be a little counterintuitive. Having the rigidbody kinematic unless it is grabbed is done so characters don’t move it just by running against it. Setting is to false while pushing is done so the block can fall through holes in the floor under it. When the block starts falling the action is ended and a coroutine is started that resets isKinematic once the block has stopped moving.
Sling
The HeroSling equipment item contains the custom HeroSlingAction. It implements the IHoldable interface so it can put itself in the player characters hand when appropriate and also lets it be put away in the same way the player puts away the sword.
Depending on the AutoFirstPerson it can also activate first person when the player is pulling back the sling without being locked on to a target.
To try out how the sling interacts with other parts of the demo check out the HeroDebuggingGeneral debug scene which starts the player off with a sling equipped in one of the slots. It also contains ammo pickups and a pebble pouch that increases the slings ammo capacity.
Hero Glade
permalink: /manual/hero-glade title: “Hero Glade” sidebar: title: “Manual” nav: manual —
In this scene the player fights an ape that is controlled by an evil mask. It jumps into the glade as the player moves into it. They can blow off the rocks that protect its arms and legs using bombs. The ape can also be stunned with nuts or enraged by hitting the mask. The sling can be used to easily deal direct damage. Once the ape runs out of health a cutscene plays showing the mask come off and the maskless ape fleeing.
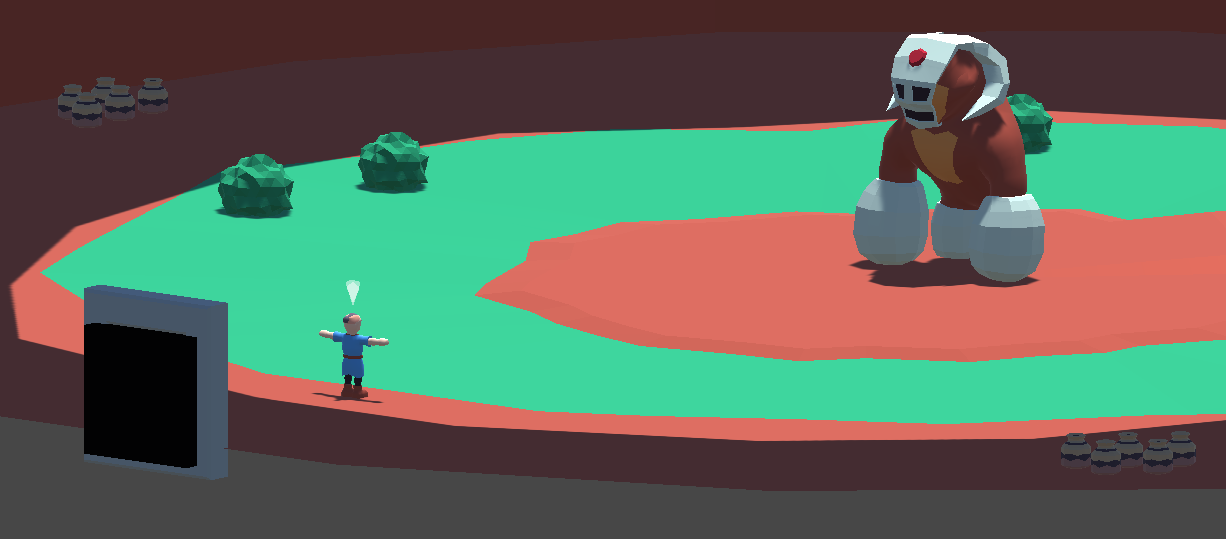
In addition to the boss itself there are two smaller changes to the player character. The CharacterController has some settings changed to avoid it stepping onto the boss. Depending on the game these settings could be used in the entire game but some of the geometry in other scenes works better with some step up distance. The LockOn CycleLock toggle is set On in order to let the player easily switch between the two points in the boss.
State
The overall state of the boss fight is controlled by the StateManager on the HeroApe GameObject which has the APE key.
WAIT
This is the default starting state when the ape has not been defeated. The ape gets hidden and a trigger is activated that transitions the state to INTRO when the player enters it.
INTRO
This state plays the Intro TimelineAction which shows the ape jumping into the glade. That action transitions the state to ACTION when it is finished. The INTRO state activates the navmesh agent when it is exited because the ape is sure to be active and standing on the NavMesh at that point.
ACTION
This is the main state of the boss fight, here the monkey fights the player. The state activates the StateMachine on the Character when it is entered. That StateMachine controls which actions the ape character takes and any other logic needed for it to function.(like movement)
DEAD
This state gets set by the StateMachine when the ape runs out of health. Similarly to the INTRO state it plays a cutscene using a TimelineAction which moves the state over to DONE when it is finished. It also deactivates any running logic like the StateMachine and NavMeshAgent that is no longer needed.
DONE
In this state the boss has been defeated and removed. It is either reached after the DEAD cutscene is played or when players enter the scene after the boss has been defeated previously. Persisting and checking the boss defeat is done in the ScriptMachine in the Entry GameObject.
Character
The ape character uses a GenericCharacter script with no direct custom code. Its logic is contained in the StateMachine with the HeroApe graph. Like the skeleton enemies it has Health and Stun resources and an EffectPool so it can be damaged by attacks and stunned by nuts. To visualize damages and stuns it has some playable animations under the ‘Animations’ GameObject that get triggered by MessageEvents on the character. The HURT message is sent by the TriggerDamageReceiver on the ‘Model’ GameObject. STUN is sent from the Added event on the Stun EffectResourceValue.
Movement
Instead of the regular NavMeshAgentMovement used by other enemies in the hero demo the ape uses the NavMeshTankMovement. This movement always first rotates towards its target and then moves relatively straight towards it. It sets its SpeedFactorSideways and SpeedFactorForward properties accordingly which get forwarded to the animator by the HeroApe StateMachine. The SpeedSideways parameter in the animator makes it shuffle to show it rotating and the Speed parameter makes it run. The root motion in HeroApeRun is then used by the movement and synchronized with the agent.
Graph
During the actual fight the actions the ape takes are controlled by the HeroApe graph in the StateMachine. That graph makes heavy use of the RunAction unit which, when called in a coroutine, starts an action in its in port and continues on its out ports when the action has finished or failed to start. The graph starts off by waiting for a second and the running the scream action which gives the player a little pause after the cutscene. After that it moves to the Action state which controls the main combat logic.
Inside the Action state the ape moves between thinking, chasing and attacking the player. The rage state chains multiple actions together into a combo, it is reached either randomly from the attack state or when a RAGE event is triggered during the Chase and Think states because the mask was damage by, for example, the slingshot.
The Action state can be disrupted by the HURT event that is sent when one of the Rock armor parts is blown off by a bomb. The Hurt state forces the Hurt action which effectively staggers the ape and then moves back to the Action state.
Actions
Most of the actions of the Ape are simple MotionActions which play the animation assigned in the CharacterAnimation field using PlayableAnimations. The attacks activate and deactivate damages and colliders in certain points of the animation. For example PunchLeft turns the regular collider of the left fist off and the damage trigger on when it receives DMG_ON. When the DMG_OFF message is received it reverts them. This allows the fist to move through the player and only push them with the damage value. If the regular collider was active it would throw the player across the entire arena.
Colliders
The ape model contains various colliders and triggers, some are meant to collide with the player, some receive damage and some are only activate during attacks and deal damage. We will go through the ones on the left arm to explain what each one does.
The ‘FistLeft’ GameObject contains the DestructibleDamageReceiver that lets the rock armor be blown off by bombs. It filters for HeroBombDamage so regular health damage does not affect it. The capsule collider in its child object is just a trigger that does not physically collide with the player. It instantiates HeroApeFistLeftDestroyed when it is destroyed and also activates the FistLeftTrigger which allows the player to damage the ape when hitting the fist from then on. It also triggers the HURT event on the state machine to stagger the ape.
The ‘FistLeftCollider’ is the object that actually physically collides with the player.
‘FistLeftDamage’ only gets activated during attacks and contains MovingDamageSender that can deal health damage to the player.
Hero Debug
permalink: /manual/hero-debug title: “Hero Debug” sidebar: title: “Manual” nav: manual —
General
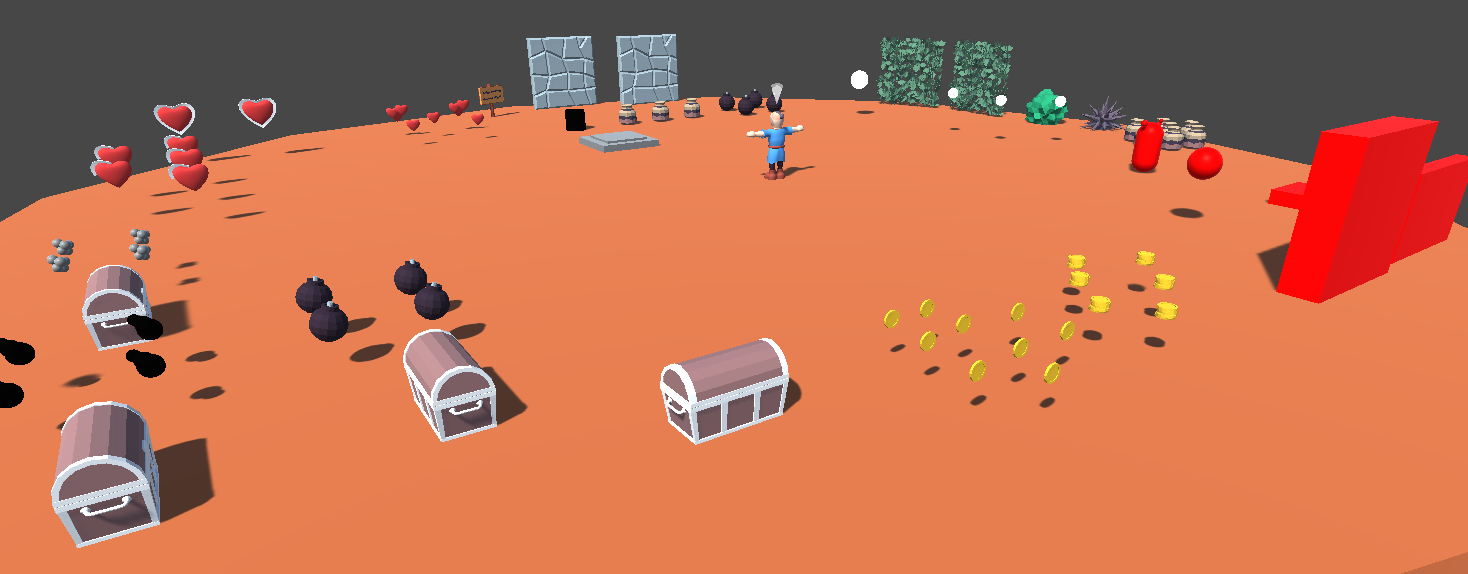
Features a wide variety of items and objects. The hero character starts with a filled inventory and equipped items.
The white spheres in front of the destructible bushes contain lock on points which can be used to test out the lock on system. The slightly larger sphere also contains an test action that can be started as a context action whenever it is locked on. This could theoretically be used to read signs from a distance or talk to NPCs sitting out of regular action area reach.
The red blocks and spheres can be used to test out damage. The blocks have damages senders with different damage values, magnitudes and directions. The red capsule also contains a minimal enemy setup. This includes the stun resource so it can be used to test out the stunning nut equipment item.
The opposite side has some items that can be carried. The pots spawn different pickups as defined in Destroyed Prefab. The bombs ignite as soon as they are picked up which can not be found in the regular stages. The cylindric black CarryObject can be placed on the pressure place in front of it which can be detected in its Trigger.
Loading
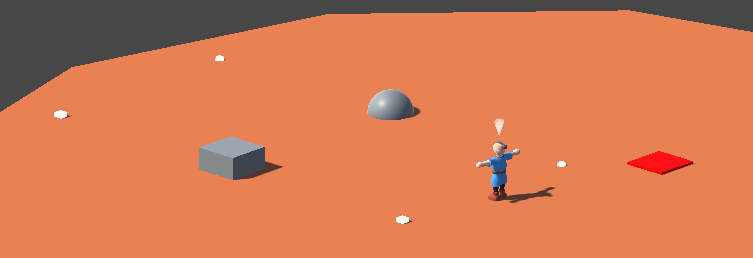
This scene can be used to test out and debug the Entry logic that is defined in each scene and the Exit logic used by the HeroExitTrunk and HeroExitPassage objects.
It features two different Exits that both load back into HeroDebuggingLoading, they set Parameter to different values which is then used in the Entry visual script.
The timelines used when entering and exiting use a MarchTrack that moves the character towards a configured transform. These transforms are visualized with white spheres here.
The red box in the scene instantly kills the character which lets us test out the Die action and the Entry scenario with an empty Parameter.
Passage
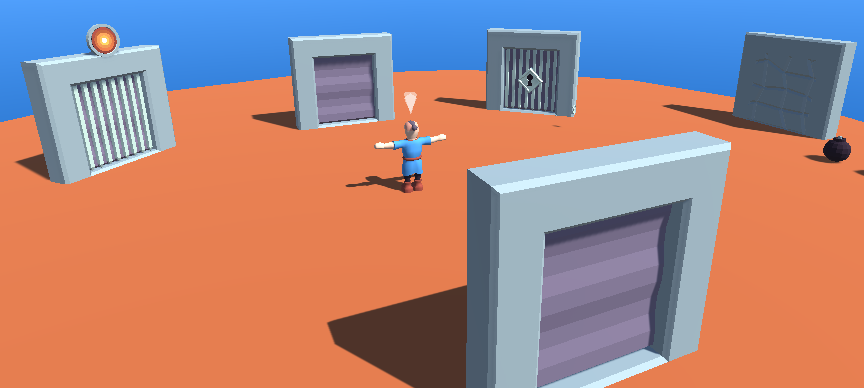
Contains different variations of the HeroPassage prefab. Only HeroExitPassage is more of a variation on the HeroExitTrunk but using the model from the passage.
The root of the passage contains a StateManager that is used to set a couple different objects active or inactive together. For example if the HeroPassageLocked variant detects that it has previously been unlocked it sets the manager to the OPEN state. Otherwise we would have to separately deactivate both locks and activate the entry areas which would all have to be exposed to the visual script.
The enter actions themselves use a TimelineAction to open the passage, march the character through and then close it again. It activates different virtual cameras that show the character entering and exiting. The HeroReset signal is sent during the timeline which resets the third person camera to the camera position of the virtual camera.
The passage variants used in the Temple scene are described there. The Inland scene contains a passage exit blocked by a cracked wall.
Skeleton

This scene can be used to quickly try out combat. It contains three skeletons that pop up when the player enters their area. The player starts out with equipped sword, shield and equipment items.
The skeleton itself is also described in the Inland scene where the player usually first encounters that enemy.
Block
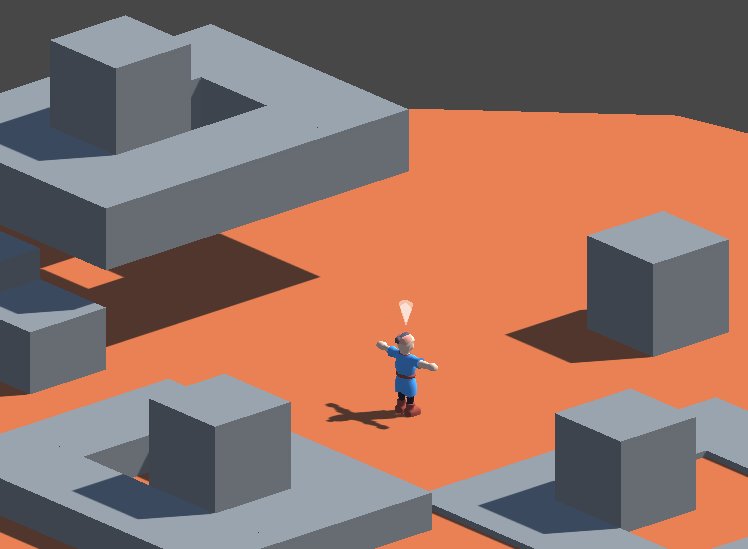
Shows off a couple more things that could be done with the movable HeroBlock object in addition to its usage in the Temple scene.
There is a regular block in front of the character which can be pushed or pulled in any direction. To their right is a block that is limited in its movement. The block behind the player can be pushed into a hole with a trigger which activates a red sphere here. The raised area to the characters left can be used to test how a block behaves when it falls through a hole.
Climbing
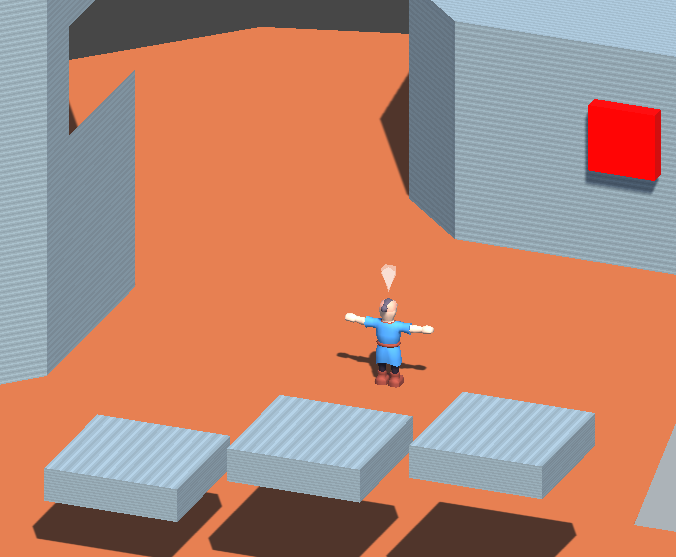
Contains a couple different ways to set up a CLIMB trigger for the HeroClimbAction.
The wall to the characters left combines three separate colliders into one rigidbody with a single trigger area. This allows us to have a hole in a wall using convex colliders. The climb action can only use one area at a time, moving between areas mid climb is not possible.
In front of the character is a plateau that can be used to test out pulling up onto a higher level. It also has a damage sender for testing out damage while the character is climbing.
The small platforms behind the player are climbable but too small to actually climb on. This results in the character always immediately pulling itself up onto the platform.
Ground
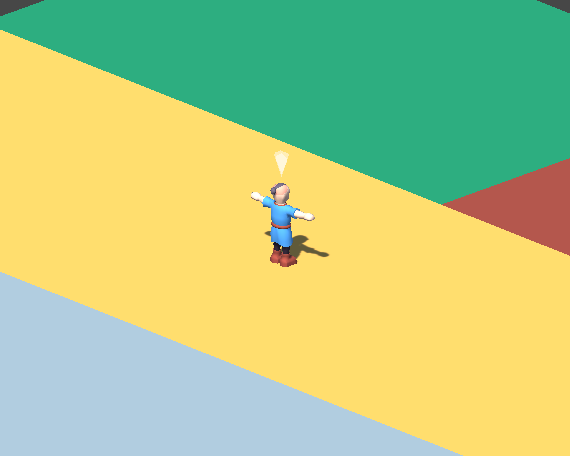
This scene is made to test the ground checker located in the sound transform in HeroSetup. The check is triggered whenever the character receives a STEP message and should play a different sound for each of the ground colors in the scene.
Triggering the GroundChecker is done by a message event in the HeroPlayerCharacter. The different options then forward different messages to the AudioManager which plays the sounds. The sand and dirt options also play a particles system which shows some dust particles.
The checker performs a raycast downwards from its own position to get the material and texture coordinate it reads the color from. For this to work the Read/Write checkbox in the textures import settings needs to be checked.
Ape
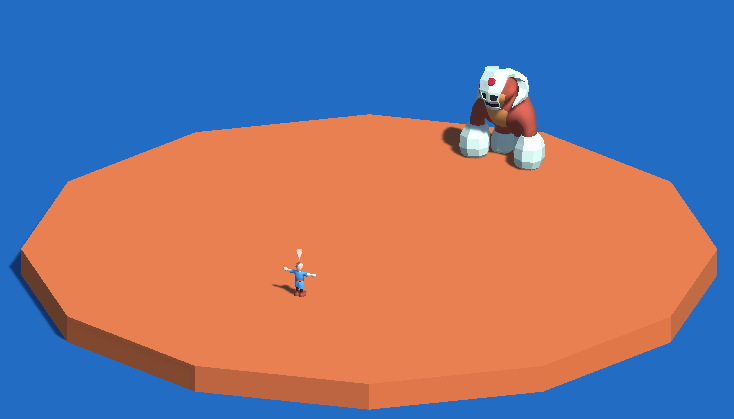
Use this scene to test out the actual fight portion of the ape boss fight. The state manager of the ape is set to its ACTION state which makes it immediately start attacking without playing its cutscene. The equipment of the hero can easily be changed in its inventory so the fight can quickly be tested with different items. Additional information about the boss fight can be found on the glade manual page.
Projectile
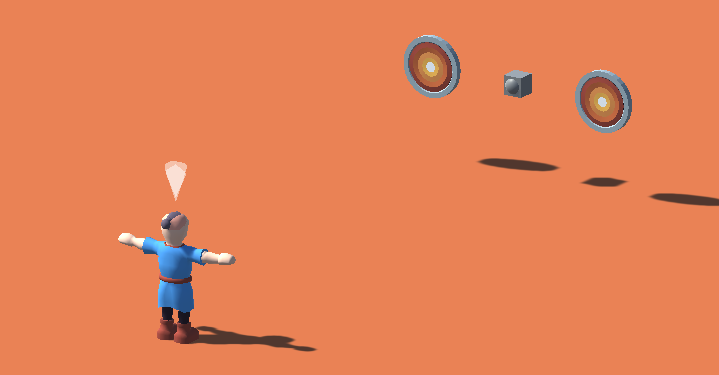
This scene contains a spawner that instantiates projectiles which move towards the player. These projectiles can be redirected while guarding with the knight shield. This is controlled by the DeflectedDamages field on shield items. The BlockedDamages and GuardAngle of shields can also easily be tested in this scene. Deflection is done in the CheckDamage method of the HeroGuardAction which is called in the PreDamageReceive damage step of the HeroPlayerCharacter.
The projectiles can also be redirected with sword attacks. This is done using a TriggerDamageReceiver on the projectile itself which redirects the projectile in its Damaged event. By changing the called action there from Redirect to RedirectBack it could be changed to fly straight back where it came from instead of being redirected in the damage direction.
The two HeroTarget objects left and right of the spawner are triggered when hit with damage. Guard with the shield and aim at a target to redirect the projectile to them and trigger them. This could be used for puzzles in an actual game but is not currently used in any of the regular demo scenes.
Parcour
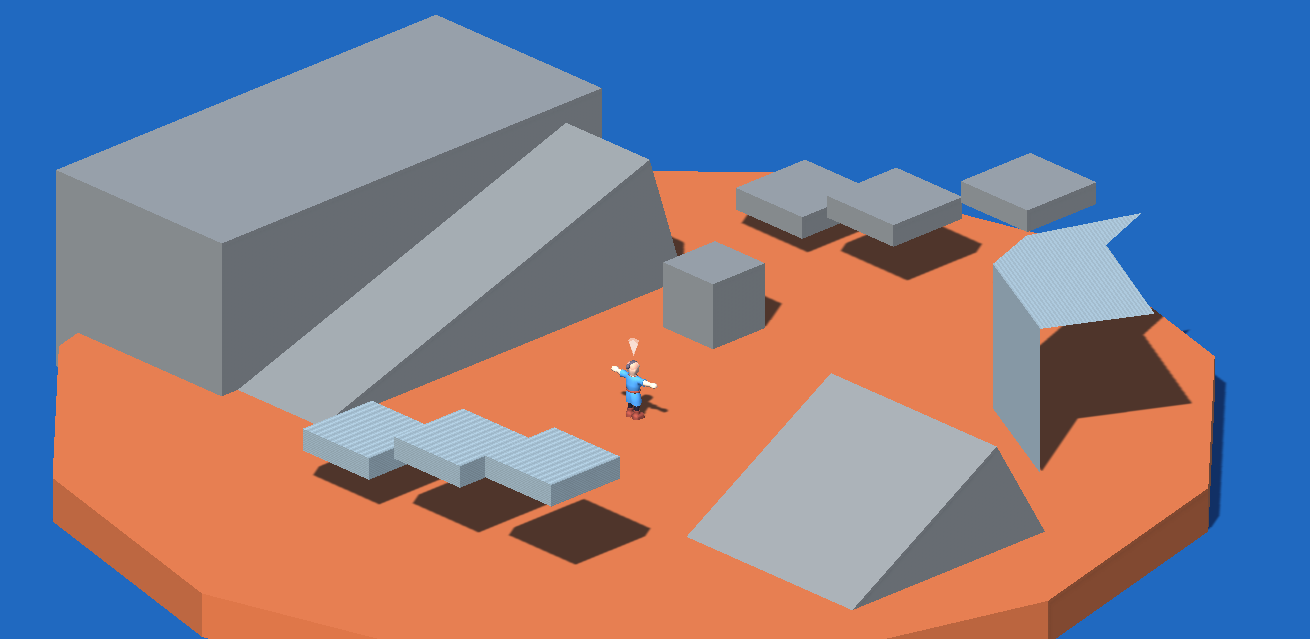
This scene demonstrates some alternate types of movement that are not currently used in the regular demo.
The script machine on …/Actor/Jump/AutoJump automatically forces a jump whenever the character leaves the ground. It only does this when it is not already jumping or climbing and the movement factor forwards is not full so the player can still walk off ledges slowly or backwards. the FALLING custom event is triggered from the CharacterControllerMovement.Falling event via a VisualScriptingHelper. Additional limitations to Auto-Jumping may be needed depending on the application, for example when the character is damaged.
Regular jumping is still enabled in addition to auto-jumping in this scene, to get an even more classic feel the jump could be removed from the PlayerInput event that triggers it.
The Climb action has its PullUpWithoutClimb field checked which allows the action to pull up onto arbitrary surfaces without a climbing trigger or having to climb first. When the field is checked the action looks for obstacles and performs the pullup raycasts, as indicated by the green lines in the scene view, before pulling up on surfaces.
Blackout
This debug scene shows how a character may be reset if it falls under the world by clipping of falling in some kind of pit. The Barrier that usually prevents this is disabled in this scene and a trigger area that starts the blackout has been placed underneath. This is not used in other scenes of the demo currently as there are no pits or other ways to jump off. The blackout works as follows.
- character walks off
- character Trigger Item enters Blackout Trigger Area
- Blackout Trigger Area sends BLACKOUT message to character
- Message Event on Character force starts Blackout Timeline Action
- Blackout Timeline blacks out camera
- Blackout Timeline sends HeroBlackout signal
- Signal Receiver handles signal and teleports character
- Blackout Timeline removes black from camera
- on Blackout Action Ending damage is send to character
To use the blackout in an actual scene simply add a blackout trigger area to the scene. Also make sure the transform in the HeroCharacter signal receiver is in a safe position.
Souls Setup
permalink: /manual/souls-setup title: “Souls Setup” sidebar: title: “Manual” nav: manual —
The following is an overview of the SoulsSetup prefab in the AdventureSouls demo. This prefab contains all the components required for the gameplay of the demo.
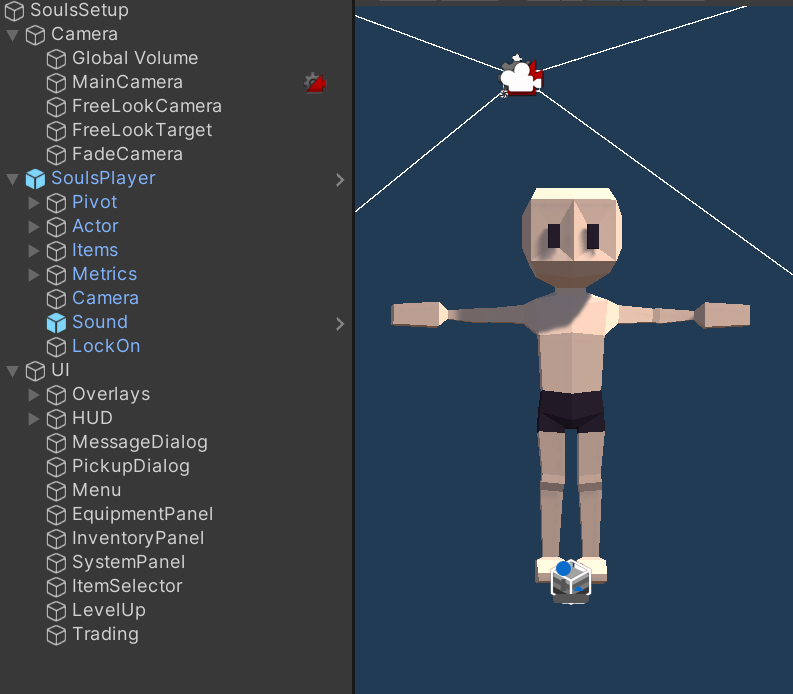
SoulsSetup
The first component in SoulsSetup is the SoulsCommons component. This component can be seen as the general game manager of the demo. It contains such general logic as scene loading and switching. It also holds references to common attributes, resources, stats and damages. SoulsCommons is a Singleton and accessible through the static Instance variable. This allows for example checking damage types by comparing incoming damage to SoulsCommons.Instance.PhysicalDamage.
The next couple components are related to Persistence. During regular gameplay, started from the title screen, the Index of the persistence container gets set by SoulsCommons. When scenes are started directly the index in the field is used. In most debug scenes the Saver field of the container is set to None to disable persistence and start fresh each time. To debug persistence that change can be reverted which should keep game state across starting and stopping the editor. Clearing player prefs may be needed before doing so to avoid loading save data that positions the player somewhere outside the environment.
The final component in the root game object is the FocusHelper which manages application focus and cursor lock. It has some special handling for the editor which disables the mouse input device if the game view is not focused. Otherwise the camera would move while outside the game view and the character would attack whenever clicking into it. It is still possible to exit the game view without disabling the mouse by pressing Win instead of Esc.
Camera
This GameObject contains all the various camera components. This includes a volume URP component that adds some minor post processing. The MainCamera object contains the actual unity camera, the AudioListener and the central CinemachineBrain.
FreeLookCamera contains the third person camera used in regular gameplay. It gets controller by the lockable camera inside the souls player. The object also contains a collider that keeps the camera from clipping into the environment. The offset component is used when the player is aiming to nudge the camera to the side and give a better view.
The FadeCamera virtual camera is used to fade out the screen. This happens, for example, on death and is controlled by the corresponding timeline.
SoulsPlayer
This nested prefab contains the player character itself and is explained in detail on the SoulsPlayer manual page.
UI
This is where all the UI components can be found. The souls demo uses both the new input system and ui toolkit. The input module and player input components that bind those together can be found in the root game object. You may notice that the input asset contains different actions for submitting and navigating the ui between the title and regular scenes(Navigate/NavigateTitle). This is done so character keys like E or WASD don’t interfere with the character name input in the title.
The Overlays and HUD objects contains different resource bars which are reusable components from AdventureCore.
Next up are two different dialogs, one for general messages(MSG) and another for pickups(PCK). They are used by the souls talk and pickup actions which access them by their Key.
The Menu object contains the logical behaviour and ui document of the menu that is displayed when the player presses Esc(or Tab in the editor). It also manages showing and hiding the three different panels beneath it.
Finally the ItemSelector, LevelUp and Trading objects contain dialog used in different situations. They each contain a custom MonoBehaviour that contains their logic and lets other components use them and a UI Document that contains the actual UI and its layout. Open the behaviour script to get more detailed explanations of the different script or click the ? button in the inspector to access the api documentation.
All the different ui documents in souls reference the SoulsStyle.uss style sheet. This style sheet defines the look of the UI including simple settings like margins and colors but also the animation that brings in the boss health bar.(triggered in SoulsHUG.ShowBoss)
Souls Player
permalink: /manual/souls-player title: “Souls Player” sidebar: title: “Manual” nav: manual —
The following is an overview of the SoulsPlayer prefab in the AdventureSouls demo.
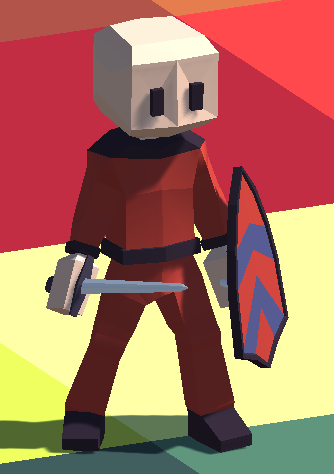
SoulsPlayer
The main transform contains the following components.
- SoulsPlayerCharacter
- ManualPersister used to save any state related to the player
- CharacterControllerMovement and the CharacterController it uses
- Rigidbody and CapsuleCollider which are used by
- GenericTriggerItem with Key PLY which triggers GenericTriggerAreas in the environment(for example the traps in the dungeon)
- CharacterActionArea which is used by the character to detect and start actions in the environment(doors, chests, …)
Pivot
This transform gets rotated by the movement to face the direction the player is moving.
Body
Contains the TriggerDamageReceiver that receives damage. It also has a second CapsuleCollider with IsTrigger unchecked which pushes around decorators like smashed crates. The components of the Body GameObject were originally located on the Model but have been moved into a separate GameObject to make model replacement easier.
For the sake of simplicity and performance the collision model for the player only consists of a simple capsule. If a more detailed model is required do the following:
- Move TriggerDamageReceiver and Rigidbody to your Model they use any collider in the players model
- Delete the Body GameObject
- Change the Layer of Model to PlayerBody
- Create detailed colliders in the Armature of the model, skip if your model already comes with colliders
Model
This is where the visuals of the player are located. It contains the Animator along with an AnimatorProxy that passes along events and root motion from the animator to the character.
Some other components of AdventureSouls depend on the players model and have to be reassigned if the model is replaced. The following steps show how the player model could be replaced by the zombie model that is usually used by the enemies.
- Open up the SoulsPlayer prefab
- Drag the Models/Characters/SoulsZombie into Pivot
- Add an Animator and an AnimatorProxy to it
- Assign the SoulsPlayer Controller and SoulsPlayerAvatar Avatar to the Animator
- Assign the SoulsPlayer as the Character for AnimatorProxy
- Completely expand the old and new models
- the original armature will contain Left/RightHand transforms under its Hand.L/R transform, drag those over to the new models Hand.L/R(these are used to instantiate items by the weapon and usable item slots)
- Delete the original Model
- In the ArmorTop/Bottom item slots assign CharacterBody to the now missing Template field, it is needed so the armor moves properly with the character model
- On the SoulsPlayerCharacter script reassign the missing Animator to the one you just created and set SoulsZombie as the Model that is replaced by the ragdoll
- At the bottom of SoulsPlayerCharacter you can empty out the HeadRenderer field, it is used for the character customization sliders but the zombie model does not have the needed blend shapes
When you now open up SoulsDebuggingGeneral you should be able to move around and perform actions with the Zombie. If you start the game through the title you’ll see that things there are mostly unchanged but when you start a game the model is in fact changed.
The process to replace the model may be different depending on the model used but generally, as we have seen above, the following dependencies have to be satisfied.
- animator and model on SoulsPlayerCharacter
- hand transforms and body renderer for the item slots
Critical
The Critical GameObject holds the actions and triggers necessary for ripostes and backstabs.
The SoulsCriticalAction is the one performed by the player, it uses a GenericTriggerArea to find potential enemies that may be critted. When it is started it forces the enemy to perform the SoulsCrittedAction which disrupts anything it was doing. This action moves the enemy to the Front(riposte) or Back(backstab) transform in order for the animations to line up.
Actor
All the actions a player can perform on its own as well as the actor are found here.
The specific Actor implementation used is the BufferedCharacterActor which will queue up actions for a short period of time. So when roll is pressed while the character is still attacking the roll will still be performed after the attack has finished
- Sit is not really in use currently but serves as an example of a gesture that is performed until some other input arrives
- Turn is started by the movement when the character makes a sharp turn
- Roll is started by the SoulsPlayerCharacter when dodge is pressed and the input direction is not neutral, in the Starting/Ending events in the inspector you can see that it activates a damage while it is active.(the damage has value 0 so it destroys boxes but does not hurt enemies)
- Dodge is started by the SoulsPlayerCharacter when dodge is pressed and the input direction is neutral
- Jump is directly bound to the Act.Jump input by SoulsPlayerCharacter
- Stagger is started by the SoulsCharacterBase base class that the player has in common with the enemies when the character runs out of poise from being hit
- GuardBreak is started by the SoulsCharacterBase when a character guards and runs out of stamina or it is parried while attacking
- Death is started by SoulsPlayerCharacter when it gets hit and health runs out, notice the SignalReceiver which calls the ResetDeath method
Items
Holds items, item slots and inventory. You can add entries to the Items field on the ListedInventory to make the character start out with certain items which is quite useful for debugging.
- Usable is a special item slot that is just a placeholder for the three slots it has as its children. This lets us bind input and UI to that single item slot. Which one is currently active can be switched through using the F key.
- ArmorTop/Bottom are slots for SoulsArmorItem, they need a reference to the CharacterBody in order to copy the bones over to the armor they instantiate which makes the armor mesh move with the character
- WeaponLeft/Right are slots for SoulsWeaponItem, they have a target transform inside the character models armature which they parent their meshes to, the weapons then move because they are children of the characters hand bone. Also notice that the weapon slots have fists as their fallback item, otherwise the character would have no actions to perform when no weapons are equipped
Metrics
Holds the resource and attribute pools. Attributes are defined directly in the pool while resources are separate scripts found in the children.
Souls NPCs
permalink: /manual/souls-npcs title: “Souls NPCs” sidebar: title: “Manual” nav: manual —
The following is an overview of the different prefabs used for NPCs in the AdventureSouls demo.
The different character script used in souls all share some common behavior which is implemented in the following inheritance tree.
- SoulsCharacterBase
contains some very general logic like defense calculation, staggering and death- SoulsPlayerCharacter
adds player specific behavior like input, lock-on and special actions - SoulsNonPlayerCharacter
base for NPCs in the general game world including some very general behavior
adds a state(idle, attacking, loot, dead) to the character which is also persisted- SoulsFriendCharacter(Trader, Talker)
are not aggressive at the start but can be aggroed by attacking - SoulsEnemyCharacter(Zombies, Sprout)
immediately attack when the player enters their trigger area
- SoulsFriendCharacter(Trader, Talker)
- SoulsMorningstar
performs different actions based on player location and energy - SoulsHeroApe
performs action sequences based on an energy counter
- SoulsPlayerCharacter
The object hierarchy of NPCs is very similar to the one of the player as explained on the player manual page. Most characters in AAK share this structure which looks more or less like the following.
- Root - character, movement, persistence
- Model - visual model
- Actor - actor, actions
- Metrics - resources, attributes, effects
- sounds, …
The objects within the enemy prefabs are on the Enemy, EnemyBody and EnemyDamage layers. For details on how these work see the damage manual page.
SoulsZombie
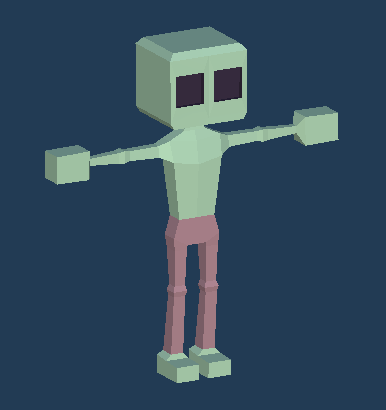
This is the most common enemy in the souls demo. It can be customized by changing up the weapon it holds or the attack it uses and by changing its idle action. You can find a couple different variations of the basic zombie enemy in the SoulsDungeon stage and the SoulsDebuggingEnemies debug scene.
Basic zombies do not have an inventory of their own. You can give them a weapon by just dragging a weapon prefab into the WeaponRight/Left objects and assigning the attack action on the character. Don’t forget to adjust the layer of the damage object of the weapon accordingly.
The Idle action determines what a zombie does when it is not attacking. SoulsDebuggingEnemies and the shrine stage contains a variant that patrols between points using a NavPatrolAction. SoulsDebuggingEnemies also has a variant that returns to a home point and then sits down by using a NavApproachAction with a PoseAction in its Next field.
SoulsZombieScripted is a slightly more advanced base for zombie enemies that have their behavior controlled by visual scripting. They have an inventory to store weapons and usable items. Getting the weapons on the correct layer is achieved using the LayerOffset field on the weapon slots which shifts the layer by 5 from the player to the enemy layers.
The SoulsDebuggingVisualScripting debug scene contains two implementation of the scripted advanced zombie enemy. Theses are not used in the regular demo stages. Check out the SoulsArcher and SoulsAttacker script graphs to see how they work. The character scripts of these have their IsExternallyScripted toggle checked which keeps the character from starting actions on their own.
SoulsSprout
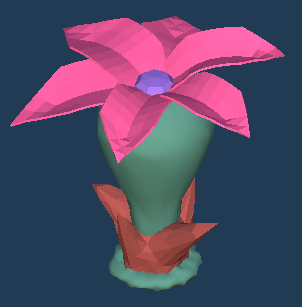
This is a very basic example for an enemy that is more of a creature rather than a humanoid enemy. Otherwise it works very similarly to the basic zombie enemy and also uses the SoulsEnemyCharacter script. It has a single attack action that activates a spherical damage sender which sends ticks of SoulsPoisoningDamage.
SoulsFriend
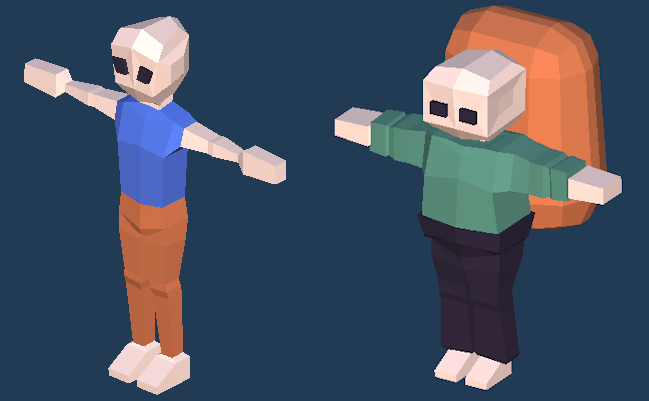
SoulsFriend is used as a basis for the SoulsTalker and SoulsTrader prefab variants an not usable on its own. The variants add different interaction actions and visual models to the prefab.
The Interaction object in the base prefab already contains a trigger collider that is meant to trigger the CharacterActionArea on the player character. The different variants add whatever action they need here, for example talking or trading. As you can see interacting with an NPC works very similarly to interacting with objects like doors. Since the executing character of the action is the player and not the NPC the actions may need to reference the NPC character in an extra field. For example the SoulsTalkAction has the Target field which it uses to make the NPC nod on action start.
These characters use the SoulsFriendCharacter script which has an internal aggro counter. On the first hit the character tries to equip whatever fitting weapon it has in its inventory to its right weapon slot. On the second hit it starts attacking back. This deactivates the IdleObjects object which contains the trading/talking action. It also activates the AggroObject which contains a lock-on point.
SoulsMorningstarBoss
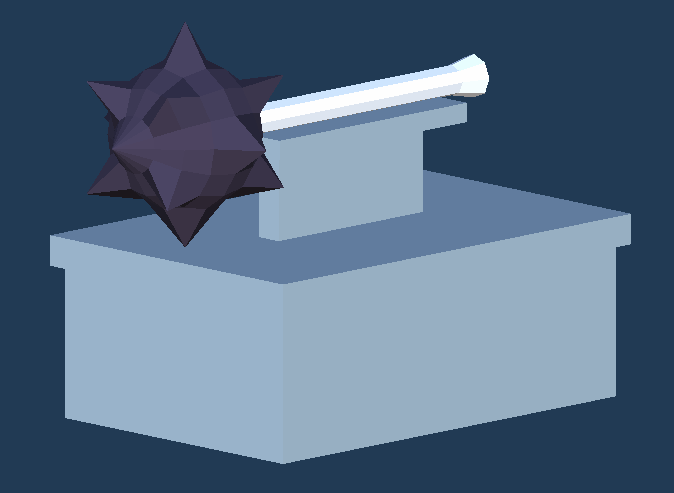
In addition to the character itself this prefab also contains the logic of the boss arena. For more information about the boss arena see the boss arena chapter in the scenes manual page.
The character itself if fairly basic. It uses a static model without any deforming animations. All the attacks are done using timeline graphs. The position of the player is incorporated by moving the AttackTarget transform to the players position before starting attacks. The character subscribes to its actors ActionEnded event and starts a new action whenever the last one ends.
The morning star has an internal tiredness counter which makes it wait after performing a couple attacks. A simple Spin or Smash only costs it 1 tiredness and a Stomp from a distance costs 2. When it reaches 3 it has to use the Wait action which gives the player a chance to counter attack.
For another variant of a souls boss fight with a slightly different approach to its scripting see the souls hero ape boss fight in the extras project.
Souls Scenes
permalink: /manual/souls-scenes title: “Souls Scenes” sidebar: title: “Manual” nav: manual —
Title
The Title scene is where the player should first arrive, this is the case as long as it is at the first place in the build settings. It is where the player can create new games or load existing ones.
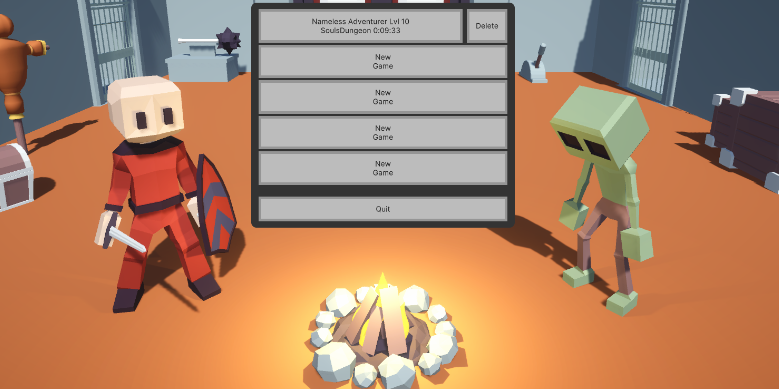
- Title
UI for the different save slots that are used to create new games and load them - NewGame
Dialog that is used to customize and name new characters
the model and camera that are used for the render texture in the UI are its children - Commons
Scripts that are common to every scene like persistence and the SoulsCommons singleton - Background
Holds all the 3d models in the background which are purely cosmetic
Loading
This scene gets loaded when a player loads a save from the title or when using a teleport action. The SoulsLoading script starts loading the target main scene asynchronously. After that it can be configured to wait for player confirmation by setting a UIDocument or to wait for a playable director if that is set. When those are done it additively loads the Temp scene and activates the loaded Main scene.
In the demo loading is always done pretty much immediately because it uses very little assets. The scene is meant as an example for games that grow large enough to warrant it. If you don’t need it simply use SwitchScene instead of LoadScene from the title screen and empty the loading scene parameter in teleport actions.
As mentioned above the actual levels in the demo are split into a main and a temp scene. This is done to simplify the reset process when the player sits down at a bonfire which reloads the temp scene. Therefore the environment, bonfires, managers, lighting and things like that belong in main while enemies and destructibles should be placed in temp. It may make sense to put bigger assets from the temp scene into main too just so it is part of the loading process.
Dungeon
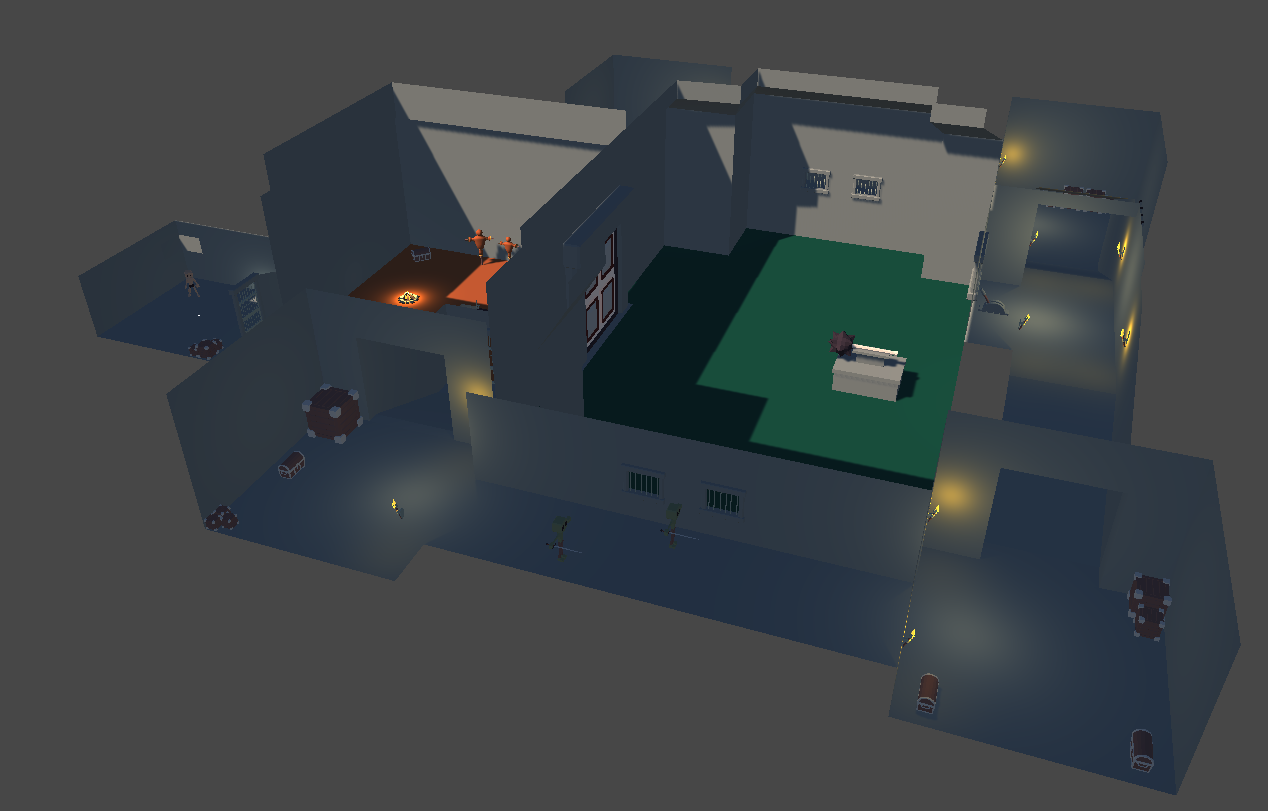
The dungeon stage, in classic games fashion, starts the player off in a prison cell. After freeing themselves by using a key that has dropped into the cell in the intro they collect some basic equipment while going through the stage and finally defeat a boss which unlocks a teleport to the next stage.
The SoulsDungeon script on the Logic object is meant to hold any custom logic for this scene. It uses the persister assigned to it to check if the intro has been played already or if this is the first time the player enters the dungeon. If so it plays the intro and sets the players reset point to the cell.
The intro is a simple TimelineAction which suspends player control and the HUD using character instructions.
Lower
First off the player can pick up the key that dropped into the cell in the intro. The pickup has a PickupAction which can be found by the players CharacterActionArea because of the trigger collider on the same object. The model and particles of the pickup are disabled in the actions started event. The item the player gets when interacting is set in the actions Items field.
The door that the key unlocks has an ObjectAction which has the key set in its Cost field. The action has trigger names set for the character(OpenDoor) and the object(Open) which are set on the respective animators when the action is started. It also has the name of the state(Opened) after the action so it can restore it if the game is reloaded.
In the following corridor the player encounters the first enemies. These will not attack on their own because the trigger area which would aggro them has been disabled and unset on the character. They will still attack when hit however but otherwise they just remain in their idle action.
The ladder at the end of the corridor uses the special SoulsLadderAction which responds to up and down input to move the player up or down the ladder. To know if the character started the action from the bottom or top there are SoulsLadderEnterAction at both ends that lead into the ladder action. The actual movement on the ladder is actually done by the root motion of the characters animation. In addition to hiding the weapons and suspending movement the ladder action also has a SuspendMovementCollision instruction which prevents the character from colliding with the ladder during the action.
Courtyard
At the top of the stairs the player finds a chest which works very similarly to a door. The only differences are that this chest does not have a cost and activates its content, which contains a pickup, when used. The LeatherBottom inside the chest can be equipped to increase defense(reduces damage) and poise(harder to stagger). It does this because these stats have been set on the SoulsArmorItem which acts as an IStatModifier.
Another pickup in the courtyard contains the SoulsFlask item which restores the health resource when used and is refilled when the player rests at a bonfire.
The bonfire in the center of the yard contains a very special action that uses three different playables to enter, sit at and leave the bonfire. The binding of director to the characters animator is done at the start of the action so that the object does not need a direct link to the player. When the enter playable is done the bonfire resets the world and player and shows the level up menu.
The crates on the yard have a DestructibleDamageReceiver which destroy the object when it takes damage and replaces it with the destroyed prefab. When the crate is destroyed the DestructionPersister persists that and when the scene is loaded again after quitting the game it immediately destroys the object to restore the previous state. This is different from the player sitting at a bonfire which clears the persistence area that contains the crate and reloads the scene which makes the crate show up again.
Finally there are two doors at the end of the yard. These can only be opened from one side simply because the trigger collider of the action is on one side of the door.
Hallways
The end of the western hallway contains several traps which periodically spawn a projectile that contains a damage sender that deals physical and poise damage. If the player were to simply walk into the hallway these would damage them and stop their movement due to the stagger caused by the poise damage. The shield found in the chest has a guard action which, while active, nullifies physical damage and turns poise damage into stamina damage.
The lever in the northern hallways, just like doors and chests, uses an ObjectAction. The only difference is that it incorporates an additional animator(Gate) which gets triggered at the end of the action.
The western hallways contain two more zombies which do have their trigger areas set up and will attack once the player gets too close. One detail to note here is that these two carry sword despite enemies not really having an inventory. The swords have just been dragged onto their hands in the editor. The layers of the weapon has also been changed to EnemyBody/EnemyDamage. The light or heavy attack action has then been set on the enemy character to make it use that action when attacking.
Boss Arena
After using the lever located in the northern hallways the gate has dropped and the boss arena is accessible.
There is a box collider located a bit into the area that start the fight by calling StartFight on the SoulsBossArena script which does a couple things.
- Persistence
First off it sets the player movements position to outside the arena and suspends persistence completely. This makes it so that quitting and reloading the game during the fight resets the player to outside the arena - Boss Character
Sets the target to the player and starts the configured action - UI
Shows the big boss HP bar - Fog
Activates the fog at the gate so the player can’t leave during the fight
The boss character itself has a couple attacks which are all defined by timelines. Which ones it uses depends on the players location and each one uses a certain amount of energy. When the energy is used up the boss uses the wait action which gives the player a chance to deal damage.
When the boss is defeated the boss area resumes persistence and sets a flag so the state can be restored later. It also activates the teleporter that can be used to move to the shrine stage.
Shrine
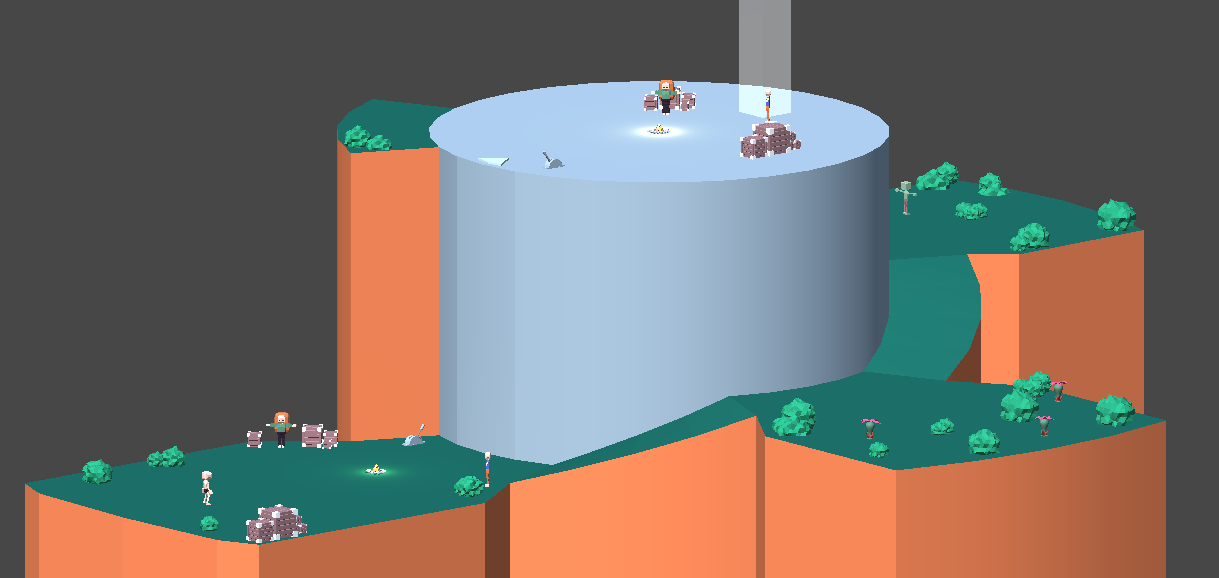
Bottom
There are two friendly NPCs at the bottom of the shrine stage. What each one does is defined in the action in its Interaction object.
SoulsTalker has a SoulsTalkAction which will display the configured lines of dialog in the general message box when used.
SoulsTrader has a SoulsTradeAction that opens the trading dialog that lets the player exchange experience for the items configured there. This action uses a different persister than the main character which has the permanent persistence area set. Therefore when the player sits at a bonfire the NPC will reset but items that have been bought will still be missing.
The trader sells moss which can be used to reduce the poison resource and boosters which double the characters strength.
Levels
On the first level the player encounters a couple sprout enemies. These will approach the player and attack by activating a spherical damage sender that deals poisoning damage. Just like fists or swords this attack still uses a SoulsAttackAction but instead of setting a weapon that deals the damage the activation of the damage and particles is done by creating events for the DMG_ON and DMG_OFF message in the inspector. Another difference from enemies previously encountered is that these have GoHome as their idle action which will make them return to their home if they loose aggro. When they have arrived at their home point they will continue with the action configured in Next so this is where idle poses and such can go.
The second level holds a single zombie enemy which has a PatrolAction as its idle. This action makes it move between the configured transforms. Which one it is currently moving towards is persisted so it will keep its current path even when the game is reloaded.
Top
The top of the shrine stage lets the player activate an elevator to the bottom by walking on a pressure plate.
The main script at work here is AnimationToggler which is used to toggle an animator between two states and persist which one it is at. The current position of the elevator is persisted to Shrine_Elevator_Down.
When the elevator starts moving it activates a CharacterCarrierArea which reparents the player to itself and suspends its movement persistence. It also writes to Shrine_Elevator_Enabled which deactivates the NPCs at the bottom and activates the ones on the top on the next reload.
The NPCs at the Top use the same persistence key as the ones at the bottom so their values will carry over. The only exception is movement which uses a different persister on the ones at the top so the position does no carry over.
Finally the top also contains a teleporter that leads back to the dungeon stage. This teleporter has TeleportTarget set so the player will be moved to that transform in the dungeon stage.
Extras
permalink: /manual/extras title: “Extras” sidebar: title: “Manual” nav: manual —
The AdventureExtra project in AAK contains different examples that may use assets from all the other projects. Therefore to try one of these be sure to always import the entire asset.
Arena
Arena is a minigame that combines assets from all the other projects to create something new. Players fight enemies in increasingly difficult stages and upgrade their character in a shop between stages. The options in the shop are randomly selected to provide some variation between runs. The game is playable here.

Persistence is done a little differently from other demos. Loading is only done in the title screen and Saving is only done whenever a player beats a stage. Data like player equipment and health is kept between scenes using the new Buffer toggle on the PersistenceContainer. This also makes debugging scenes more convenient as disabling loading to start fresh like in souls or hero is not needed.
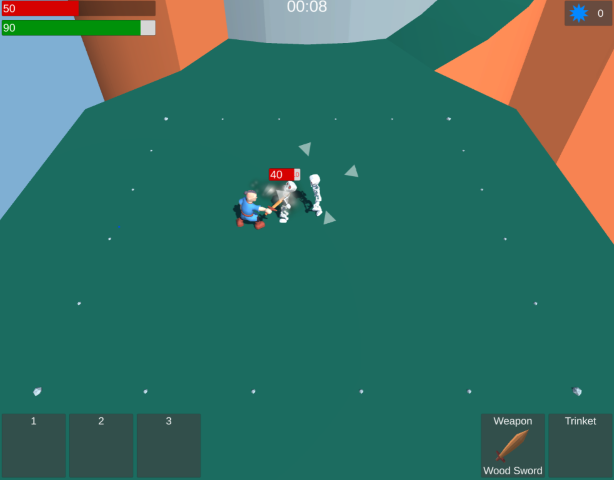
The enemies spawned in the stages can easily be configured in the inspector. Their behavior is defined in simple visual graphs. Currently this includes a simple melee enemy that runs up and attacks, a ranged enemy that runs away if the player gets too close and another variation of the ape boss. When all enemies are beat the stage awards bonus points for each second under par time and then loads the shop.
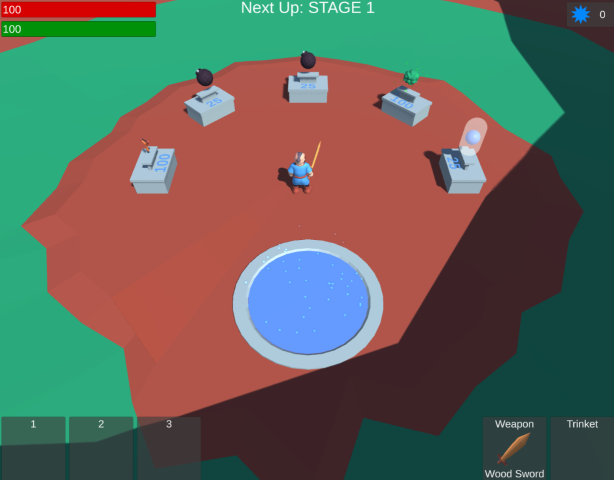
In the shop players can exchange the essence they earned in the stages for useful upgrades. The items offered here include:
- Weapons Equipment Items that each have on attack action
- Melee weapons like sword and morning star
- Ranged weapons like sling and shortbow
- Usable items that are removed when used
these have to be equipped to one of the 3 usable slots- shielder and booster add temporary effects
- potion heals damage
- bombs does aoe damage
- Attribute upgrades(check attributes in pause screen)
- Strength gives bonus damage
- Endurance increases max stamina
- Vitality increases max health
- Trinkets that are instantiated on the player and add an effect
- Skeleaton Skull for bonus damage
- Aromativ Herb for stamina recovers
- …
Update 1.9.1 added twin stick controls to arena, to change this back to regular walking simply remove or unbind the Rotate action in the inputs.
HeroSouls
This example demonstrates how assets from the souls demo may be used in the hero demo. The scene was made by duplicating the SoulsDebuggingGeneral scene and replacing the SoulsSetup with HeroSetup. Other changes made are detailed below. A big part of making actions reusable between demos is the PlayableAnimation which is described on the utilities manual page.
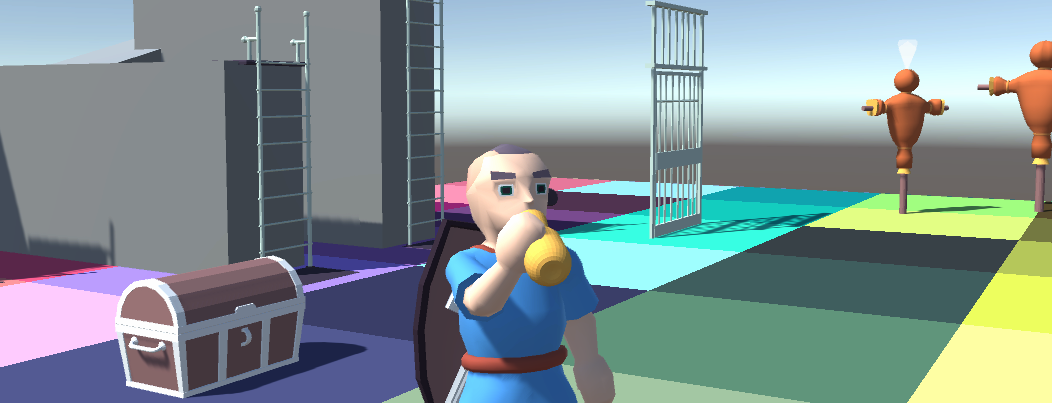
HeroSetup
Some changes have been made to the setup to work better with souls assets. The changes are also easy to discover by checking the HeroSetup Overrides in the inspector.
- scaled the character model up to 1.2 to fit better with the souls assets
- set the key of the generic trigger item on the player to PLY which identifies the player in the souls demo(for example in the moving platform)
- increased the size of the lock on collider because lock on distance is determined by the player area in souls
- added MessageEvents SHEATHEA and SHEATHEI which can be used to sheathe items from non hero actions
- added a ResourceBarManager to the UI so enemy health bars are shown
- added ItemNotifications so items picked up are shown(souls items don’t have the hero pickup dialog)
- added gear and equipment buttons in the UI for the items brought over from souls(sword, shield, flask, bow)
- added the HeroSouls items to the inventory so they can be tested in the scene
Gear
Both Sword and Shield are mostly identical to their counterparts in the hero demo. The prefabs just use different models and sounds. Because the attack animations are not determined by the gear in the hero demo these also don’t change.(if you want to look into individual animations by sword the HeroCharacter state graph would be the place to start looking as this is where the attack actions are started)
Equipment
The actions in the flask and bow items are wrapped in a HeroHoldableAction which takes care of visualizing the item in the characters hands. It forwards any input it receives to the actual action.
The flask uses a regular MotionAction instead of the souls action which contains some souls specific logic. Filling the resource, removing the item and adding the healing effect on use is done in a event handler for the ACT message of the animation.
A couple additional fields have been added to the SoulsShootAction on the bow to make it usable without the arrow slot it uses in the souls demo. The projectile that is linked there is also custom made for HeroSouls so it damages HeroHealth instead of souls resources.
Scene
The ladders in the scene contain two additional instructions to make the work better with the hero character. The MovementMotionMultiplier increases the movement from root motion to make the hero character match its movement to the ladder. The HeroActionOverride sets the ladder as the current context action which allows the player to leave the ladder by pressing E.
The dummies in the scene use the HeroHealth resource instead of the souls one so they can be damages by hero damage sources like bombs.
The key needed to open the door has been replaced by the key from the hero demo so it shows up in the hero UI.
In the door right in front that does not require a key a SHEATHEA message is sent on start which makes the hero put away its items.
SoulsHero
As the name indicates this is the inverse of the HeroSouls example. Here assets from the hero demo are used by the souls character. Once again changes made are detailed below
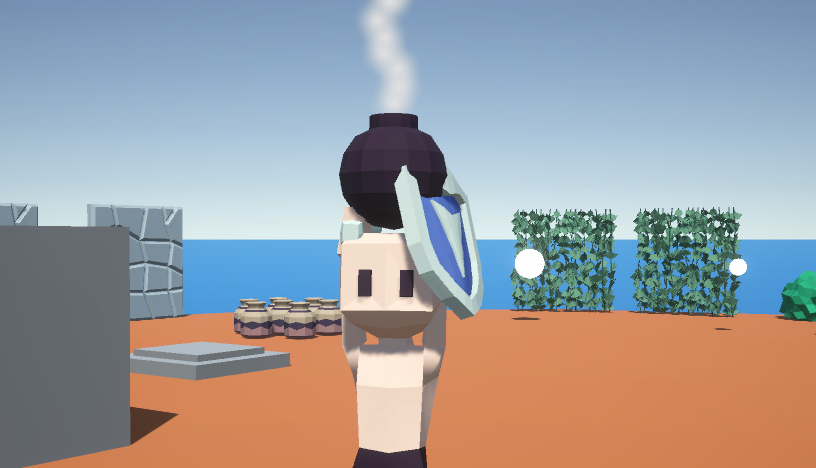
SoulsSetup
- scaled the character model down to 0.8 to fit better with the hero assets
- set SortByDistance on the action area so the character picks up closer (for example)pots first
- added OverheadItem transform as replacement for the ItemParentOverhead in the hero demo
- added the Climb action so the character can climb walls in the hero demo the climb action is also added to the RecoveryActions array on the Stamina resource so the character recovers stamina while climbing, otherwise they would not be able to jump off if they enter climbing on low stamina
- added the SoulsHero items to the inventory so they can be tested in the scene
- added ItemNotifications so items picked up are shown(pickups don’t have the souls pickup dialog)
Weapons
Hero Sword and Shield are very similar to their counterparts in the souls demo. In addition to the models the animations from hero are also used here. This was achieved by creating a custom SoulsHeroAttacks animator controller that replaces SoulsAttacks.(for example in the Light attack action in the sword)
Usables
The bombs from hero are available as a SoulsUsableItem. One essential change made are the additional SuspendMovementControl instructions in the Pick, Put and Throw playable animations. Since the character in souls does not use root motion for its movement it would otherwise keep moving during those animations. The carry actions of the bombs and pots lying around the scene have been changed in the same way.
The nut item uses a regular SoulsUsableAction pretty much identical to the pebble in the souls demo. It still spawns the HeroNotImpact on hit though which can be used to stun enemies.
SoulsHero also contains some changed version of the heart and money items in hero. These have been modified to add attributes and resources like SoulsExperience and SoulsHealth instead.
Scene
All the different pickups have been modified to add appropriate items. For example the heart essences use SoulsHeroHeartEssence which adds SoulsVitality that increases the souls characters health.
The HeroBlock has had some changes to the grab actions. Holding and Releasing the grab does not work in the souls demo and therefore the InputType is changed to Perform. To keep other actions from being started while the character is grabbing the block a SoulsSuspendActing instructions is added which disables the Act input.
SoulsHeroApe
This scene contains the Ape boss fight from the hero demo but adjusted to fit in with the souls demo. The souls setup is left unchanged. The ape boss is placed in a souls boss arena, its logic is controlled by a custom character script instead of visual scripting. When defeated it spawns a ragdoll instead of playing a cutscene.
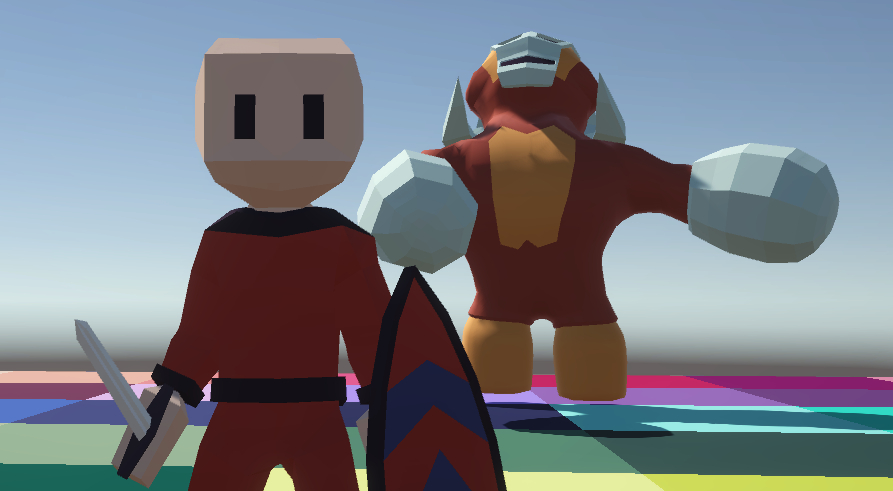
Just like the morning star boss the SoulsHeroApe character script inherits from SoulsCharacterBase for some common functionality like defense calculation. It implements its own guard break logic which lets players parry the left and right punch attacks. There is no critical follow up attack, instead the ape has its energy reset which makes it take a rest action that lets players heal or attack.
The behavior of the ape is done using different IEnumerable sequences of actions. Whenever the apes actor goes idle and the current sequence contains no more actions it selects a new one. If its energy is low is can select a rest or wag action to recover some energy. Otherwise it will randomly select an attack action which will reduce the energy counter.
Ragdoll creation for the ape differs from regular characters because its model is scaled. For the joints of the ragdoll to work properly in this case it has to be disabled before the scale it applies. This is done be creating a temporary disabled gameobject the ragdoll is instantiated inside of at first.
Since there are no bombs in the souls demo all the breakable models and triggers of the ape have been removed. The triggers and colliders have also been changed since the souls demo uses different layers. The health and damage assets have also been replaced by the ones from the souls demo.
Death will not work properly in this scene because it does not have a Temp scene that is usually used to reset enemies. Therefore the enemies and the boss will just keep attacking after death.
Utilities
permalink: /manual/utilities title: “Utilities” sidebar: title: “Manual” nav: manual —
Playable Animation
This utility allows playing animations on top of a regular animator. They do this using the Playables API that is also used in timelines. A test scene called PlayableAnimationTest can be found in AdventureCore.Tests. Enter play mode and use the Play/Start buttons on the different actions and players to try them out.
By using a PlayableAnimations it is possible to store and configure animations outside of the character, for example on actions. This can make reusing actions more convenient as the character animator is not required to contain the actions animations. It also allows makes it easier to individualize animations between actions, for example by changing their speed.
Storing the animations in the actions can also slim down the character animator greatly. In HeroDebuggingGeneral the original animator controller HeroKid has been replaced by HeroKidMovement which only contains the movement. The downside to this is that animations moved outside the character animator can’t really interact with those inside. For example the guard action that holds up the shield also needs the character to go into a Shield Stance which is why it was left in the character animator.
A lot of the actions in both the hero and souls demo now use playable animations. To restore the original behaviour you can simply set the animation clip or controller on the action to none.
![]()
Above is how a PlayableAnimation looks in the Inspector when no animation or controller is configured. You can set an AnimationClip in the left field or an AnimatorController in the right one to use them. These can be found on a lot of the actions that come with AAK or the PlayableAnimationPlayer behaviour.
To use PlayableAnimations in your own behaviour simply add a PlayableAnimationParameters field to it. The actual PlayableAnimation is created by calling Play(to start immediately) or Create(to play later).
Settings
Some settings are different between clips and controllers and some are the same. I will give some extra pointers here but as with everything in AAK a short description for every individual field can be found in the tooltip in the inspector.
One Setting that deserves a little extra attention is the Mask because it is one of the limitations of playable animations. It is not usually possible to only affect parts of a character in a playable when using humanoid animations. Playable animations work around this by copying all the muscle values from a previous animation. This will lead to some undesirable side effects especially when combined with root motion. In conclusion, be aware that playable animation may cause weird behaviour with masks on humanoid animations, especially when root motion is not baked.
In most cases the Mask, Additive and Weight fields should work very similarly to their counterparts in animator layers.
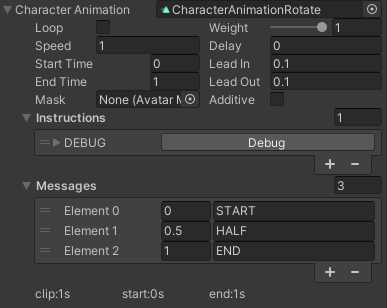
Instructions and Messages are the only features of PlayableAnimations that are directly dependent on AAK characters. They are optional so PlayableAnimations are completely usable outside of AAK. When played on an action the instructions are applied to the character associated with the action and messages are sent to it at the defined times. The PlayableAnimationPlayer has a Character field which can be used when these features are used.
During play mode there are some additional information labels and controls in the inspector to help with debugging. The parameter field is also colored yellow when the animation is active. To get further insight you may want to add the PlayableGraph Visualizer from unity to your project.
Animation Clip
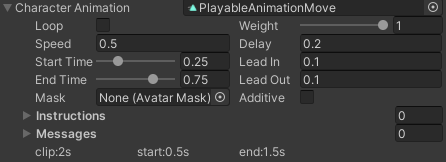
By default animation clips play once and then end the playable animation. This can be changed by checking the Loop field. In this case the animation has to be ended from outside or it will play continuously. It is possible to change start and end times, the absolute time value in seconds is displayed in the bottom.
Animator Controller
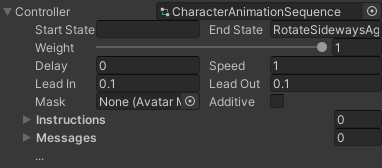
When an animation controller ends is a bit harder to determine than an animation clip. The EndState field can be used to define one or more state names at the end of which the playable animation ends itself.(separate multiple using spaces) Otherwise it has to be done from outside, for example some actions use a END message on one of the animations to determine that the animation has ended.
Trigger Areas
The TriggerArea and TriggerItem behaviors included in AAK offer a convenient layer on top of regular unity triggers. They make sure trigger events happen exactly once and that triggers that are disable get removed reliably. They always come in a item-area pair which also filters out a lot of usually unwanted triggers.
The basic functionality of these triggers is defined in the abstract TriggerArea and TriggerItem base classes. AAK offers a very general implementation of these in GenericTriggerArea and GenericTriggerItem. These add unity events that can be used in the inspector as well as ways to add instructions and send messages to characters attached to the area or item. They also let users define a Key which is used to filter which areas and items interact with each other.(in addition to regular unity layers) For and example see the AdventureManual/Systems/Trigger/ManualTrigger example scene.
Two more specific usages of triggers inside AAK are the lock on and damage systems. The LockOnManager implements TriggerArea and LockOnPoints is a TriggerItem. TriggerDamageSender is the most common type of damager sender and derives from TriggerArea while TriggerDamageReceiver is derived from TriggerItem.
It is fairly easy to create your own triggers with special behavior, see the example below:
public class CustomTriggerArea : TriggerArea<CustomTriggerArea, CustomTriggerItem>
{
    protected override void onItemAdded(CustomTriggerItem item)
    {
        base.onItemAdded(item);

        //your custom logic
    }

    protected override void onItemRemoved(CustomTriggerItem item)
    {
        base.onItemRemoved(item);

        //your custom logic
    }
}
public class CustomTriggerItem : TriggerItem<CustomTriggerArea, CustomTriggerItem>
{
    protected override void onAreaAdded(CustomTriggerArea area)
    {
        base.onAreaAdded(area);

        //your custom logic
    }

    protected override void onAreaRemoved(CustomTriggerArea area)
    {
        base.onAreaRemoved(area);

        //your custom logic
    }
}
Dialogs
AAK comes with a generalized dialog component for displaying simple messages, conversations and dialogs. There are implementations for legacy Unity Text components(DialogUI), the more common TextMeshPro Text component(DialogTMP) and the newer UI Toolkit system(DialogElement).
They are used in both the Hero and Souls demos to display various messages and dialogs. The MSG dialog in souls displays general message and the PCK dialog is shown from the SoulsPickupAction. In Hero the MAIN(empty key) dialog is used for pickup animations, a Fullscreen FULL dialog is shown on GameOver and a SIGN dialog displays the texts defined in the Signs around the stages.
Dialogs are shown by calling one of the Show method overload or by using a Visual Scripting Unit like ShowDialog which just call those methods under the hood. You can find various examples in the VisualScriptingDialog test scenes in AdventureCore.Tests.
Another way to show dialog is through Timeline. Add a DialogTrack to your Timeline to do so. DialogClips can be added to the Track to define the text to display. Hide and Show Clips can be used to fade the dialog in and out. This can be used to display Text in Cutscenes or short Sequences(Hero Demo opening Chest). The Dialog Implementation can be directly referenced in the Track or through its Key in the individual Clips. Check out the TimelineDialog test scenes in AdventureCore.Tests for examples.
While the built in Dialogs may work well for simple messages and short dialogs, for more dialog heavy games a dedicated dialog language may be a good choice. If this is the case for you please check out the Ink Integration.
State Manager
A StateManager component can be used to define various states and things that happens when the active state changes from one to another. Each state defined has events for when it is Entered and Exited. The Started event is called when the state becomes active at the start of the scene. The distinction between Entered and Started is made because some states may want to play animations when entered but not when started.
The state of a manager can either be set directly by using SetState or by setting an override. Overrides become the active state and return the manager to its underlying state when they are reset. This can be done through code, by using one of the visual scripting units or using the dedicated timeline track.
The Hero demo uses one StateManager for general game state like PLAY, MENU, CUTSCENE, DIALOG. Its states set the current InputActionMap, transition the sound mixer and change cursor lock among various other functions. They also control the state of the second StateManager(HUD) which manages the action buttons on the top right.
Some ways the main state manager in the hero demo has its state changed are:
- PlayerInput(HeroCharacter) Pause Action sets the state to MENU
- SIGN Dialog Opening sets DIALOG as an override, Closing resets it
- HeroIntroBeach timeline overrides the main state to CUTSCENE
- HeroChest timeline overrides the HUD state to HIDE and DIALOG
Audio Manager
The AudioManager component can be used to centralize audio clips. It allows defining clips and music that can be played sending the defined key. By hooking it up to a characters MessageReceived event this allows playing sounds on the character from actions that are defined outside of it. Another use case is UI, instead of playing sounds on all the individual component the audio manager allows defining and changing them in one central location.
The Hero demo uses AudioManager components in its UI and in all of the characters. There are also audio managers in the sword and shield prefabs which hook up to the owning characters message pipeline using a CharacterMessenger component. This allows playing different sounds for sword swings and shield blocks depending on the characters current equipment. The S_SWING message for example is sent from events in the attack animations(HeroKidAttackVA, VB, …).