Visual Scripting
Setup
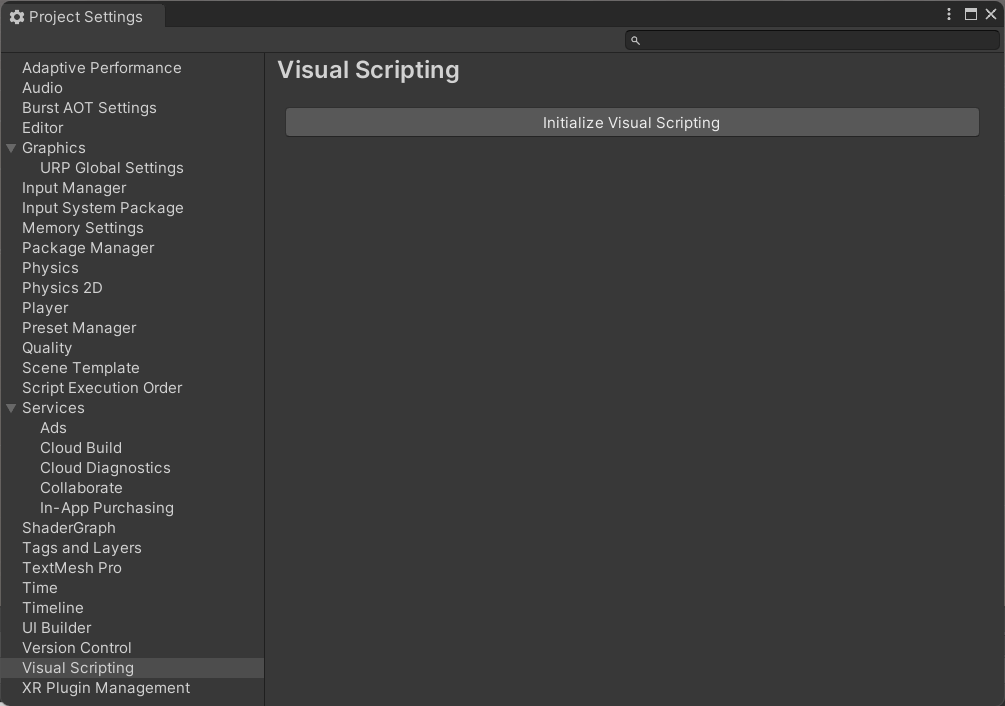
Visual Scripting is not automatically initialized when importing AAK. Before opening any of the visual scripting scenes be sure to go into Edit/ProjectSettings and click the ‘Initialize Visual Scripting’ button.
This would be enough for the included scenes to work but to be able to use AAK types in variables and find the included nodes in the fuzzy finder we’ll have to add them to the visual scripting settings.
You can find a prepared settings file in …/AdventureManual/VisualScripting/VisualScriptingSettings.asset which you can replace your own settings in the ProjectSetting folder with. After doing that you’ll have to restart the editor.
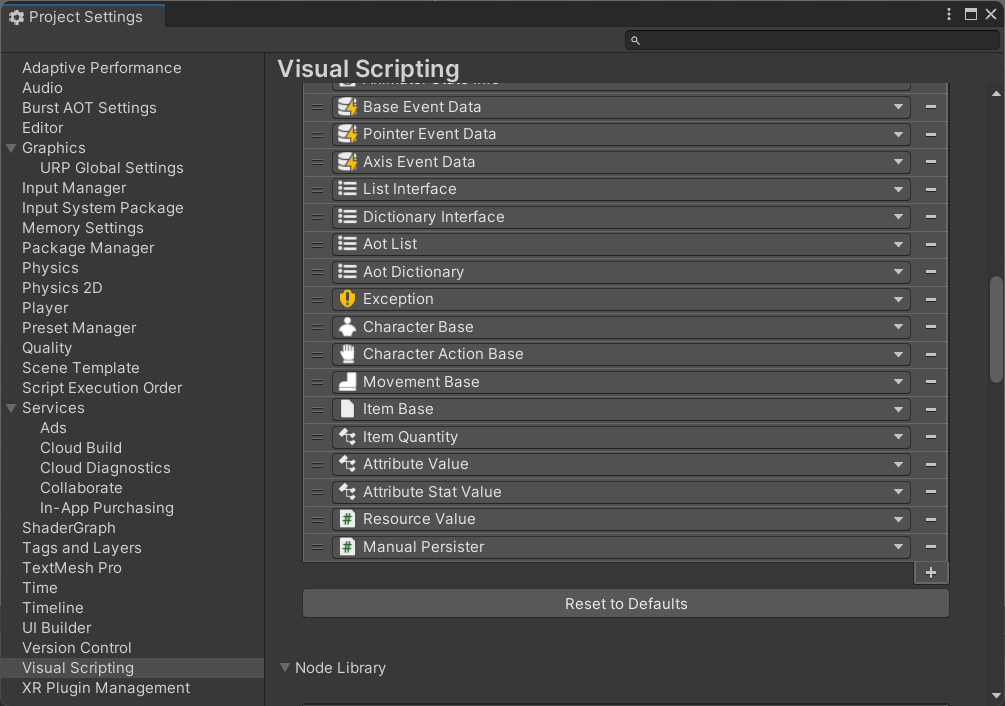
Add additional AAK types here so you can use them in variables or call their methods and properties directly. A lot of AAK functionality is exposed through the custom units but there will always be specific use cases where that is not enough.
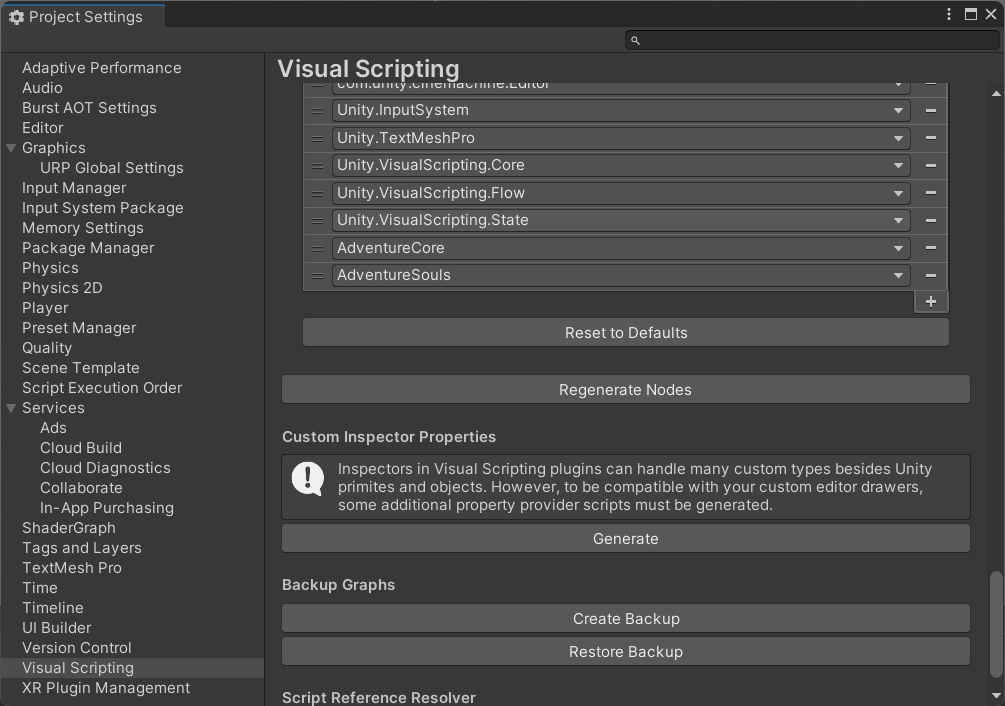
Finally make sure the AdventureCore(and AdventureSouls if you are exploring the demo) are added as Node Libraries and click ‘Regenerate Nodes’ so all the custom units that come with AAK can be found in the fuzzy finder.
Getting Started
The Assets/SoftLeitner/AdventureManual/VisualScripting/VSGettingStarted.unity scene copies some of the behaviors from the getting started manual using visual scripting. In doing so it touches on how to use most of the included custom units.
Areas
The CharacterEnter and CharacterExit units found in Events/AdventureCore/Triggers fire whenever an item with an attached character enters/exits their area. Like many of the custom units when the area is not set explicitly the unit looks for the needed component on the GameObject of the machine and its parent. This has a small performance cost but it improves reusability and readability of the graph.
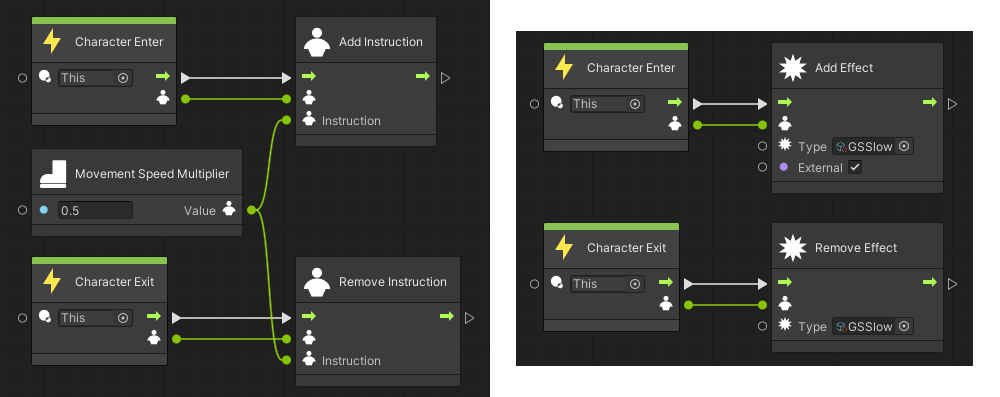

The SlowInstructionArea adds an instruction when a character enters and removes it on exit. Take note that the instruction that gets removed has to be the same unit as the one added and not just one of the same type. The character that this is done to is passed from the events to the other units.
SlowEffectArea work pretty much the same but instead of instructions is adds and removes an effect. Same thing for the vitality areas, just split into two different areas.
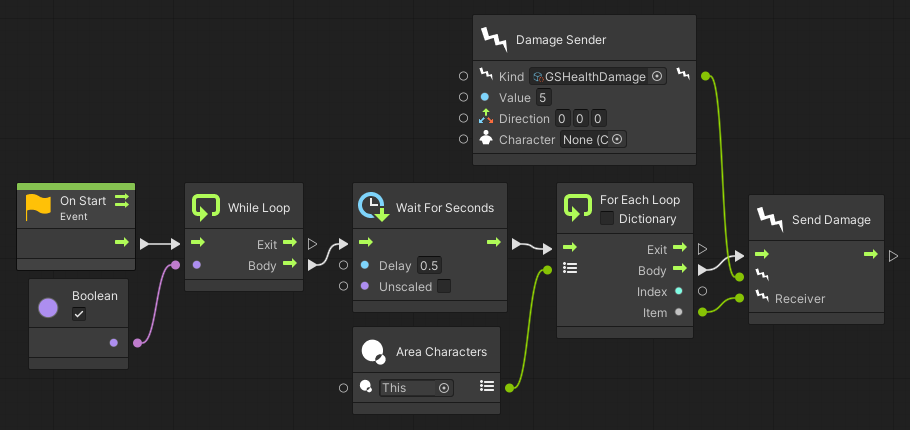
The DamageSenders work a little differently as they do things periodically instead of just on entry/exit. Every 0.5 seconds they request the characters currently inside the area using the AreaCharacters unit. It then loops through them and send each one a damage event. They could be improved to only run once a character has entered but for the sake of simplicity they run non-stop here.
Actions
To define actions using VisualScripting we will use the VisualScriptingAction behavior. This action does nothing on its own but provides some additional events and methods geared toward that. For example usually whether a specific character can start an action is checked in a method. VisualScriptingAction fires the CheckStartable event and then returns whatever was set in Startable by the graph.
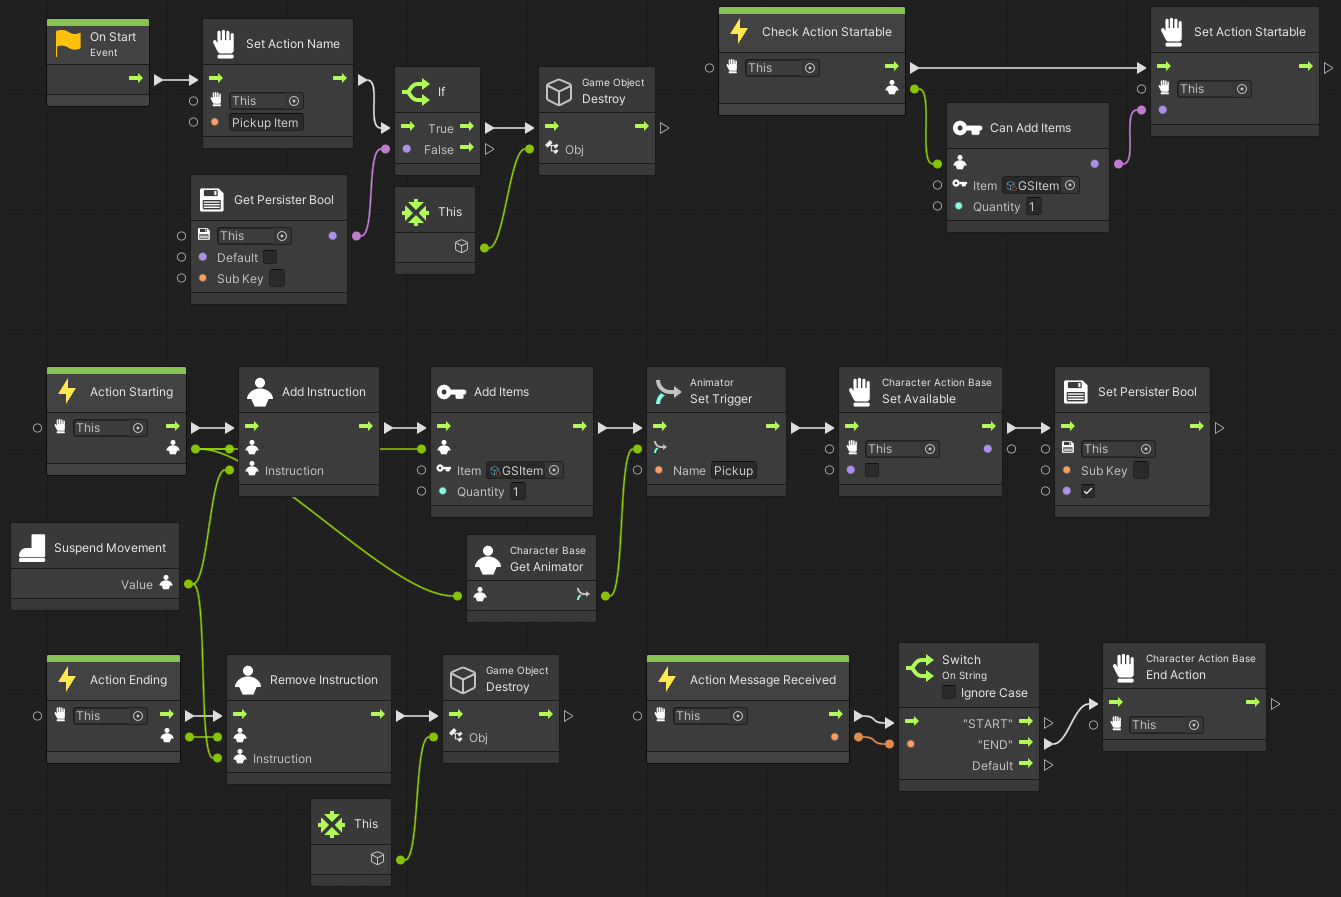
When started the pickup sets the action name which will be displayed in the UI. In this case that is unnecessary but, for example, if the item was changeable we could use the item name here. After that is checks in persistence if the action has already been performed and destroys the action if it has.
On Action Startable we check if the items can actually be added to the characters inventory.
When the action is actually started we do various things, whenever the character is concerned we pass the one that started the action which we get from the event parameter. We add an instruction that suspends the characters movement so the character can’t move during the event. We set a trigger on the characters animator to start the pickup animation. We also add the items to the characters inventory and set the persistence bool that saves if the action has been executed. On the action we set Available to false so the action can no longer be started in any way.
In the ActionMessageReceived we wait for the ‘END’ animation event which ends the action. In the coded PickupAction there are additional checks that make sure that the ‘END’ message is only accepted if a ‘START’ is sent first. This is meant for situations where a character is still in another action(a roll for example) when the pickup action is started.
Finally when we receive ActionEnding we let the player move again by removing the SuspendMovement instruction and destroying the GameObject.
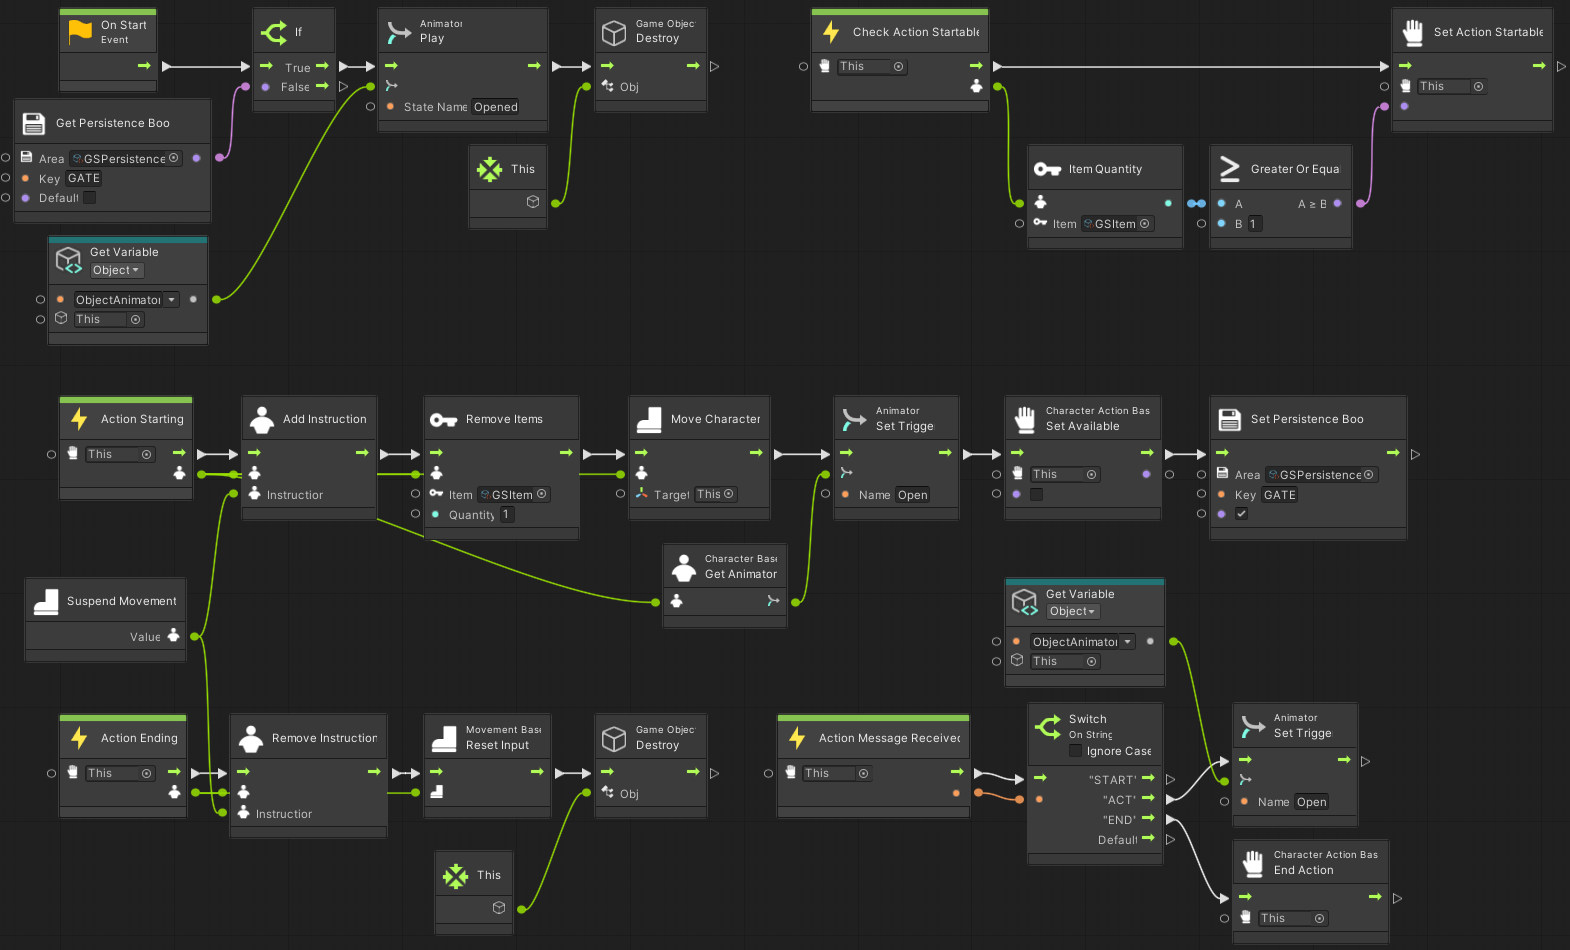
When it starts and the action has already been executed the animator gets moved to the Opened state. The GameObject also gets destroy but as opposed to the pickup this only destroys the action here and not the whole object.
When checking for Startable the action on the gate checks if the character has at least one GSItem in its inventory.
In addition to things similar to the pickup action the gate action also moves the character into position and removes the items from its inventory.
There is an animation event called ‘ACT’ which starts an animation on the gates animator.
Lean
One deviation from the getting started manual is the character leaning forward a bit when moving. To achieve this an additional Transform called ‘Pivot’ has been inserted between the character and the GSRobo model. This is needed so the movement and the lean logic have separate transforms and don’t interfere with each other.
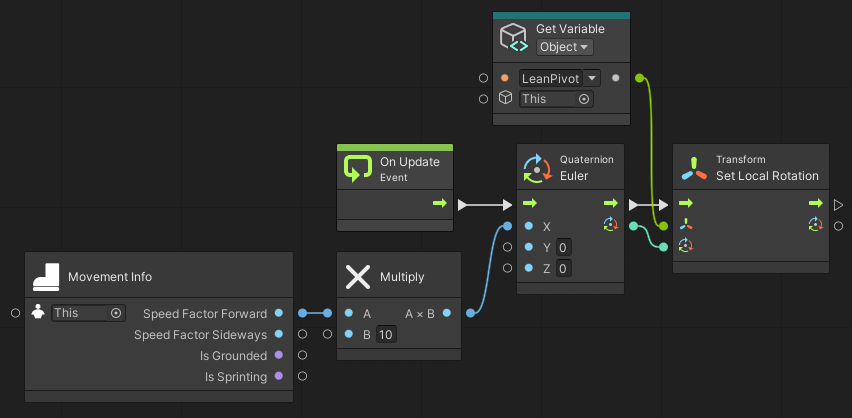
The implementation is relatively straightforward. We take the SpeedFactorForward from our character multiply is by 10 and set it as the x rotation of the pivot. Bear in mind that the context of the MovementInfo is a character and not a movement. This is the case for most of the units working with parts of the character like inventory, attributes and so on.
UI
The scripts that display the resources, attributes, … in the UI have also been replaced with visual scripting. For simplicity most of them simply rely on the ToString implementations of the units they display. Just like the scripts they replace this is more of a debugging solution than something suitable for a release.
Behavior
The following chapters show a couple different ways that NPC behavior may be controlled using Visual Scripting. The first two are found in the …/AdventureManual/VisualScripting/VSBehaviour.unity manual scene.
Patrol
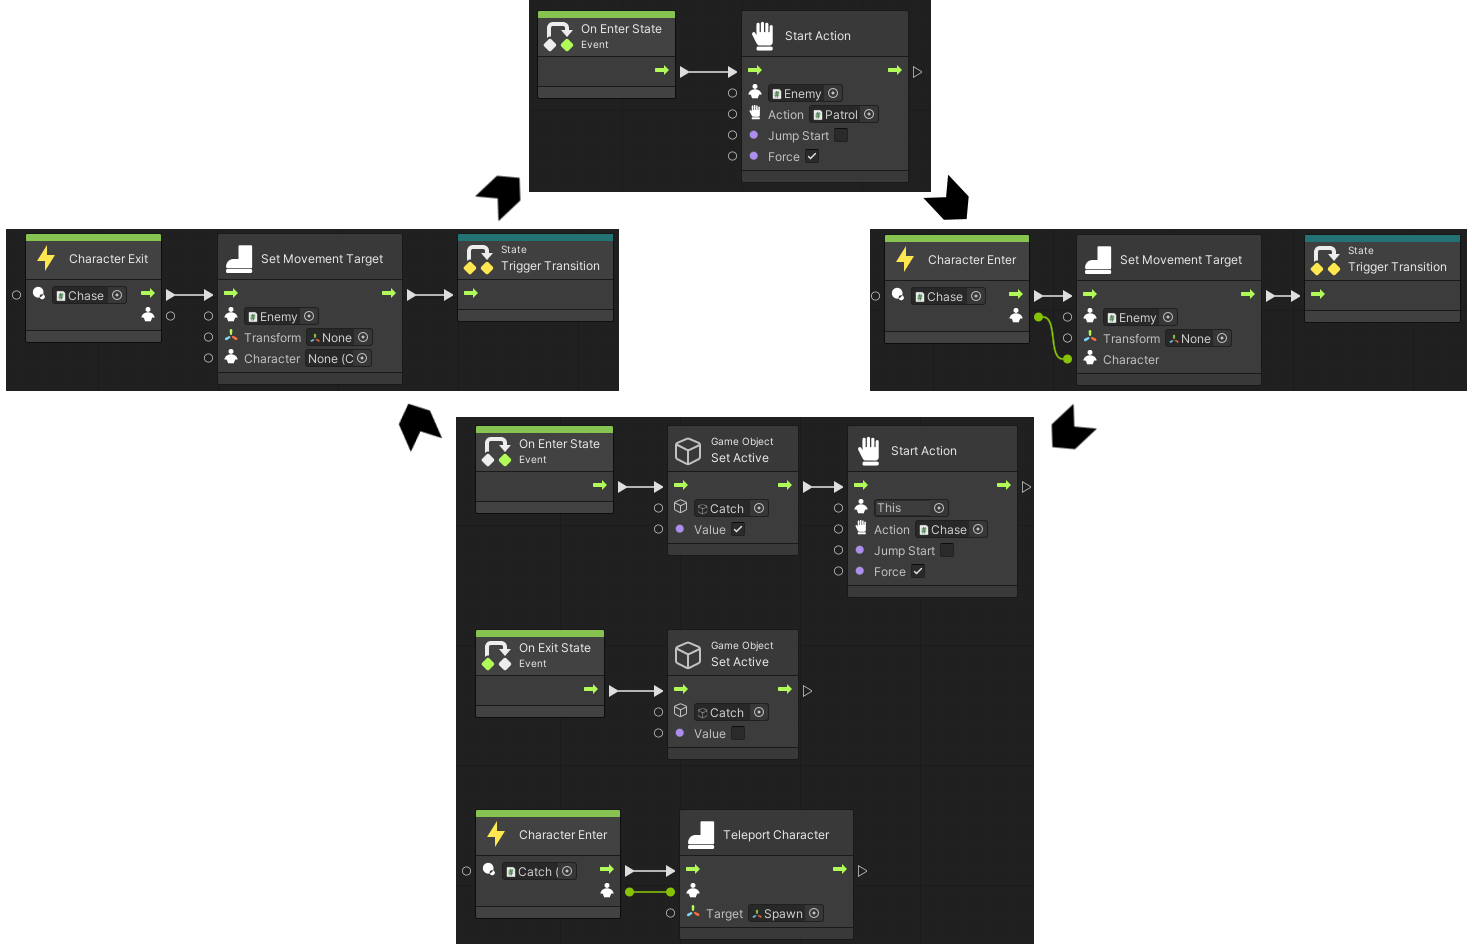
The red bot patrols between two points until the player enters its area. As long as the player is in the area it approaches it. If it catches the player it teleports it back to its spawn point.
This behavior is realized using a state graph which has separate states for patrolling and chasing. It switches between them when the player enters or exits the chase area which also sets the movement target so it know where to go. When either state is entered the appropriate action is started.
We don’t have to do any additional work for persistence here since patrol persists the current target on its own and the rest of the behavior is determined by the characters positions which gets saved by their movements.
Toggle
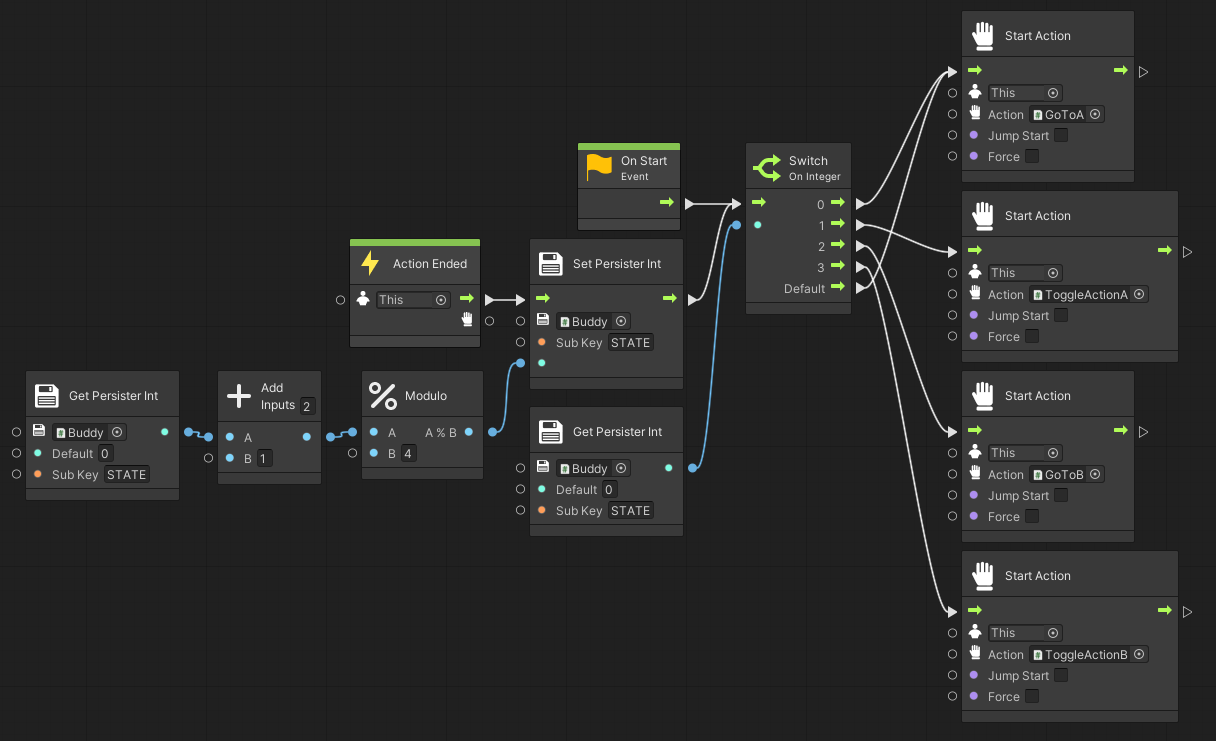
This script machine shows a way to chain a couple different actions and persist the current state. This is what makes the yellow bot move between and toggle the gates.
When it is started it retrieves a persisted integer and starts the appropriate action. Whenever an action ends it increases the counter by one and starts that action.
AdventureSouls
Open up …/AdventureSouls/Scenes/Debugging/Enemies/SoulsDebuggingVisualScripting.unity to find two special enemy variants for the souls demo. They are not used in the regular levels as visual scripting is optional in that demo.
Actions in these enemies are not just started once like in the manual examples. They are kept active using the Perform NPC Action node which start their action whenever possible and just pass the flow if the action currently happening. This allows for a different kind of modeling behavior that is similar to classic behavior trees.
These enemies are also not entirely visually scripted. They still use the SoulsEnemyCharacter for things like death and loot. The graphs also use some special units that allow easily retrieving the state of the character or its current default or item actions.
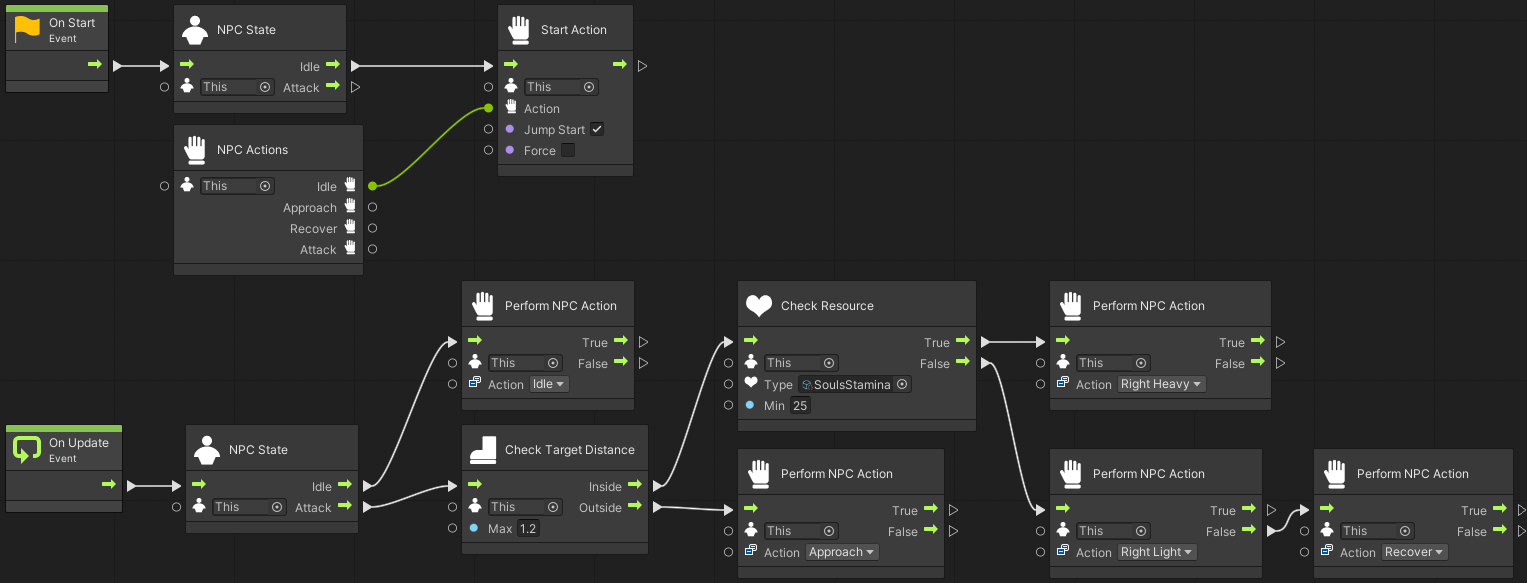
The attacker enemy is a slightly more advanced version of the default enemy. It varies its attacks depending on the stamina it currently has and also uses whatever weapon it has equipped in its right hand. When it can no longer perform even a light attack using its current stamina it performs the recover action.
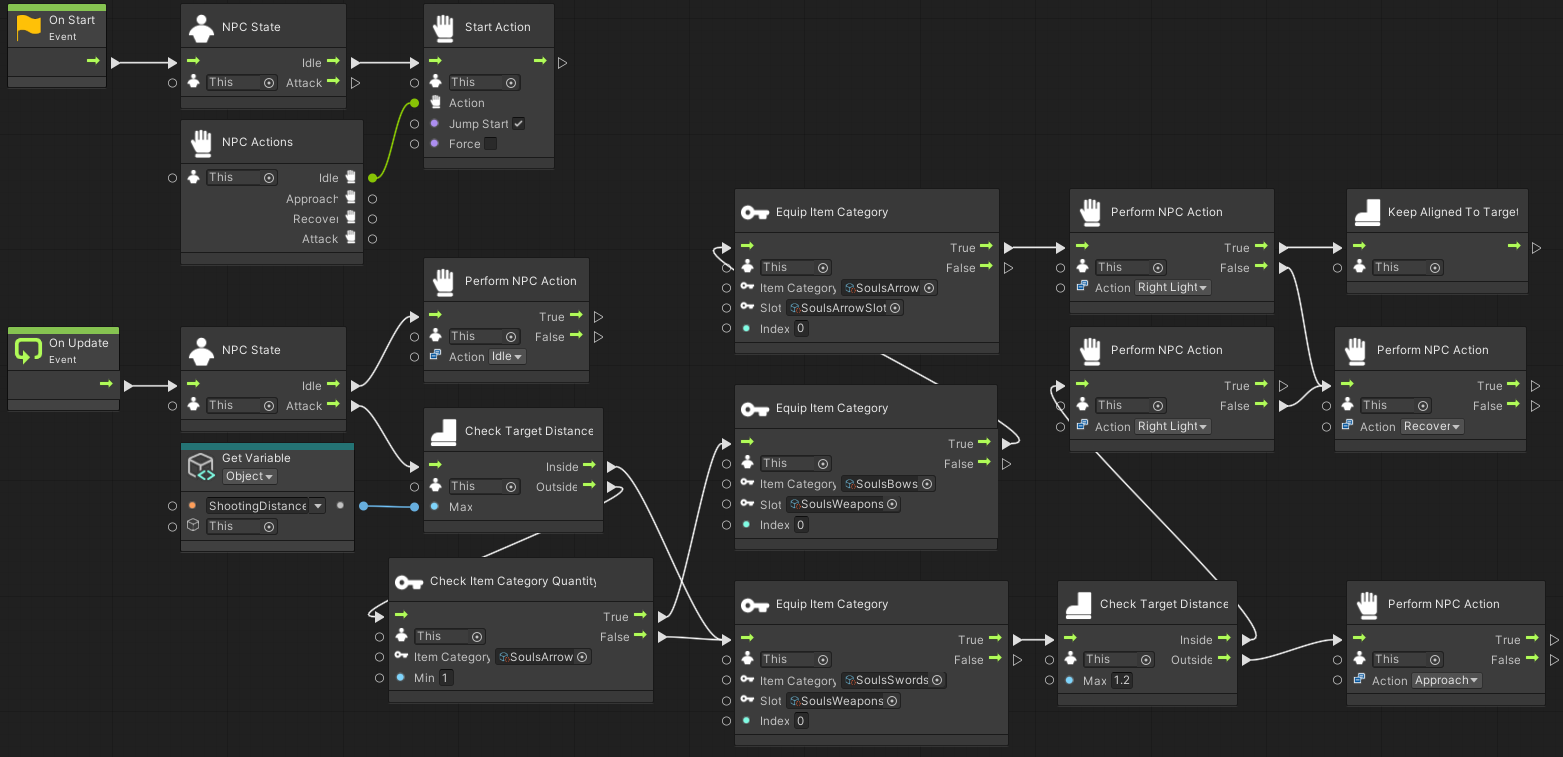
The archer is able to equip appropriate items depending on the players position. The distance at which it switches to melee can be configured using the ShootingDistance variable.
The SoulsWeaponSlot does not allow switching equipment while an attack is happening. So if the archer is currently aiming when the player enters its melee range it will wait until that action has been appropriately canceled. The EquipItemCategory units go to their False output in that case.
Also note that the action after equipping the bow and arrows goes to KeepAlignedToTarget when it is active. This is what makes the enemy actually turn to aim at the player. When it can’t be started, probably because of lacking stamina, it goes to the Recover action through its False port.